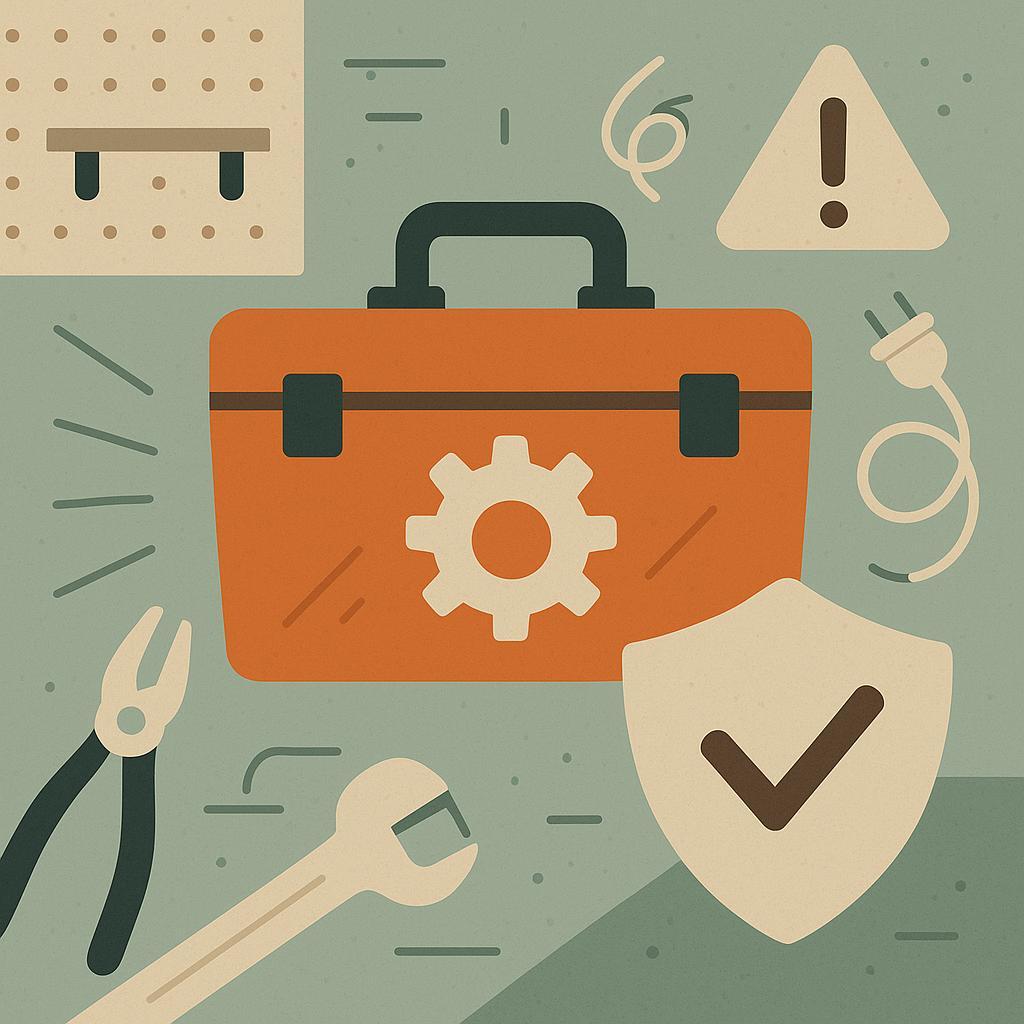
The sharpest cut begins long before you power up. A well-ordered shop is a calm mind in action, turning chaos into predictable results.For woodworking enthusiasts, organization and safety aren't extras-they're the difference between a satisfying finish and a costly mistake. This article shows you how to design efficient work zones, tame dust, and establish repeatable safety routines. You'll gain practical layouts, checklists, and workflows that speed setup, keep tools handy, and reduce accidents. Clear, engaging, and actionable guidance sets you on a path to safer, more productive projects.
Optimizing Workspace Layout for Safe and Efficient Tool Access
Organizing for safe and efficient tool access begins with deliberate zoning and clear traffic patterns.Visualize your workspace as interconnected zones: Cutting/Prep, assembly/Finishing, Tool access, and Storage. By mapping these areas around a central workbench, you create predictable routes that minimize backtracking and reduce clutter. Prioritize wide,unobstructed walkways-aim for at least 36 inches (0.9 m)-and place the most-used tools within your strongest reach, so you can work without leaning or twisting.
Planning the layout further means placing tools and surfaces to support a smooth workflow. Mount a sturdy pegboard or wall rails near your main surface for frequently used hand tools, and build a dedicated power and dust-collection zone to keep cords and hoses out of the work area.Use a mobile cart for items you swap between tasks, and position measuring, marking, and writng implements within arm's reach. The following speedy reference summarizes the zones and their roles at a glance.
| Zone | Primary Purpose | recommended Clearance | example Tools |
|---|---|---|---|
| cutting/Prep | Material prep and primary cutting | 36 in (0.9 m) around setup | Saw,planer,clamps |
| assembly/Finishing | nearby assembly and finishing | 3 ft (1 m) between stations | Workbench,vises,mallets |
| Storage & Access | Tools and supplies at reach height | Aisle width 36 in | Pegboard,drawers,bins |
| Dust & Waste | clean workspace,safe air flow | Path to disposal,vent | Dust collector,trash bins |
Ergonomics and safety come next. Adjust bench height so forearms rest comfortably and implement anti-fatigue mats where long standing is required. Ensure proper lighting, glare-free angles, and accessible emergency stops or power-off switches for machinery. Plan for waste removal and dust control by routing disposal paths away from your main workflow, and clearly separate dust-heavy operations from finishing steps to protect your lungs and eyes.
treat layout planning as an ongoing process. After arranging the zones, walk thru a typical project from start to finish to test flow, then note bottlenecks and rearrange as needed.Use color-coded labels, simple signage, and a periodic maintenance cadence to keep the system sharp: review tool placement quarterly, refresh storage bins monthly, and document changes for future reference.
Build Your Dream Workshop on a Budget →
Smart Storage Solutions to Reduce Clutter and Boost Safety
Smart storage isn't just about packing more into a space-it's about creating a safe, efficient workflow. By designing dedicated zones, maximizing vertical space, and using clearly labeled containers, you reduce rummaging, cut clutter, and make safety a natural habit. Prioritize visibility, accessibility, and consistency in every storage decision.
- map your most-used tools and materials and assign them to clearly defined zones.
- Label bins, drawers, and shelves with large, durable tags.
- Group items by function (cutting, fastening, measuring) to minimize unnecessary movements.
- Choose modular, adjustable storage that can grow with your workshop needs.
Vertical strategies pay off in even small spaces. Install a sturdy pegboard or slat wall beside the workbench to keep frequently used hand tools within arm's reach, while magnetic strips keep metal implements tidy and visible. Ceiling or wall-mounted racks support seasonal or infrequently used gear, freeing floor space for a safer workflow. Pair these with clear, stackable containers so you can see at a glance what's inside and when you're running low on supplies.
To formalize safety, create a quick-reference storage map that matches the actual path you take during a typical project.This “zones at a glance” guide keeps hazards out of the work zone and helps new collaborators understand your system instantly.Here's a compact example of a zone-to-storage plan you can adapt:
| Zone | Tools/Materials | Storage Type | Access |
|---|---|---|---|
| Workbench | Hand tools,measuring tools | Pegboard + drawers | Frequent |
| Hardware Station | Fasteners,anchors,small parts | Clear bins | Frequent |
| Consumables | Sandpaper,glues,tapes | Stackable containers | Sometimes |
| Occasional Gear | Extra PPE,backup batteries | Ceiling racks | Infrequent |
Build your Dream Workshop on a Budget →
Systematic Risk Assessment to Drive Safer Work Practices
Systematic Risk Assessment is the compass that guides safer work practices in a busy workshop. Start by identifying hazards across tools, materials, and workflows; then assess risk by estimating likelihood and impact; and finally implement controls with clearly defined ownership. A robust process turns instinctive caution into repeatable behavior: everyone knows what to watch for, how to intervene, and how decisions are documented. In practise, this means a simple, recurring routine: walk the line, talk with the team, and record findings in a living risk register that travels with every project.
| Hazard | Likelihood | Impact | Risk Level | Key controls |
|---|---|---|---|---|
| Unsecured blades and tools | Medium | High | High | Blade guards, locked storage, PPE |
| Slippery or wet floors | Medium | High | High | Immediate spill cleanup, anti-slip mats, signage |
| Overloaded electrical circuits | Low-Medium | High | High | Distribute loads, inspect outlets, use GFCI |
To operationalize this, adopt a lightweight risk matrix and a clear escalation path. The matrix translates observations into prioritized actions, so time is spent on the most consequential risks rather than chasing every nuisance. Use a concise table below to summarize hazards, their likelihood and impact, the resulting risk level, and the recommended controls. This shared view keeps supervision consistent and makes it easy to onboard new staff.
embed risk thinking into daily practice. Assign ownership for top risks, schedule quarterly reviews, and encourage near-miss reporting without blame. build a concise start-of-shift risk briefing checklist, post simple signage where risks persist, and keep the risk register accessible to the whole team. When risk assessment is treated as a living standard rather than a one-off exercise, safer decisions and smoother workflows follow.
Build Your Dream Workshop on a Budget →
Essential Personal Protective equipment and Practical Training
In any well-run workshop,PPE is not a one-size-fits-all add-on; it is indeed a fundamental element woven into the daily rhythm of work. Start with a quick risk assessment for each station, identify potential hazards-from flying debris to chemical splashes-and map the appropriate personal protective equipment (PPE) to that risk. Equally significant is building a culture where PPE is seen as a protective habit rather than a barrier to productivity. Clear expectations, simple routines, and visible leadership set the tone for safe practice.
PPE selection should be task-specific and easy to access. Provide a spectrum of dependable options, from eye and face protection to hearing protection, gloves, respirators, and protective footwear. A practical reference helps teams choose quickly without guesswork. Key principles include proper fit, comfortable materials, and easy maintenance so PPE is worn consistently rather than worn out of necessity.
| PPE Item | When to Use | Fit & Comfort | Common Mistakes |
|---|---|---|---|
| Safety glasses | Grinding, cutting, sanding | Wraparound or splash-protective lenses; anti-fog | Not replacing damaged lenses |
| Hearing protection | Drills, grinders, impact tools | Earmuffs or molded plugs; snug seal | Loose fit; removing early |
| Gloves | Handling sharp objects; solvents | Material appropriate to task; comfortable grip | Using unsuitable material; tattered gloves |
| Respirators | Dusty or fume-heavy tasks | Fit-tested; seal checks | Poor maintenance; incorrect cartridge |
Practical training blends demonstration, repetition, and accountability. Kick off with a quick PPE orientation at the start of every shift, followed by hands-on practice that mirrors real tasks. Use a buddy system where experienced team members coach newcomers on donning and doffing, inspection, and correct storage. Reinforce learning with a simple checklist and periodic refreshers so good habits become automatic rather than optional.
To sustain safety,store PPE in clearly labeled,accessible locations and schedule routine maintenance and replacement. Visual cues – posters, floor markings, and quick-start guides – keep safety top of mind even during busy periods. Track training via a short, end-of-shift log: who wore what, any adjustments needed, and suggestions for improvements.When PPE and training are reliable, the workshop thrives on consistency, confidence, and uninterrupted momentum.
Build your Dream Workshop on a Budget →
Clear Labeling and Standard Operating Procedures for Consistency
Clear labeling isn't merely about making things look neat; it's the backbone of safety and efficiency. Labeling and Standard Operating Procedures (SOPs) create a predictable environment where team members can find, identify, and use items without guesswork. When labels are durable,legible,and standardized across the shop,errors drop,and downtime decreases. Establishing a single visual language - consistent fonts, colors, and size – helps everyone move through tasks with confidence.
Implement a centralized labeling scheme that covers tools, materials, and safety gear. Use color-coded labels for categories, clear text for item names, and dates for expiration or revision. A simple three-tier labeling system can be: (1) item identity, (2) handling instructions, (3) last-updated date. Make sure labels survive routine use and cleaners. Train staff to replace damaged labels immediately and keep an inventory of label stocks so you never run out.
Standard Operating Procedures should be documented, accessible, and regularly reviewed. Create a living SOP library and assign ownership for updates. for each task, outline the steps, required tools, safety considerations, and the exact trigger for the next step. Include visual aids or checklists, so workers can verify completion at a glance. Use version numbers and dates to track revisions, and conduct quarterly reviews to catch outdated practices before they become risky.
To make information actionable, accompany SOPs with quick-reference tables and checklists. A concise table can surface the essential details at a glance,reducing the need to search through long documents. Below is an example structure you can adapt to your space.Adjust categories to match your workflow and ensure ownership is clearly designated.
| Label Type | Example | Purpose |
|---|---|---|
| Item identity | Hammer, Drill, Safety Glasses | Identify tool or material |
| Handling | Fragile, Wet | Provide care instructions |
| Date/Version | 2025-09-11 v3 | Track updates |
Build Your Dream Workshop on a Budget →
Emergency Preparedness and Response Planning in the Workshop
Emergency preparedness in the workshop starts with a clear plan and ownership. Begin with a quick hazard inventory and a risk assessment that prioritizes common workshop hazards such as sharp tools, hot surfaces, flammable liquids, and electrical cords. Create a simple, visible plan: designate a safety lead, map escape routes, and install a lightweight safety board that is updated after each project. Encouraging a culture where everyone participates in a brief safety check at the start of each session helps catch issues before they become incidents.
Establish an Emergency Action Plan (EAP) that covers dialog, alarms, evacuations, and reunification. Key elements include clear alarm signals, a list of muster points reachable by all participants, and a defined chain of command. Action steps: 1) acknowledge the alarm, 2) shut down hazardous equipment, 3) evacuate using the closest safe route, 4) gather at the muster point, 5) account for all people, and 6) await further instructions. Use a dedicated contact sheet posted near the entrance and in digital form for off-site or remote teams.
| Role | Name | Phone | |
|---|---|---|---|
| Fire Warden | TBD | N/A | N/A |
| Medical Lead | TBD | N/A | N/A |
| Evacuation Lead | TBD | N/A | N/A |
| Communication Lead | TBD | N/A | N/A |
Regular drills turn planning into practice. Schedule quarterly simulations that cover common scenarios-fire, chemical spill, power outage, or intruder alert.Before each drill, assign observers who will note timing, decision points, and bottlenecks. After-action reviews should capture a concise list of lessons learned, assign owners for each action, and update the EAP within one week. This continuous feedback loop keeps safety fresh and responsive to changing workshop layouts or materials.
Equip the workspace for rapid response and recovery. Maintain a compact emergency kit in an accessible location with items such as a first-aid kit, fire extinguisher, flashlight, whistle, and spill-cleanup materials.Post exit signage and route maps that reflect temporary changes during builds, and perform monthly checks to ensure supplies are intact. A small, dedicated tool for documenting near-misses and safety observations can vastly improve prevention and culture over time.
Build Your Dream Workshop on a Budget →
Q&A
What are the essential first steps to organize a workshop for safety and efficiency?
Start by clearing clutter and measuring the space, then designate zones for cutting, assembly, and finishing. Move frequently used tools to reachable spots, label everything, and install a first-aid kit, fire extinguisher, and clear exits. Establish simple routines that keep aisles clear and tools returned to their homes after use.
How can I balance safety with productive workflow in a busy workshop?
Run a quick risk assessment for each task and build short, clear SOPs that cover setup, operation, and shut-down. Use signage, color-coding, and checklists to remind everyone of safety steps without slowing work. Train staff on these practices and reinforce them with regular brief refreshers.
What storage ideas help maximize space while keeping tools easy to find?
Use pegboards and magnetic strips for frequently used hand tools, and invest modular cabinets or racks for larger items. Keep inventory visible with labeled bins or clear containers, and store by workflow zone to minimize walking. A simple 5S approach-sort, set in order, shine, standardize, sustain-keeps the area organized long-term.
How often should I review safety practices and equipment, and what should that involve?
Schedule regular inspections of cords, machines, and guards at least quarterly, with an annual full risk review. Check fire extinguishers, first-aid supplies, and emergency exits monthly, updating signage as needed. Document findings, retrain staff when changes occur, and keep a clear log of updates and maintenance.
In Summary
Mastering the art of workshop organization and safety is not about rigidity but about enabling freedom. When tools have homes, cords are tidy, and safety routines are second nature, your hands can focus on ideas, not hazards. The key takeaway is simple: preparedness accelerates creativity, and discipline protects your projects and your future. For woodworking enthusiasts, this matters because a well-ordered shop lowers frustration, reduces waste, and invites experimentation with confidence. Now is the time to act: try a project with a fresh storage plan, dive into another guide, and apply one new safety habit this week.With steady routine and imagination, your workshop becomes a dependable ally and a source of inspiration for your next project.


Great insights! Proper organization and safety measures can make a huge difference in productivity and creativity during workshops. Thanks for sharing!
Absolutely agree, Vincent! A well-organized workshop not only enhances efficiency but also ensures a safer environment for everyone. Can’t wait to implement these tips!
I completely agree with both of you! An organized space really does pave the way for greater creativity and minimizes risks, making workshops more enjoyable for all participants. Let’s all strive for that perfect balance of structure and safety!
It’s inspiring to see everyone so invested in creating a safe and organized workshop environment! These principles truly lay the foundation for innovative and effective collaboration. Let’s keep the momentum going!
It’s great to see such enthusiasm for prioritizing safety and organization in workshops! When everyone is on the same page, it fosters a more productive and enjoyable atmosphere, allowing us to focus on our projects without unnecessary distractions. Looking forward to seeing how we all apply these ideas!
I couldn’t agree more with all of you! A focus on organization and safety not only maximizes productivity but also enhances the overall experience for everyone involved. Let’s keep sharing our best practices and tips to elevate our workshops to the next level!
Well said, everyone! It’s clear that an organized and safe workshop is crucial for fostering creativity and collaboration. Let’s continue to support each other in implementing these practices and share our success stories along the way!
Absolutely, Deborah! It’s wonderful to witness such a strong commitment to safety and organization in workshops. By maintaining a tidy and secure environment, we empower everyone to unleash their creativity and fully engage in the collaborative process. Let’s keep the conversation going and share our ideas for continuous improvement!
I love the positivity surrounding this topic! Implementing effective organization and safety measures not only protects us but also allows our creativity to thrive, making workshops more enjoyable for everyone involved. Excited to learn from each other’s experiences and continue building a supportive community!
Absolutely, Anna! It’s inspiring to see everyone rallying around the importance of workshop organization and safety. Creating a structured and secure environment truly lays the foundation for innovation and collaboration, and I can’t wait to exchange ideas that will not only enhance our workshops but also ensure that everyone feels confident and inspired to create. Let’s keep the momentum going!
Absolutely, everyone! It’s great to see such enthusiasm for workshop organization and safety. When we prioritize these aspects, we not only protect ourselves but also create a thriving space for creativity and collaboration. I’m excited to share ideas and best practices that can help us all elevate our workshop experiences!
I couldn’t agree more, everyone! The shared focus on crafting a well-organized and safe workshop not only enhances our creative processes but also fosters a sense of community and collaboration. I’m looking forward to diving into practical strategies and insights together that will help us improve our workshops and ensure everyone feels secure and inspired while working. Let’s keep the exchange of ideas alive!
I’m thrilled to see all this enthusiasm for workshop organization and safety! It’s clear that prioritizing these elements not only nurtures our creativity but also creates a welcoming and inspiring environment for everyone. I’m eager to hear more about the innovative strategies we can implement to enhance our workshops and keep our creative spaces safe and organized. Let’s continue to support each other in this journey!
I completely resonate with all the sentiments shared here! A well-organized and safe workshop is essential for fostering creativity and collaboration, and I’m eager to explore innovative ideas and practical solutions that we can all implement. Let’s keep the conversation going and build an even more supportive and inspiring community together!
I completely support everyone’s enthusiasm for creating a well-organized and safe workshop! It’s wonderful to see such a strong commitment to fostering an environment that inspires creativity and collaboration. I look forward to sharing and learning more about practical strategies that we can all integrate to elevate our workshops, ensuring they remain inviting and secure for everyone. Keep the ideas flowing!
I couldn’t agree more with all the amazing points shared! A focus on organization and safety is crucial for nurturing our creativity and fostering a vibrant community. I’m excited to engage in discussions about actionable practices and tools we can all utilize to enhance our workshops, ensuring they remain inspiring and secure for everyone involved. Let’s keep sharing our insights and learning from one another!