
What if the simplest joints could unlock a lifetime of sturdy, satisfying builds? This guide speaks to every woodworking enthusiast who believes a project is only as strong as the join that holds it together.Joinery forms the backbone of honest furniture,and mastering a handful of basic techniques can boost durability,reduce waste,and boost confidence. Here you'll explore beginner-friendly joints, safe tools, and practical steps-from choosing the right joint to measuring, cutting, fitting, and finishing. Expect clear explanations, hands-on tips, and room for creativity as you transform scraps into reliable, elegant pieces.
:
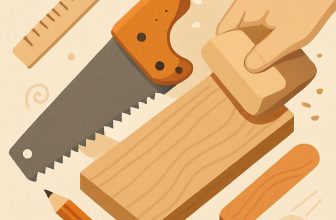
Core joinery techniques for beginners with practical guidance
Starting with core joinery means embracing safety, accuracy, and a repeatable process. A classic beginner-friendly choice is the butt joint, simple to cut and easy to reinforce with glue and fasteners. before you cut,plan your pieces on scrap stock,mark square corners with a try square,and dry-fit the parts to verify alignment. When you're ready, apply a thin bead of wood glue along the joint, clamp with even pressure, and wipe away squeeze-out as you go. This approach builds confidence in layout, clamping discipline, and clean assembly.
- Set up a safe workspace with sharp saws, a square, clamps, and a pencil.
- Choose beginner joints: start with butt joints, then try dowel or rabbet as you gain comfort.
- Dry-fit every project frist, then glue and clamp until the glue sets.
- Wipe excess glue with a damp rag and let pieces cure undisturbed for a solid bond.
To help you compare options at a glance, the following table outlines common beginner joints, what they're best for, and what to watch out for.
| Joint | Best For | pros | Cons |
|---|---|---|---|
| Butt joint | Frames, boxes | Simple, quick to cut | Weak without reinforcement |
| Miter joint | Trim, frames | Clean edges, aesthetically pleasing | May open if not clamped |
| Dowel joint | Boxes, frames | Strong, aligns pieces well | Needs drill guide or jig |
| Rabbet joint | Shelves, cabinet sides | Large glue surface, sturdy | Requires router or tablesaw |
| Dado joint | Shelves, panels | Extra strength, good alignment | Requires accurate cuts |
With practice comes choice. For simple boxes and frames,the butt joint with a small spline or backing piece can be surprisingly sturdy,while a dowel or rabbet joint increases strength and keeps edges aligned.Always predrill holes for screws to prevent splitting, and use cauls or scrap wood to distribute pressure on longer joints.
- Small keepsake box: butt joints with a bottom panel; practice neat glue lines.
- Open shelf: two or three shelves with dados or dowels for even support.
- Picture frame: miter joints; focus on square corners and finishing flush miters.
Get Instant Access to 16,000+ Woodworking Plans →
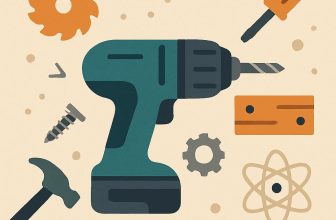
Selecting the right tools for simple joinery projects
Choosing the right tools for simple joinery starts with a plan and a focused, reliable set you can grow with. For beginners,quality and comfort beat quantity-look for ergonomic handles,balanced weight,and edges you can keep sharp with modest effort. Focus first on joints you're likely to use: butt and miter joints, dowel connections, and simple edge treatments. A small toolkit that emphasizes control and accuracy will teach you the rhythm of measuring, marking, and fitting before you chase speed.
To help you assemble a practical starter kit, here is a concise overview of core tool categories, why they matter for simple joinery, and a dependable beginner pick.
| Tool category | Why its essential for simple joints | Starter pick |
|---|---|---|
| Hand saws (dovetail/back saw) | Cuts accurate shoulders and tails with feel | Narex 9″ dovetail saw |
| Chisels | Removes waste and cleanly define joints | Stanley bevel-edge 1/4″ and 1/2″ |
| Marking tools | Transfers measurements and ensures fit | Veritas marking knife |
| Squares/straight edges | Checks squareness and layout | 6″ combination square |
| Clamps | Hold parts steady during glue-ups | 2x F-clamps or quick-grips |
With these tools in hand, plan a beginner project such as a small box or a wall shelf. Start by laying out parts, marking cut lines, and dry-fitting before you apply glue. practice one joint at a time-try a basic butt joint with a dowel reinforcement or a simple miter with a square stop-so each step builds your confidence and accuracy.
Safety and maintenance matter as much as technique. Keep blades sharp and rust-free, oil moving parts, and store tools in a dry, organized rack.Use clamps to secure pieces, wear eye protection, and work on a stable surface that won't shift as you cut and assemble.
Get Instant Access to 16,000+ Woodworking Plans →
Understanding joints and how they create strong connections
Joints are the tiny engineers that turn pieces of wood into furniture. They create strong connections by guiding how forces travel through the structure-across surfaces, along grain, and into the opposing piece. A well-made joint increases surface area for glue, resists separation under pressure, and locks parts together so they act as a single piece. When you think about joints, imagine three parts: the fit, the glue or fastener, and the wood's natural behavior as it swells and shrinks with humidity. For beginners, the goal is to choose joints that provide adequate strength while staying forgiving of small mistakes.
Among the most approachable starter joints are: butt joint (ends joined, simple, needs reinforcement with glue and/or screws); pocket-hole joint (hidden screws, quick, strong in frame assemblies); dowel joint (round wooden pins for alignment, hinges on precise drilling); mortise and tenon (classic interlock, very strong for frames and legs); biscuit joint (loose-filler biscuits for alignment and glue surface); and lap joint (overlapping pieces for extra glue area and straightforward setup).
Here's a quick reference to compare typical joints at a glance. The table below summarizes typical strength, best uses, and key notes to help you choose the right joint for your project.
| Joint Type | Typical Strength | Best Uses | Notes |
|---|---|---|---|
| Butt | Low to moderate in tension; improved with glue or screws | Simple frames, tabletops | Fastest to assemble; least forgiving without reinforcement |
| Pocket-hole | Moderate to strong in face-frame assemblies | Cabinets, frames | Hidden fasteners; good clamping behavior |
| Dowel | Moderate; alignment-dependent | Tables, frames, panels | Requires precise drilling for clean fit |
| Mortise & Tenon | Strongest among basic joints | Rails, legs, frames | Best with precise fit and sometimes shoulder support |
To apply these ideas in practice, follow a focused routine that builds skill and confidence: Dry-fit the pieces first to verify alignment without glue; prepare surfaces by smoothing and cleaning to ensure a clean glue touch; glue and clamp with even pressure and minimal squeeze-out; check squareness as you go and adjust by re-clamping or trimming; test the joint by applying gentle pressure before full assembly; and note wood movement to plan for end-grain sealing and seasonal changes.
Get Instant Access to 16,000+ Woodworking Plans →
Planning your first joinery project with measurements and layout
Planning your first joinery project starts long before you set a blade to wood. Visualize the finished piece, choose a simple joinery approach, and sketch a quick layout that fits your space. For beginners, butt joints with glue and screws are perfectly workable while you learn the basics. Break the project into a small set of parts, decide the grain direction, and note any hardware you'll need. A clear plan reduces surprises at the bench and makes the measurements feel purposeful rather than rushed.
with measurements in hand, prioritize accuracy and consistency. Use a sharp pencil or marking knife, a square, and a tape measure to map every joint. Mark lines on the stock, account for the saw kerf, and label each piece so you don't mix parts. Create a simple sequence: measure, mark, cut, dry-fit, and adjust. This ritual keeps the project organized and builds confidence as you proceed.
To crystallize your plan, assemble a compact cut-list that translates measurements into action. The table below outlines a tiny,beginner-friendly project: two side panels and a top that form a small end table. Align pieces for clean joints and minimize waste by laying out parts on the stock with grain direction in mind.
| Part | Size (L x W) | Quantity | Notes |
|---|---|---|---|
| side panels | 18 in x 12 in | 2 | Grain runs lengthwise; join to top with butt joints |
| Top | 18 in x 12 in | 1 | Glue and screws; pre-drill to avoid splitting |
test-fit everything before committing glue. Do a dry assembly on sawhorses or the floor,check that the joints sit flush,and confirm the assembly is square.If a part doesn't fit, re-check the measurement, adjust for kerf, and recut as needed. By planning deliberately and measuring carefully, your first joinery project becomes a reliable springboard for more creative builds.
Get instant Access to 16,000+ Woodworking Plans →
Safe and efficient methods for clean cuts and secure bonds
Sharp tools and steady hands are the quiet engineers of clean cuts.Start by inspecting and honing your blade until it shaves wood smoothly with little effort. Secure the workpiece firmly and align your cut line precisely, using a backer strip to prevent tear-out on the exit edge. A simple stop block helps you repeat identical lengths,turning a one-off project into a series of precise pieces.
Choose the right blade for the job and feed rate. For cross-cuts, a fine-toothed blade offers crisp edges; for ripping along the grain, a more aggressive blade does the work. Guide the blade with confident, steady strokes rather than forcing it through; let the saw do the cutting. Support long boards on a workbench or roller stand and clamp firmly to minimize drift. When joining, consider a shallow first pass to establish the line, then complete the cut in a single controlled motion.
For strong, clean bonds, surface preparation is as critically important as the glue itself. Wipe away dust and loose fibers, flatten mating faces if needed, and apply a thin, even film of adhesive. Use clamps that distribute pressure evenly across the joint, and keep the pieces square as the glue dries. For angled joints or delicate woods, pinning or using a temporary fastener can help hold alignment until the glue cures. Work in a clean, dry surroundings and respect glue cure times to avoid gaps or slow setting.
| Scenario | Tip | Why it helps |
|---|---|---|
| Tear-out on end grain | Place a backer strip or sacrificial sheet | Prevents chipping and keeps the exit edge clean |
| Inconsistent board length | Use a stop block for repeat cuts | Delivers uniform pieces every time |
| Uneven clamp pressure | Distribute with cauls or wide-jaw clamps | Prevents gaps and bowing at the joint |
| Dry joints, gaps | Wipe surfaces and clamp promptly | Encourages close contact and a strong glue bond |
Get Instant Access to 16,000+ Woodworking Plans →
Finishing and refining for a durable and polished result
Finishing starts with a clean,prepared surface. Begin with a practical sanding plan: rough grit 120-150 for soft woods and 140-180 for hardwoods, then progress to 220-320 for a silky finish. Use a sanding block to keep panels flat and to follow the grain, avoiding heavy scratches from random-orbit sanding. After rough sanding,wipe with a damp cloth or tack cloth to remove dust and raise any loose fibers; let the wood dry thoroughly before applying any finish. Run a quick test on a scrap piece to preview how the grain will respond to your chosen finish and adjust your plan accordingly.
Selecting a finish that matches use and your comfort level is essential. For beginners, wipe-on polyurethane or shellac can be forgiving and easy to control, while oil finishes bring warmth with a thinner, more natural film. Apply in thin, even coats with a clean cloth or brush, and avoid puddling on end grain. Allow proper curing between coats,then lightly sand with 320-400 grit to knock down dust nibs and refine the surface. Work in a dust-free space and consider a dry, moderate-humidity day to minimize finishing defects.
Edge and joinery treatment matters for durability.Slightly rounding sharp edges helps prevent chipping and makes the finish feel smoother to the touch. After the final coat, burnish with a clean cloth to compress the surface and even out sheens, then seal end grain with a penetrating oil or a matching finish as end grain soaks up more liquid. If glue lines appear,you can fill small gaps with a compatible filler or blend the seam with a touch of stain. Finish with a light wax or furniture paste to protect and to ease daily cleaning.
A practical finishing workflow keeps results durable and polished.
- Prepare: ensure surfaces are clean, dry, and dust-free.
- Sand: smooth to 320-400 grit and remove all dust.
- First coat: apply a thin, even layer and wipe off excess.
- Between coats: light sanding and clean wipe-down.
- Final coat: apply last layer, then cure fully.
| Finish Type | Pros | cons | Best For |
|---|---|---|---|
| Oil Finish | Warm look,easy to apply | Requires maintenance; longer curing | Natural grain,easy touch-ups |
| Water-based Poly | Clear,quick dry,low odor | Can raise grain on soft woods | Durable surfaces,kitchen items |
| Shellac | Fast drying,great sealer | Not highly water resistant | decorative pieces,light woods |
| Polyurethane (Oil-based) | Very durable,rich amber tone | Longer cure,stronger odor | High-use furniture,tabletops |
Get Instant Access to 16,000+ Woodworking Plans →
Q&A
Which beginner-friendly joint should I start with for a small project?
Begin with a basic butt joint, glued and clamped. It's simple to align and works for many small projects.If you want a touch more strength, try a dowel joint or pocket-screw method.
What tools do I need to get started without spending a lot?
A sharp handsaw, a square, a tape measure, clamps, and a drill will get you far. Add a marking knife and decent glue to cover most tasks, and you can grow your toolkit as you tackle bolder projects.
How do I ensure clean, tight joints when joining boards?
Dry-fit first, then mark your joints precisely before applying glue. Use clamps to hold pieces flat and apply steady, even pressure as you assemble. Let the glue cure without shifting.
How should I prepare wood before joining to prevent tear-out?
Work with sharp tools and support the wood when cutting to minimize tear-out. Score the cut line with a knife, use backer boards for end grain, and take light passes when planing or sanding edges.
What are common mistakes beginners make and how can I fix them?
Over-tightening joints can pinch and misalign parts; looseness leads to wobble. rushing glue-ups or skipping a dry-fit ofen results in gaps. Inadequate blade sharpness or rough cuts invite tear-out; keep tools sharp and cut with proper support. Practice on scraps first, and measure twice before cutting.
To Conclude
As you close this guide, the key idea is clear: good joinery grows from simple habits-accuracy in cut, fit, and grain alignment, plus a patient mind. When these meet, even modest projects become sturdy and satisfying, proof that craft outlives trend. For woodworking enthusiasts, these fundamentals unlock creativity without fear, turning rough boards into reliable, lasting pieces. Now take action: try a small project, experiment with a new joint, or skim another guide to deepen your toolkit. Apply the insights you've gathered, reflect on the results, and iterate. With steady hands and curious hearts, your next creation is already taking shape.


This sounds like a fantastic resource for beginners! I can’t wait to try out some of these techniques in my next project.
I love the idea of using simple joinery techniques to elevate DIY projects! Looking forward to exploring the creative possibilities!
I’m excited to see how these joinery techniques can really enhance my woodworking skills; it’s great to have a guide that makes it accessible for beginners!
These joinery techniques are exactly what I need to build my confidence in woodworking! Can’t wait to dive in and see what I can create!
I’m thrilled to find a guide that simplifies joinery for beginners! These techniques will definitely inspire me to tackle some exciting woodworking projects!
I’m really looking forward to trying out these simple joinery techniques; it’s awesome to have a guide that makes woodworking feel approachable and fun for beginners!
This guide is just what I needed to get started with joinery! Excited to learn these techniques and see how they transform my woodworking projects!
This guide is perfect for anyone looking to improve their woodworking skills! I’m eager to try out these joinery techniques and see how they elevate my projects!
This guide is a game-changer for beginners like me! I’m excited to learn these techniques and take my woodworking skills to the next level!
This guide has me feeling inspired and ready to dive into joinery! I can’t wait to experiment with these beginner-friendly techniques and see what amazing creations I can make!
I’m so thankful for this creative guide! I’ve always wanted to learn joinery, and these simple techniques seem like the perfect way to start my woodworking journey. Can’t wait to get my tools out and give it a go!