There's something undeniably inviting about a farmhouse table-the kind that bears fingerprints and shared meals,and somehow makes a room feel lived-in. For woodworking enthusiasts, this project offers a satisfying blend of planning, conventional joinery, and finish that holds up to daily use. By walking through a step-by-step build, you'll learn how to pick straight grained stock, lay out mortises, create sturdy breadboard ends, and finish with a warm, durable patina. You'll gain a reliable process you can adapt to sizes, timber, or styles, plus confidence to tackle future projects. This guide keeps complexity approachable while delivering a table you can be proud of.
Selecting Materials for a Rustic Farmhouse Style Table
Selecting materials for a rustic farmhouse table starts with mood and practicality. Seek boards that carry character-hand-sawn edges,saw marks,and warm tones-whether you choose reclaimed lumber or new stock milled to look aged. Plan for moisture control; aim for a moisture content in the 6-8% range when dry to minimize seasonal movement. For most indoor spaces, kiln-dried stock with consistent thickness is easier to build with and will age into the look you want without warping.
wood species shape price, weight, and how the grain reads in light. A rustic farmhouse table blends warmth and durability: pine offers affordable, forgiving stock with a honey glow; white oak resists wear and shows a bold, tight grain; reclaimed barn wood delivers patina and history but requires closer inspection and stabilization. Below is a rapid at-a-glance comparison to guide your choice.
| Material | Pros | Cons |
|---|---|---|
| Reclaimed Pine | Warm character; budget-friendly | Softer surface; may have checks |
| White Oak | Durable; stable grain | Higher cost; heavier |
| Reclaimed Barn wood | authentic patina; enduring | Variable quality; prep required |
| hard Maple | Hardwearing; smooth finish | Can blotch with some finishes |
Finish and assembly decisions finalize the material story.Oil finishes (linseed or tung) deepen color and leave a warm, tactile feel, while a matte polyurethane protects the surface with minimal sheen. A wax topcoat can soften the look and speed repair after dings. Plan for movement by allowing a small expansion gap along the ends for solid boards, and consider joinery that accommodates seasonal changes, such as floating panels or breadboard ends, to keep the table flat year after year.
Get Instant Access to 16,000+ Woodworking Plans →
Planning Proportions and Layout for a Farmhouse Table
Planning begins with the footprint. Start by mapping the room and the seating you envision. For a cozy dining arrangement, allow about 24 inches of table-side width per person, which translates to roughly 72-96 inches of table length for 6-8 diners. reserve a clear walking path behind each chair, aiming for at least 36 inches of clearance to avoid crowding during gatherings. A precise footprint keeps the table feeling integrated with the space and ready for everyday meals or weekend feasts.
Scale and top composition drive the farmhouse look. A table top in the range of 1.5″–2″ thick delivers that sturdy, handmade presence. Pair a 30″–36″ wide top with a modest 1.5″–2″ overhang to let chairs pull in neatly. If you include breadboard ends, you gain classic character and a little extra width control. Plan your joinery around seasonal movement, keeping gaps and loose floating panels in mind so the top remains flat and proud rather than binding or cupping.
Legs and apron set the stage for comfort and support. With a top in the 30″-36″ width range, position outer legs about 8″–14″ from each end on the long sides, providing ample knee room under a roughly 4″–6″ tall apron. Two popular layouts are four sturdy legs at the corners or a pair of supportive pedestals connected by a rail. Either configuration works as long as you preserve at least 24″–25″ of knee clearance under the apron and keep the under-top space open for feet and shins.
| Element | Typical Dimension | Notes |
|---|---|---|
| table height | 29″-30″ | Comfortable with standard chairs |
| Table width | 30″-36″ | Allows chairs on both sides |
| Table length (6-8 seat) | 72″-96″ | adjust to room and seating |
| Knee clearance under apron | 24″-25″ | Keep feet comfortable |
draft a precise plan before cutting: sketch your dimensions on paper, then translate them to the shop with a simple grid. Create a concise cut list for the top boards, apron pieces, and legs, with joinery choices that suit your wood and tools. Start by assembling the top, then attach the apron and legs so you can test the fit with a sample chair at the intended height. account for seasonal wood movement and finish with a forgiving design-such as a floating top or breadboard ends-so the table stays level and comfortable year after year.
Get Instant Access to 16,000+ Woodworking Plans →
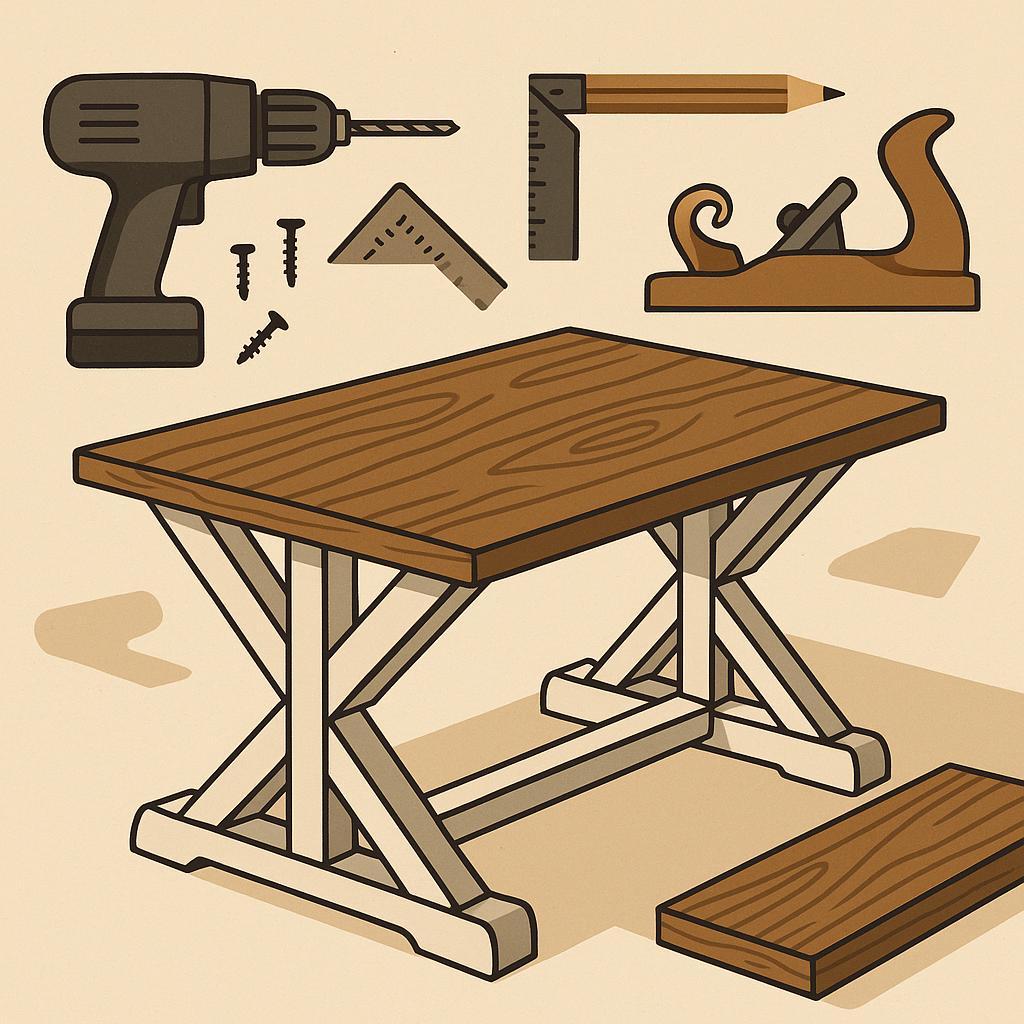
Essential Tools and Woodworking Techniques for a Clean Build
Clean, accurate assembly begins with the right toolkit. start with measurement tools-a steel tape, a reliable combination square, and a precision marking gauge to lay out every line. For cut readiness, rely on a sharp handsaw or guided circular saw with a quality edge and straightedge, then trim stock with chisels and a sturdy mallet. Keep surfaces flat and joints clean by using sensible clamps and a dedicated dust-collection plan to minimize fuzz and tear-out during the build.
Techniques that preserve clean, farmhouse-friendly lines start with careful setup and precise joinery.Dry-fit pieces to confirm alignment, then choose joints that balance strength with rustic charm-butt joints reinforced with pocket screws for quick builds, or classic rabbet joints for long-edge connections. A router or router plane helps clean shoulders and grooves, while a sharp chisels and a light pass with a sanding block keeps edges square and ready for finishing. Maintain consistent clamping pressure, work from dry to wet glue, and wipe away excess adhesive to avoid squeeze-out that mars the wood.
Finish-first thinking keeps your table looking purposeful from the first cut. protect the grain with a compatible finish-milk paint, wiped-on polyurethane, or wax-applied after a thorough sanding sequence that moves from rough to fine grits. Use edge banding or chamfering sparingly to soften edges and achieve the farmhouse silhouette. Endurance comes from routine maintenance: keep blades sharp, inspect hardware for looseness, and store materials so you can reproduce consistent results on the next project.
| Tool Category | Care Tip | Recommended Frequency |
|---|---|---|
| Measuring tools | Calibrate occasionally; keep edges clean | Weekly |
| Saws & blades | keep teeth sharp; wipe clean after use | Per project |
| Clamps & hardware | Check jaws for nicks; lubricate screw threads | Monthly |
Get Instant Access to 16,000+ Woodworking Plans →
Joinery and Construction Methods for Strength and Style
To fuse strength with the warm charm of farmhouse style, prioritize joinery that can withstand daily use while maintaining a handcrafted look. A robust mortise-and-tenon connection between the legs and the apron anchors the frame and resists racking, while breadboard ends on the tabletop help control seasonal movement without compromising the surface's clean lines. If you want a touch of period detail, consider pegged or shallow through-tenons that read as traditional craftsmanship and add visual depth.
Key joinery types for strength and style include:
| Joinery Type | Best For | Key Advantage |
|---|---|---|
| Mortise and Tenon | Legs to apron; frame connections | Highest strength and classic look |
| Wood Dowels | General alignment; quick assembly | Simple, forgiving; good glue surface |
| Breadboard Ends | Tabletop warp control | Resists warping while keeping a clean line |
| Tongue and Groove (Panel Joints) | Tabletop panels; edge-to-edge alignment | Flat, tight joints with minimal gaps |
During assembly, start with a careful dry-fit to confirm alignment, then apply a suitable adhesive on joints and clamp firmly until set.For a traditional farmhouse look, consider pegging a few joints or inserting small decorative plugs to seal the joints while adding a subtle detail. Finish with a protective topcoat that suits your space, and keep an eye on seasonal humidity to maintain square, steady lines.
Get Instant Access to 16,000+ Woodworking Plans →
Finishing Touches and Protective Coatings for Longevity
Finish selection should start with one final light sanding to prepare the surface for adhesion. Oil finishes bring a warm, natural glow that sinks into the grain, while polyurethane (water-based or oil-modified) offers durable protection for everyday farmhouse life. For a soft, antique look with minimal gloss, a wax or wax-oil blend can be appealing, but plan for periodic maintenance to preserve protection and luster.
Apply coats thinly and evenly, following the grain with a quality brush or lint-free cloth. Avoid pooling by working in manageable sections and maintaining a steady pace. Allow each coat to cure fully-timing varies from a few hours for water-based finishes to a day or more for oil-based ones. Between coats, lightly sand with 220-320 grit to knock down dust nibs, then wipe with a tack cloth before the next layer to ensure a smooth, even surface.
To keep the tabletop looking good for years, protect it with practical habits: use placemats, coasters, and hot pads; wipe spills promptly with a soft, damp cloth; and avoid abrasive cleaners. Plan a refresh schedule by reapplying a topcoat as the finish shows wear or dulls; the frequency depends on usage. For a farmhouse vibe,a satin or matte shield typically balances character with durability and hides minor scratches better than a high gloss.
Before you commit to a finish, test it on a scrap piece of the same wood in similar lighting. This quick check confirms color, clarity, and how the sheen will read in your dining room.
| Finish Type | Pros | Cons | Best For |
|---|---|---|---|
| Water-based polyurethane | Clear, low odor; durable | May raise grain if not properly prepped | Everyday dining tables |
| Oil (tung/linseed) | Deep warmth; easy spot repairs | Requires maintenance; may amber over time | rustic, traditional look |
| Hard wax oil / wax blend | rich tactility; easy touch-ups | Less durable; needs periodic reapplication | Antique or soft farmhouse patina |
Combine table with an optional protective edge treatment if chair movement is heavy, and keep notes on coat counts, sheen level, and any color adjustments for easier re-coats in the future.
Get Instant Access to 16,000+ Woodworking Plans →
Assembly Tips and Quality Checks for a Durable Table
Begin with a meticulous dry-fit to confirm that the legs, aprons, and tabletop panels align perfectly.place the assembled components on a flat, true surface and use a square to verify 90-degree corners; clamp as you go to lock everything in place. This upfront attention to alignment pays off in a sturdy table that remains true over years of use.
During glue-up, follow a consistent sequence and spread the pressure evenly. Apply a thin bead of glue, clamp with cauls across wide faces, and wipe away squeeze-out before it cures. Pre-drill holes to reduce the risk of splitting, and use a thoughtful fastener plan-screws in a staggered pattern or dowels reinforce joints without crowding the grain. The goal is a joint that's strong yet forgiving of seasonal wood movement.
After assembly, run through a quick quality check routine: test the table on a flat floor for wobble, sight along edges to spot twist, and confirm the top sits flush with the apron. If anything feels off, loosen and readjust before final tightening, and consider slight shimming under the apron in small increments rather than forcing the joints. A deliberate, methodical approach here protects the piece from warping and keeps the farmhouse look lasting.
| Check | Criteria |
|---|---|
| Squareness | 90° corners; edges align along the frame |
| Joint Security | No movement; glue squeeze-out cleaned |
| Table Flatness | Tabletop lies flat on a level surface |
| Hardware Fit | Centered holes; no tear-out; flush fasteners |
Get Instant Access to 16,000+ Woodworking Plans →
Q&A
What wood types work best for a farmhouse-style table, and what should I consider when choosing?
For warmth and character, you can pick pine, poplar, oak, or reclaimed boards. Pine is budget-friendly and easy to work, while oak offers durability and a stronger grain; reclaimed wood adds age and charm but may require more prep. Look for straight grain, minimal defects, and boards that are kiln-dried to reduce warping. Consider the finish you want, since softer woods take stain differently than harder woods.
How should I plan the size and joinery to ensure the table is sturdy and comfortable?
Common farmhouse dimensions run about 5-7 feet in length for seating 6-8 and 30-36 inches wide; aim for a top 1.5-2 inches thick for a solid feel. Use an apron and sturdy legs; mortise-and-tenon or dowel joinery (or even well-assembled pocket screws with a solid edge) yield a durable frame. leave roughly 1-1.5 inches of overhang on the long sides for comfort.If space is tight, consider a trestle base for stability and a light, airy look.
What tools and materials are essential to complete the build?
Collect a saw (circular or miter), a drill/driver, chisels, a router or sander, clamps, and a square for accuracy. Have sandpaper grits 80-120 for initial shaping and 220 for a smooth finish. For materials, buy lumber with straight edges, wood glue, wood filler for knots, and appropriate fasteners (screws or dowels) plus a finish or stain and sealant. Safety gear like eye and ear protection should be on hand throughout the project.
Which finish and detailing choices help achieve the farmhouse look while protecting the table?
Popular options include a light stain or clear protective finish (polyurethane) to preserve the wood's character while resisting wear. A hand-rubbed wax or oil can enhance the grain and yield a softer, matte look common to farmhouse furniture. Distressing or a slightly weathered patina, along with a simple, rounded edge profile, keeps the piece approachable and timeless. Be sure to apply a durable topcoat and recoat as needed to maintain protection in high-traffic areas.
To Conclude
Ultimately, the key takeaway is that a farmhouse-style table can emerge from clear planning, careful measuring, and thoughtful material choices-proportions and grain tell the story as much as the joinery does. The project matters to woodworking enthusiasts as it marks a bridge between practical skills and timeless design: you gain confidence in layout, hand tools, and finishing, while building a piece that lasts. If you're ready, try the build, or explore more guides to deepen technique, or apply the shared insights to your next project.May your workshop stay patient, your joints stay solid, and your craft keep growing with every board you trim.


This guide is fantastic! I’ve always wanted to build my own farmhouse table, and the step-by-step instructions are super clear and easy to follow. Can’t wait to give it a try! Thanks for sharing!
This is an awesome guide! I love the farmhouse style, and your tips on materials and finishing really help simplify the process. Definitely saving this for my next DIY project!
I appreciate how detailed this guide is! The pictures are super helpful, and the advice on choosing the right wood makes it less intimidating for a beginner like me. Looking forward to tackling this project soon!
This is such a great resource! I’m really excited to try building a farmhouse table, and the step-by-step approach you’ve outlined makes it feel achievable. The tips on tools and techniques are particularly useful for someone who’s new to woodworking like me. Thanks for the inspiration!
This guide is exactly what I needed! I’m a bit nervous about starting my first big project, but the clear instructions and helpful suggestions have me feeling more confident. I’m especially excited to see how my own farmhouse table turns out-thanks for putting this together!
This is exactly what I was looking for! I’ve been wanting to build a farmhouse table for ages, and your detailed instructions and tips make it feel so doable. I can’t wait to get started and add my own personal touches to the design. Thanks for sharing such a valuable resource!
This guide is fantastic! I’ve been wanting to tackle a farmhouse table for a long time, and your clear steps and helpful tips make it feel more accessible than ever. Can’t wait to personalize mine and share the results! Thanks for the inspiration!
This guide is a game changer! I’ve always admired farmhouse tables but never thought I could build one myself until now. The step-by-step instructions and practical tips are just what I needed to get started, and I’m especially looking forward to customizing it to fit my home. Thank you for sharing such a wonderful resource!
This guide is incredibly helpful, and I’m really excited to finally take on the challenge of building my own farmhouse table! The clear instructions and practical advice make it seem much less intimidating, and I can’t wait to add my unique flair to the design. Thank you for sharing such a fantastic resource that empowers beginners like me!
This guide is just what I needed to finally build my own farmhouse table! The detailed steps and practical tips really simplify the process, making it feel achievable. I’m excited to put my own spin on it and can’t thank you enough for providing such a fantastic resource that inspires creativity and confidence!
This guide is absolutely perfect! I’ve been dreaming of building my own farmhouse table, and your step-by-step instructions make it seem entirely achievable. I love how you break everything down and provide such practical advice, and I’m thrilled about the idea of adding my own twist to the design. Thank you for putting together such an inspiring and useful resource!
This guide is exactly what I needed to kickstart my farmhouse table project! The step-by-step approach is so encouraging, and I love how you highlight personal touches in the design. Feeling inspired and ready to create something special for my home-thank you for sharing such a valuable resource!
This guide is fantastic! I’ve been wanting to craft my own farmhouse table for ages, and the detailed steps you provided make it feel achievable. I can’t wait to add my personal touches to the design, and I appreciate the encouragement and practical tips. Thank you for inspiring me to dive in and create something special for my home!
I’m so glad I found this guide! Building my own farmhouse table has been on my to-do list for a while, and your step-by-step instructions make it feel totally doable. I really appreciate the practical tips and can’t wait to infuse my own style into the design. Thanks for the inspiration-I’m ready to get started!
This guide is incredible! I’ve always wanted to create my own farmhouse table, and the clear, step-by-step instructions make it seem so manageable. I love the emphasis on personalizing the design and the helpful tips you’ve included. Can’t wait to get started on my project-thank you for the motivation and guidance!
This guide is precisely what I needed to finally tackle my farmhouse table project! The clear instructions and inspiring tips really motivate me to get started. I love that I can customize the design to fit my style, and I’m excited to jump into this craft. Thank you for such an amazing resource!
This guide is a game changer for anyone looking to build a farmhouse table! I love how straightforward the steps are and the tips for customization truly spark creativity. I’m so excited to finally start this project and make something unique for my home. Huge thanks for sharing your expertise!
This build guide is just what I needed to finally take on my farmhouse table dream project! The step-by-step approach is super helpful, and I love the idea of adding my own flair to the design. Can’t wait to start building and make it a centerpiece in my home-thank you for the inspiration!
This build guide is fantastic! I’ve been dreaming of creating a farmhouse table for ages, and the clear instructions make it feel achievable. I love the customization ideas, and I can’t wait to put my own spin on the design. Thanks for sharing such an amazing resource-I’m excited to dive into this project!