
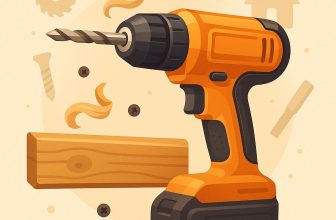
Powerful, reliable, and a touch magical-these tools turn rough lumber into refined pieces with less sweat and more precision. For woodworking enthusiasts, the right tools are not just conveniences; they redefine what's possible in a weekend project or a professional build. This article spotlights the top 10 power tools that consistently earn their keep in the shop.You'll learn what each tool does, why it matters, how to choose between models, and practical tips for safer, faster, more accurate work.By the end you'll have a practical sense of which tools to prioritize, how to pair them for common tasks, and a clear path to a smarter, more productive workshop.
Choosing Power Tools That streamline Woodworking
starts with aligning your tools to your actual workflow. Look for models with clean dust extraction, comfortable grips, and intuitive controls that minimize switch-and-stop moments. For long sessions, ergonomics and balance matter as much as raw power; a lighter, well-balanced tool reduces fatigue and improves accuracy. Cordless options give you freedom to move around the shop, but confirm battery life or have a fast-charging plan so you're not waiting mid-project.
Think in modules rather than scattered gadgets. A core set-a cordless drill/driver, a compact circular saw, a plunge router, and an orbital sander-can handle most tasks when paired with compatible accessories. Prioritize interoperability (same blades, collets, dust ports) to cut downtime. Look for features that streamline setup, such as quick-release blades, integrated LED work lights, precise depth controls, and anti-kickback safety mechanisms.
| Feature | What to Look For | Why It helps |
|---|---|---|
| Power | W or HP, RPM | Faster, cleaner cuts |
| Weight | Light to medium | Less fatigue during long sessions |
| Vibration | Low-vibe grip | Comfortable, steadier control |
| Dust Collection | Integrated port or adapter | Keeps workspace visible and healthy |
test before you buy whenever possible. Rent or borrow to compare feel, balance, noise, and vibration; note how quickly you can switch between tasks with the accessories you'll actually use. Build a starter kit with a few essential bits and clamps, and plan a compact storage system that keeps everything accessible. By prioritizing tool subsets that work with your existing gear, you'll accelerate projects without breaking the bank.
Build Your Dream Workshop on a Budget →
Enhancing Precision and Finishing with Essential Cutting Tools
Precision begins long before the blade starts spinning. Set up with a guided system-track saw or guide rail-that keeps your cuts straight through sheet goods and narrow boards alike. Use a sharp, carbide-tipped blade with a tooth count matched to your material: fewer teeth for solid stock, more teeth for plywood and veneer. Set the blade depth to just above the surface-typically 3-5 mm-to minimize tear-out and maintain clean edges. Clamp the work securely and use a sacrificial or backer board to catch splinters on the exit; a slow, steady feed helps the cut stay true and reduces heat buildup that can warp delicate pieces.
turn precision into a repeatable process with smart jigs and careful measurement. Build a simple fence-and-stop-block setup for each cut, and opt for a quality miter gauge for cross-cuts. For larger sheets, a track-guided system yields dependable results, especially when paired with the right blade and proper dust collection. The table below offers quick setup ideas you can apply today:
| Tool | Best Use | Tip |
|---|---|---|
| Track saw | Long, straight cuts in sheets | Keep rail tight; support both ends |
| Ripping blade | Roughing out stock | Match blade to material; use dust collection |
| Crosscut blade | Crosscuts in plywood | Light pressure to prevent binding |
Finishing with finesse hinges on edge treatment and ongoing maintenance. Choose a router with a straight or flush-trim bit for precise edge work, and always pair trimming with a clean backer board to minimize tear-out. When approaching the edge, prefer multiple shallow passes over one deep cut, and consider masking tape along the cut line to further reduce splintering. Keep your tools in peak condition: check blade alignment, clean and inspect tracks, wax the miter bars for smooth movement, and recalibrate fences and gauges so that test cuts on scrap pieces slide through with little resistance.
Build Your Dream Workshop on a Budget →
Safety and Ergonomics for Comfortable Woodworking
Thoughtful safety and ergonomics start before you flip on a tool. Build a mindset of protection: wear appropriate eye and hearing protection, dust masks when needed, and keep your workspace clean to prevent slips. A neutral spine and a stable stance form the foundation of comfortable woodworking. Position the tool so you don't have to twist your torso or reach awkwardly; adjust your chair, bench height, and clamps to bring stock into range with minimum shoulder strain. start each session with a quick two-minute warm-up of light stretches for the wrists, neck, and back to reduce fatigue later.
Ergonomics extend to setup and cadence. Use adjustable stands and benches so materials stay at elbow height, not down near your knees.A high-quality dust collection strategy keeps chips and sawdust out of your breathing zone, while anti-fatigue mats under standing work reduce leg strain. When using handheld tools,maintain a steady,controlled grip and keep wrists in a neutral position; let tool weight ride in your palm rather than gripping tightly with fingers. Take short pauses every 25-30 minutes to reset posture and re-check alignment before making the next cut.
Use the quick-reference table below to visualize key ergonomic targets:
| Aspect | Recommended Practice | Quick Tip |
|---|---|---|
| Posture | Keep spine neutral, shoulders relaxed | Shift weight, avoid twisting |
| Work Height | Align stock at elbow height | Adjust bench/stand to suit |
| Grip & Reach | Maintain wrists neutral | Let tool weight ride in hand |
| Breaks & Focus | Pause every 25-30 minutes | Do quick shoulder/neck rolls |
Adopt these habits gradually to build safety into your routine, so comfort grows with confidence:
- Pre-check: inspect PPE, clamp stock, and clear the workspace before starting.
- During work: keep tools sharp, maintain sightlines on your cut line, and never bypass safety guards.
- Aftercare: tidy up, store tools properly, and note any ergonomic tweaks you made for future sessions.
Small, consistent adjustments yield big comfort over time.
Build Your Dream Workshop on a Budget →
Cordless versus Corded Power tools How to Decide
Choosing between cordless and corded power tools isn't just about convenience-it's about how you work. Start by mapping your most frequent tasks and your workshop layout. If you move around a project site or work away from outlets, cordless tools offer unmatched mobility and quick setup. For longer sessions in a powered shop, corded models provide steady performance and predictable runtimes without worrying about batteries.
key decision factors to weigh include power consistency, runtime and charging cadence, weight and ergonomics, battery ecosystem, and budget. Cordless tools shine for adaptability,overhead work,and quick,on-site jobs,but you'll need to plan for battery swaps or charging breaks during longer sessions. Corded tools excel when you require continuous torque and uninterrupted operation for heavy-duty tasks like ripping, planing, or repeated drilling sessions.
| Aspect | Cordless | Corded |
|---|---|---|
| Power/ Torque | High torque,depends on battery | Max steady torque |
| Runtime | Limited by battery size | Unbroken operation |
| Weight | Often heavier due to battery | Typically lighter without battery |
| Cost | Higher upfront; batteries add to total | Lower upfront; no batteries |
| Best use | Portable,quick jobs | Heavy-duty,continuous use |
Practical steps to decide for your shop: choose core tools that address your most frequent tasks,align your battery ecosystem across brands to maximize interchangeability,and budget for at least one spare battery and a fast charger. If you anticipate expanding your set, favor tools within the same voltage family to keep charging simple and investment predictable. consider your space: a well-organized cord management system reduces trip hazards for corded work,while a compact,efficient charger setup keeps your cordless station ready to roll.
Build Your Dream Workshop on a Budget →
maintenance and longevity of Your Tools
Maintenance and longevity begin with a consistent routine. After each project, wipe down surfaces to remove sap, dust, and resin, and store blades or bits with protective caps. Regularly inspect power cords, plugs, and switches for signs of wear, cracks, or looseness, and address any issue before it becomes a hazard. A quick wipe and a soft brush prevent buildup that can degrade performance, while a light coating of oil on exposed metal parts helps prevent rust in damp or humid workshops. By treating your tools with care, you extend their life and maintain accuracy over time.
To turn maintenance into a steady habit, follow a simple schedule. The table below concisely lists daily,weekly,and monthly tasks to keep your power tools performing at their best.
| Task | Frequency | Tip |
|---|---|---|
| Cleaning and inspection | Daily | Wipe surfaces; check vents and cords |
| lubrication | Weekly | Oil moving parts; avoid over-greasing |
| blade/bits care | Each use | Keep sharp; protect edges |
| Storage and rust prevention | Monthly | Store in dry area; use silica packs |
consider storage and environment. Keep tools in a cool, dry place, with guards in place and protective covers on blades when not in use. For battery-powered tools, avoid heat, don't store at full charge for long periods, and follow the manufacturer's charging guidance. When transporting tools, use a padded case to protect edges and switches, and store accessories separately to prevent damage. These practices help maintain precision, safety, and readiness for the next project.
Build Your Dream Workshop on a Budget →
Dust Control and Workshop Cleanliness for Better Woodworking
Dust control isn't just a cleanliness routine-it's a core part of safety, accuracy, and finish quality.When you manage dust well, you protect your lungs, extend tool life, and keep surfaces free of fine grit that can mar cuts or clog filters. Start with a clear plan: seal the shop, isolate dust-producing zones, and build a simple daily habit that treats cleanliness as part of the workflow. Protect your lungs and your finish with disciplined dust management.
Choosing the right collection setup is a cornerstone of good woodworking hygiene. A dedicated dust collection system with properly sized ductwork captures chips and sawdust at the source, dramatically reducing airborne dust. Pair that with a portable vacuum or cyclone for mobile tools, and add an air filtration unit to improve overall air quality. key options to match your space include:
- Central dust collection – high capture efficiency for larger shops; connects to multiple tools via 4″ or larger ducting.
- portable cyclone + shop vac - flexible, budget-amiable for small spaces or targeted tasks.
- Air filtration unit - improves ambient air and helps catch fine dust that escapes collection.
| System | Pros | Best For |
|---|---|---|
| Central dust collection | High capture efficiency; scalable | Medium-to-large shops |
| Portable cyclone + shop vac | Flexible; lower upfront cost | Small shops and benchtop tools |
| Air filtration unit | Quiet; easy upgrade | Any workshop |
Establish a daily cleanup rhythm that fits your workflow.Before you start, run the dust system to purge lines and ensure suction is ready.Keep tools wiped, blades sharp, and storage organized. A 5-minute wipe-down between tasks and a 10-minute end-of-day sweep add up to major gains in cleanliness and finish quality. Regular maintenance matters, from changing filters to inspecting joints for leaks, so suction stays strong over time.
Beyond gear, practical habits reinforce outcomes. Label dust zones near each tool to remind yourself where the dust is generated, and train everyone in the shop to follow the same routines. Place disposable rags and pre-cut cloths near the dust producers, and store combustible waste (sawdust piles) in metal containers away from heat sources. By weaving dust control into your daily flow, you'll enjoy smoother operations, better finishes, and a safer, more inviting workspace.
Build Your Dream Workshop on a Budget →
Q&A
Which power tool should I start with if I'm new to woodworking?
Start with a versatile, beginner-friendly combo: a cordless drill/driver is essential for assembly, and a circular saw covers rough cutting. add a jigsaw later for curved cuts. These picks teach basics without overloading you, and many models come with safety features and lightweight designs.
Are cordless tools worth the investment for a small workshop?
Cordless tools offer mobility and flexibility, which helps in tight spaces and without extension cords. Look for a single voltage platform (like 18V/20V) to mix and match tools, and weigh the mass and runtime against your typical projects. If you mostly work near outlets, corded tools can be cheaper and lighter per use.
What safety gear and practices are most important when using power tools?
Wear eye and ear protection, a dust mask or respirator, and non-slip gloves when appropriate. Use clamps to secure work, keep hands away from blades, and disconnect power when changing bits or blades. Maintain clean workspaces and use guards and push sticks to reduce kickback risk.
How should I maintain and extend the life of my power tools?
Keep blades and bits sharp, clean dust from housings, and lubricate moving parts as recommended by the manufacturer.Store tools in a dry, organized space and charge batteries before they're fully depleted to extend life. Regular checks for loose screws, worn brushes, and proper calibration help prevent surprising failures on the job.
Final Thoughts
Great tools don't replace craftsmanship, but they do expand what you can accomplish with less struggle.The takeaway is that the right power tools, used thoughtfully, sharpen accuracy, safety, and speed, turning ambitious ideas into tangible results. For woodworkers, these tools matter because they open doors to cleaner joints, safer operation, and a wider range of projects-from small boxes to larger pieces. So pick a project, test one new technique, or dive into our other guides to pair tool choice with material and design. start small, stay curious, and let your workshop become a place where progress happens-one precise cut at a time.


Great list! I never knew how much easier woodworking could be until I tried some of these tools. Definitely going to invest in a good planer!
Absolutely! A good planer can make all the difference in achieving that perfect smooth finish. Can’t wait to see what other tools on the list I should try out!
These tools are essential for any woodworker looking to up their game! I’m particularly interested in the router; it really opens up so many creative possibilities.
I totally agree, a good set of power tools can transform your woodworking experience! I’m especially excited about the potential of the jigsaw for making intricate cuts.
I couldn’t agree more! Having the right power tools not only speeds up the process but also enhances the quality of the final product; the table saw has been a real game changer for my projects!
I completely resonate with all the comments here! Each tool brings a unique advantage to the table, and I’m particularly fond of the impact driver; it’s a lifesaver for driving screws quickly and efficiently, making assembly a breeze!
I’m with you all on this! Each tool listed has its own unique strengths, but I think the miter saw is a must-have for anyone wanting to make precise angle cuts effortlessly; it really elevates the level of craftsmanship in woodworking!
I’m loving all the insights shared here! I think the cordless drill should also get a special mention; it’s such a versatile tool that makes everything from drilling holes to assembling furniture much more convenient, especially when you need to move around the workspace.
I appreciate all the great suggestions! While I love using the circular saw for its portability and power, I think the oscillating multi-tool deserves a shout-out too; it’s perfect for detail work and tricky cuts that would be challenging otherwise!
Absolutely! I also think the router deserves a mention; it’s fantastic for adding intricate designs and finishing touches to projects, making it a vital tool for anyone looking to elevate their woodworking skills!
I couldn’t agree more with everyone’s picks! I believe the belt sander deserves a mention as well; it really speeds up the sanding process and helps achieve a smooth finish quickly, which is invaluable for any woodworking project!
Great discussion! I completely agree with all the tool recommendations so far; I’d also like to add that a jigsaw is incredibly helpful for making curved cuts and intricate shapes in wood, making it an essential addition to any woodworker’s arsenal.