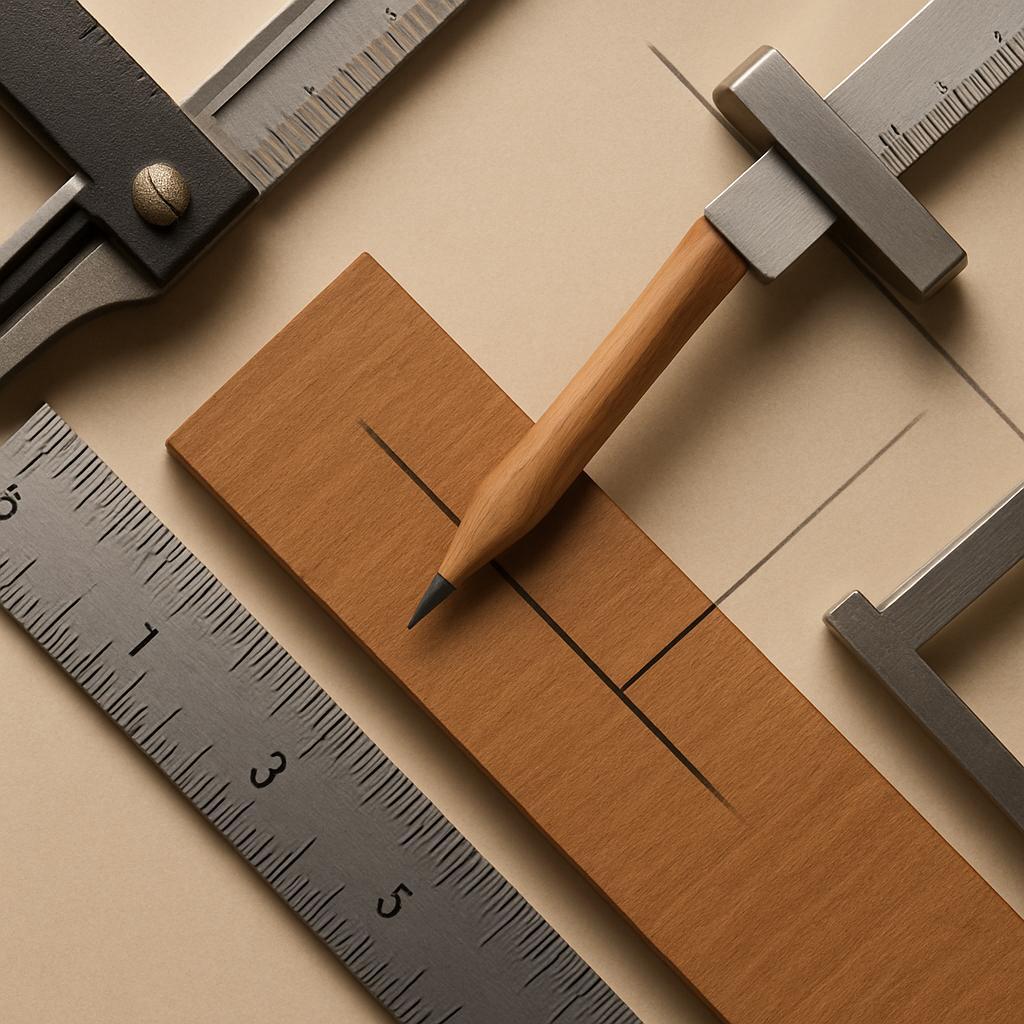
A perfect cut begins with a single, honest measurement.In woodworking, that first mark sets the tone for every edge, joint, and finish. This guide dives into the measuring and marking tools that turn rough boards into precise parts-rulers and tape measures for scale, marking gauges and marking knives for layouts, squares and bevels for right angles, chalk lines for long, straight runs, and calipers for tight tolerances. You'll learn how to choose the right tool for the job,how to read graduations at a glance,and how to maintain accuracy from setup to saw. By the end, you'll mark with confidence and cut with precision.
Selecting Essential Measuring Tools for Precision in Cuts
isn't about accumulating gadgets; it's about building a reliable kit that fits your material and workflow. Start with a core set that covers most jobs: a sturdy measuring tape, a steel ruler, a combination square, a marking gauge, a marking knife or sharp pencil, and a dependable marking tool for quick lines. Quality over quantity matters here: only tools that stay legible after daily use and that resist wear will keep your measurements trustworthy. With the right tools in hand, you'll mark and lay out with confidence rather than guesswork.
Choosing each tool means weighing scale, accuracy, and the work you do most frequently enough. For layout tasks, a steel-backed tape or metric ruler keeps long measurements flat and true, while a combination square helps verify 90° and 45° angles. A marking gauge creates consistent line spacing along edges, and a sharp marking knife yields cleaner edges than a pencil on hardwood. If you occasionally work with thickness or depth, add calipers (digital or dial) that you can zero reliably, then learn to lock and read them without distraction. Always verify zero points and test on scrap stock before committing to the final cut.
| Tool | Primary Use | Typical Accuracy | Care Tip |
|---|---|---|---|
| measuring tape (steel) | Layout and long measurements | ±1/16 in (4 mm) over common lengths | Keep clean; retract slowly to avoid kinks |
| Steel ruler | Edge marking and straight lines | ±0.5 mm over length | Check for nicks; store flat |
| Combination square | 90°/45° checks and marking | Typically within 0.5 mm | Keep blade clean; calibrate zero |
| Marking gauge | Parallel lines along edges | Depends on mechanism; usually fractions of a mm | Protect wheel/knife; clean after use |
| Calipers (digital) | External/internal dimensions, thickness | ±0.02 mm (digital) | Zero before use; wipe jaws |
With your kit framed for your typical tasks,adopt a simple pre-cut ritual: zero tools,check the reference against a known standard,and confirm your lines on scrap before you cut. Store instruments in a dedicated tool roll or box, wipe down blades, and sharpen or replace when needed. Regular maintenance keeps measurements trustworthy run after run, season after season.
Build Your Dream Workshop on a Budget →
Rulers and Tape Measures for Consistent Layouts and Straight Cuts
Precision in layouts and straight cuts starts with the edge you trust. A reliable ruler or tape measure should yield a true reference line, with crisp graduations that remain legible under shop light. Check for a truly square edge, minimal bow or twist, and graduations that align with the edge itself. Protect your tools from nicks,warping,and moisture,and verify accuracy against a known standard before marking or cutting.
Rulers come in several builds to suit different tasks.A steel ruler delivers a rock-solid straight edge that resists bending,though it can be heavy and may corrode if not stainless. An aluminum ruler offers a lighter option with respectable rigidity and easy handling. For flexible layouts or longer spans, a tape measure with a metal blade provides reach-just ensure the blade lies flat, the hook at the end is secure, and the tape hasn't stretched through repeated use. When high precision is required, pair any ruler with a square or fence to maintain a true perpendicular reference.
Reading and marking with care makes the difference. Read graduations at eye level and align your line with the edge, not the numbers that sit away from the edge.Pull tapes taut to avoid sag and lock a rule when you need a stable reference for repeated cuts. For repeatable layouts, transfer lines with a sharp marking knife or a dedicated marking gauge rather than relying on a pencil line that can smudge on soft woods. Regularly test accuracy with a quick check against a known standard-they're cheap insurance against creeping errors.
| Tool | Typical Length | Graduation Style | Best Use | Pros | Cons |
|---|---|---|---|---|---|
| Steel ruler | 12-24 in | Fractional/Metric, ground edge | Precise layouts, long straight edges | Rigid, durable edge | Heavier; can rust if not stainless |
| Aluminum Ruler | 6-24 in | Metric and/or fractional | Lightweight, portable | Moderate rigidity, affordable | Edges can wear over time |
| Tape Measure (metal blade) | 16 ft common (portable options 8-25 ft) | Imperial/metric with hook | measuring around corners, long spans | Flexible; quick to deploy | Blade stretch over time |
| Combination Square | 6-12 in | Vernier; 90°/45° | perpendicular marks and scribing | Versatile; accurate perpendiculars | Requires setup |
Build Your Dream Workshop on a Budget →
Marking Tools and Techniques for clear Cut Lines
Clear, mark-ready lines are the precursors to accurate cuts.Start with the right marking tools: a sharp pencil or mechanical pencil for light marks on soft woods, a marking knife for clean kerfs, and a steady scribe or center finder to lay out true reference lines. For edges, a sturdy straightedge or combination square helps transfer the line from ruler to workpiece without wandering. Always test your marks on a scrap piece to confirm visibility and contrast before committing to the cut.
Different materials demand thoughtful marking. For wood,a marking gauge sets a consistent offset from an edge,while a scratch awl creates a fine indentation that guides the saw. On metal, use a center punch to locate starting points and a metal scribe line that remains visible after deburring. For plastic, a light pencil or wax pencil frequently enough yields the best contrast. Keep tools sharp and apply steady, controlled pressure to avoid faint or smeared lines.
techniques for crisp lines hinge on a simple sequence: score, mark, verify. Begin with a light score along the intended line using a sharp knife or scribe, then deepen the mark with your primary marking method, and finally check alignment with a square or ruler from multiple angles. For long measurements, a chalk line or laser guide can lock in a straight edge; for short runs, a center punch or awl can provide a precise starting point. If the surface tends to smear, consider masking off surrounding areas with painter's tape to protect nearby surfaces.
Best-practice approach: establish the reference edge, lay down the line, then verify before cutting. Quick checkpoints include ensuring the line is parallel to edges, confirming measurements from the same origin on both sides, and rechecking with the measuring tool after marking. Practice makes crisp lines-spend a minute marking on scrap first, adjust grip and angle, and you'll reduce reruns on the actual piece.
| Tool | best For | Tip |
|---|---|---|
| Marking knife | Clean kerf lines in wood | Keep blade perpendicular to surface |
| Marking gauge | consistent offset from edge | Set snugly against fence |
| center punch | Starting point on metal | Lightly tap to avoid slipping |
| Pencil / wax pencil | Visible marks on various surfaces | Use high-contrast color |
Build Your Dream Workshop on a Budget →
Marking Gauges and Scribes for Accurate Layouts
Precision begins with the right tool and a intentional setup. Marking gauges and scribes are the quiet partners of accurate layout, translating measurements into visible guides that your saw and plane can follow. Choose the tool to fit the job: a pin marking gauge or wheel marking gauge for long, continuous lines; a mortise gauge when parallel marks must guard a specific width; or a marking knife for ultra-clean edges.Keep the blade or pin sharp, and hold the gauge square against the workpiece to eliminate drift. A well-placed, light pass is far more reliable than a heavy scratch that catches on fibres.
Understanding the strengths and limits of each option helps you stay consistent across pieces. The table below summarizes common types, their best uses, and a practical tip to keep lines legible and repeatable.
| Type | Best Use | Tip |
|---|---|---|
| pin marking gauge | Long, precise lines from an edge | Keep the pin sharp; set shallow depth to avoid ridges |
| Wheel marking gauge | Fast transfer along or across grain | Use a light touch; test on scrap first |
| Mortise gauge | Marking two parallel lines around a mortise | Align with a fence and verify spacing |
| Marking knife / scriber | Crisp, clean lines that resist tearing | Sharpen blade; bevel facing the mark |
To execute a reliable mark, start with a crisp reference edge and set your gauge distance with care. Place the fence or edge of the gauge firmly against the reference, then adjust the distance from the edge with a ruler or caliper.Make a single, gentle pass-avoid pressing hard enough to distort the line.Always test on a scrap piece first; if the line disappears under dense grain, back off the pressure or switch to a marking knife for a cleaner groove. After marking, verify alignment with a square or caliper to ensure the line runs true to your layout. With consistent setup and careful technique, these marks become faithful guides that keep your cuts precise from start to finish.
Build Your Dream Workshop on a Budget →
Chalk Lines and Layout Methods for Long and Precise Runs
Long, precise runs rely on chalk lines that stay crisp from start to finish. Start with a quality snap line and a taut pull to keep the mark true. Before you mark, secure your baseline with two fixed points at opposite ends, then pull the line tight and snap. Check for sag or drift by measuring the offset at several points along the line; even a small bend can throw off the entire layout. For best visibility, choose a bright chalk and work on a clean, light-backed surface so the line stands out clearly.
Plan your layout around the geometry of the piece. For long straight cuts, align with a straight edge or factory edge and maintain parallelism with a second reference line. For broader areas, use a grid or “story pole” approach to transfer offset measurements from a fixed origin. Practical steps: establish a master line with a chalk reel, mark intermediate reference points every 4-6 feet, then verify with a quick cross-check against a second line. Keep your chalk line clean and replace chalk as soon as the color dulls to preserve contrast.
Here's a quick-reference of common layout methods to keep on hand during long runs:
| Method | Best For | Key Tip |
|---|---|---|
| Chalk line (snap line) | Long, straight runs | Tighten line and snap with consistent tension |
| String/transfer line | Transferring marks between points | Use clean string and re-measure after placement |
| Laser line | High-precision layout over large areas | Calibrate against a known straight edge |
| Story poles | Offsets from a fixed origin | Mark poles first, then strike aligned lines |
In practice, a smooth workflow matters as much as the lines themselves. Re-check alignment after clamping or moving boards, and protect the marks from smudging by keeping surfaces clean. Regularly service your tools-reload chalk, replace worn reels, and brush away dust so marks stay crisp when you need them. When you doubt a line, re-mark with a quick, controlled pass rather than guessing, and you'll cut with confidence from first line to final edge.
Build Your Dream Workshop on a Budget →
Maintaining and Calibrating Measuring and Marking Tools for Lasting Precision
Maintaining accuracy begins with good habits as soon as a tool lands on the bench. After each cut or measurement, wipe away dust and oil, and inspect for nicks or burrs on blades and jaws. Store tools in a dry, padded case to guard against moisture and impact.A light coat of mineral oil on metal surfaces helps prevent rust, while silica packets in the cabinet or toolbox keep humidity in check.Regularly check moving parts for smooth operation and never force a misaligned edge-realign or replace components before continuing. By weaving these small routines into your workflow, you protect precision long before it's put to the test.
Beyond cleaning, calibration is about verifying true geometry and reliable zero references.Start with the basics: ensure rulers, steel straightedges, and squares are true by testing against a known reference block or factory-grade square. For calipers and depth gauges, zero the jaws on a clean metal surface, then confirm measurements against gauge blocks or a trusted reference object. If a reading drifts, recalibrate or retire the tool. The process is quick, but it pays off in straight lines and consistent angles across every cut.
| Tool | Calibration Method | Recommended frequency |
|---|---|---|
| Measuring tapes | Test hook alignment against a known length reference; check both metric and imperial scales | Monthly or after heavy use |
| Calipers / depth gauges | Zero jaws; verify with gauge blocks or a known-dimension reference | Every few weeks |
| Squares (try-square,combination square) | Compare against a true reference block; verify 90° accuracy | Quarterly or after drop/impact |
| Marking gauges / pencils | Test mark line width and depth on scrap material; adjust fence or pen hardness as needed | Monthly |
For marking tools,a crisp line is your guide. Keep blades sharp or replace blades regularly, and choose marking media appropriate to your material: a hard pencil for plywood, a softer lead for metal, or a durable marking knife for tight joints. Always check that the line remains visible after sanding or planing,and re-zero if you rely on a marking gauge to gauge thickness. A simple habit-mark, confirm, and cut-reduces waste and keeps joints snug.
maintain a simple calibration log. Note the tool name,last calibration date,who performed it,and any adjustments made. Keeping this record helps you spot drift before it affects a project and makes it easier to plan replacements when needed. Treat calibration as part of your finish quality: when tools drift, your cuts drift too; when they stay steady, projects finish with confidence.
Build Your Dream Workshop on a Budget →
Q&A
what are the essential measuring and marking tools for precision cuts?
Core tools include a steel tape measure, a straightedge, and a square (combination or try square) for right angles. Add a marking gauge or marking knife, plus a sharp pencil or marking pencil, and keep a caliper or precise ruler for fine measurements. A layout punch or center finder can definitely help when starting marks on tricky materials.
How do you choose the right marking tool for different materials?
Wood often benefits from a marking knife or a soft pencil for crisp, visible lines. Metal and plastic respond better to a scribe or a sharp pencil; for shiny surfaces, consider a center finder or transfer punch to establish accurate guides. Pick tools that leave clean marks without distorting the surface.
What techniques help ensure accuracy when marking?
Secure the workpiece firmly with clamps or a vise, then align your eye with the line to avoid parallax. Use a straightedge or square to guide each mark and make steady, controlled strokes. Recheck lines from a fresh viewpoint before cutting.
How do you verify measurements before cutting?
Measure twice, mark once, and compare the result with multiple references if possible. Do a test cut on scrap to check fit and adjust as needed, then recheck with a caliper or ruler for final confirmation.Only proceed when the marks sit square and true to the intended dimensions.
What maintenance tips help extend the life of measuring and marking tools?
Keep blades and tips sharp, wipe away dust, and store tools in protective cases to prevent nicks.Clean marks from surfaces to avoid ghost lines, and periodically check accuracy against a known standard. Replace worn tips and calibrate as needed to stay reliable.
To wrap It Up
Ultimately, the message is simple: the right measuring and marking tools don't just mark lines; they set intentions, align angles, and guide your hands toward cleaner joins. When accuracy starts with a solid pencil, a square that stays true, and a tape that refuses to slip, your projects resist error and you gain confidence with every cut. For woodworking enthusiasts, this focus on measurement is the quiet engine behind durable furniture, precise inlays, and satisfying finishes. So pick a project, open another guide, test a new technique, and apply what you've learned. May your workshop stay patient, and may every cut move you toward your next inspired project.


Great list! I always find that having the right measuring tools makes such a difference in achieving clean and accurate cuts.
I completely agree, Benjamin! Using high-quality measuring and marking tools really elevates the whole process and helps avoid costly mistakes.
Absolutely! Investing in reliable tools not only boosts confidence in your work but also enhances overall efficiency and precision in every cut.
Couldn’t agree more, Benjamin! Having the right measurement and marking tools truly transforms the quality of your work and saves a lot of time in the long run.
I can’t emphasize enough how crucial it is to have a solid set of measuring and marking tools; they really can make or break your project by ensuring everything is perfectly aligned and precise.
Having a dependable set of measuring and marking tools is indispensable; it not only improves accuracy but also instills a sense of professionalism in your craftsmanship!
Well said, everyone! The right measuring and marking tools not only enhance the quality of work but also bring peace of mind, knowing that every cut is executed flawlessly for the best results.
Totally agree! Using high-quality measuring and marking tools is essential for achieving consistent results and can really make a difference in both the outcome of your project and your overall satisfaction with your work.
Absolutely, Benjamin! Investing in reliable measuring and marking tools not only elevates the precision of your cuts but also boosts efficiency, allowing for a smoother workflow and ultimately resulting in a more polished final product.
Absolutely! The importance of reliable measuring and marking tools cannot be overstated-they’re foundational for achieving that level of precision and quality that every craftsman strives for, truly setting the stage for success in any project!
I couldn’t agree more! Reliable measuring and marking tools are crucial for precision; they truly empower craftsmen to take pride in their work and ensure that each project stands out with quality and accuracy.
I completely resonate with all your thoughts! Having dependable measuring and marking tools eliminates guesswork and instills confidence in every step of the crafting process, ensuring that the end results are both precise and professional.
I couldn’t have said it better myself! High-quality measuring and marking tools truly lay the groundwork for success in any project; they make a world of difference in achieving accuracy and ensuring that every cut is perfection, leading to a finish that you can be genuinely proud of.
I couldn’t agree more with everyone here! Having the right measuring and marking tools is essential for achieving that level of accuracy that can transform your projects from good to great-it’s all about setting yourself up for success!
I wholeheartedly concur with all the previous comments! Investing in quality measuring and marking tools is a game-changer-they not only enhance your accuracy but also boost your confidence throughout the project, allowing you to focus on creativity while knowing that every cut will be spot on.
Absolutely! The right measuring and marking tools are the foundation of any successful project. They help eliminate mistakes and give you the confidence to create with precision, making your work not only easier but also more enjoyable.