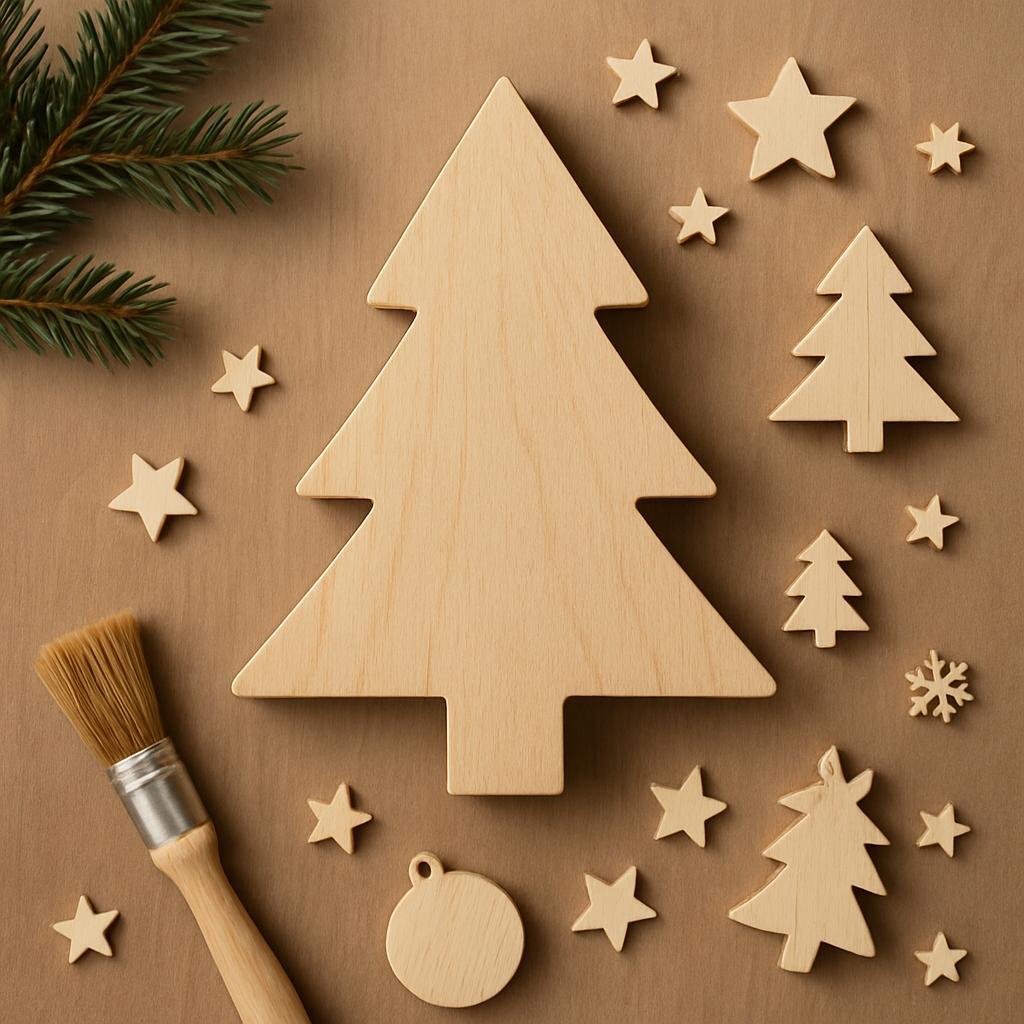
Turn a single plank into a festive chorus of wooden decorations this Christmas. For woodworking enthusiasts, this collection keeps projects approachable while sharpening your hands-on skills and letting you experiment with shape, grain, and finish. The guide explains clear, step-by-step techniques, from precise cutting to light sanding and durable sealing, so you can build confidence with minimal setup. You'll learn how to select simple designs, reuse scrap wood, tailor sizes to your space, and add personal touches that fit any style. By the end, you'll have ready-to-hang ornaments and a toolkit of ideas for years to come.
:
Choosing the Right Wood and Finishes for Easy DIY Wooden Christmas Decorations
Choosing the right wood and finish sets the stage for decorations that are simple to make and sturdy enough to last year after year. For beginner-amiable projects, start with softwoods like pine or spruce; they cut easily, sand well, and take light coats of paint or stain evenly. If you want a natural, smooth look, consider basswood or poplar for their uniform grain. Remember to pick boards with minimal knots and a consistent thickness to help your shapes align as you glue and assemble little Christmas trees, stars, or snowflakes.
Finish choices can dramatically change the ease of your project. A water-based polyurethane or acrylic varnish dries quickly, emits fewer fumes, and cleans up with soap and water-perfect for a kitchen table workshop. For a warmer, more rustic feel, a thin coat of beeswax or mineral oil can be buffed to a soft sheen, and is typically easier to apply to decorative pieces that won't bear heavy handling. If you're painting, a solid primer helps color pop, and a clear topcoat preserves the look while protecting the wood from moisture and resin bleed.
Keep these practical steps in mind to streamline your workflow: prep the wood by sanding to a smooth finish (start at 120 grit and move up to 220), wipe away all dust, seal end grains, apply your chosen finish in thin, even coats, and let each coat dry fully before lightly sanding again. Test finishes on scrap pieces of the same wood before committing to your final pieces, and label projects to track drying times. With a little patience and steady hands, you'll have a collection of charming, durable wooden decorations ready to hang or gift.
Get Instant Access to 16,000+ Woodworking plans →
Practical Techniques for Cutting Shaping and Sanding Wooden Holiday Ornaments
When cutting intricate holiday shapes, the right tool and setup make all the difference. A fine-toothed scroll saw or a dedicated fret saw excels at following curves without drifting, while a small band saw can tackle thicker stock with control. Always plan your cuts by marking the design, drill a starter hole for any interior cutouts, and secure the blank firmly with clamps or a non-slip mat. Keep your fingers clear of the blade, wear safety glasses, and test your approach on a scrap blank before committing to your final piece.
Shaping comes next, and the trick is to work with the grain and your pattern rather than against it.Use a rasp or small file to remove waste and define bold edges, then switch to a silicone sanding sponge or fine file for smoothing. Move in steady, light passes, following the wood's natural direction, and frequently compare your work to the pattern to preserve symmetry. For clean inside corners, work with a narrow flat file or a sharpened knife to pare away small slivers, and always support the workpiece to prevent tear-out.
finish your work with a intentional sanding progression and a careful seal. Start with rough garnet or 60-120 grit to knock down tool marks, then step through 180 and 220 for general smoothing, and finish with 320 or finer for a glassy feel. The exact grits depend on wood species, but staying within this sequence helps most ornaments stay crisp and ready to seal. After sanding, wipe away dust with a tack cloth and apply a light finish-often a beeswax, oil, or polyurethane-in thin coats, letting each layer cure wholly. This helps protect delicate edges from chipping when the ornament finds it's place on the tree.
| Stage | Recommended Tool | Grit/Focus | Tips |
|---|---|---|---|
| Cutting shapes | Scroll saw or fret saw | N/A | Drill starter holes for interior cuts; maintain blade tension |
| Rough shaping | Rasp or small file | 60-120 | Remove waste; check against pattern |
| Finishing smooth | Sanding block + sandpaper | 180-320 | follow grain; small, light passes |
| Sealing and care | Cloth, wax or polyurethane | N/A | apply thin coats; cure between coats |
Safety and workflow: Establish a simple, repeatable routine to keep cuts clean and reduce fatigue.
- Always clamp firmly, wear eye protection, and keep a tidy, well-ventilated workspace.
- Follow a large-to-small design flow: pattern to blank, then final shaping.
- Keep dust away from finishes; designate a finish area to avoid contamination.
- Label each ornament with design and size for quick assembly and storage.
Get Instant Access to 16,000+ woodworking Plans →
Creative Design Ideas for Rustic and Modern wooden Christmas decorations
Blend rustic warmth with modern simplicity by selecting one statement wood piece and pairing it with clean, geometric forms. Start with a reclaimed plank, a smooth oak block, or a sliced tree round as a base, then finish with a clear oil or soft wax to bring out the grain. Embrace contrast: rough-sawn edges against crisp edges, or matte surfaces with a glossy accent. For color, keep to a neutral palette-creamy whites, charcoal, and warm browns-to let the wood shine while staying versatile for holiday decor.
Ornament ideas that bridge styles include laser-cut snowflakes from thin plywood, layered wooden garlands that stack blocks into a vertical tree, and simple silhouettes like houses or stars with geometric lines. Cut edges smooth to avoid snags,sand softly,and finish with a protective coat that suits indoor use.Pair rustic textures with minimal hardware, such as blackened metal hooks or copper-tinted nails, to emphasize modern lines against natural wood.
Finish options can dramatically alter the mood of your pieces. A light whitewash preserves grain while softening color; a warm tung oil or Danish oil brings depth; a matte black stain creates a bold contrast with rustic texture. For quick reference, see the table below for concise ideas, finishes, and the tools you'll need.
Display and styling tips help these pieces shine: group a few small shapes on a mantle with a single ambient candle, or string a garland of wooden rounds along a staircase rail.Use a simple pedestal or cake stand to elevate a focal ornament, and mix heights with slices, blocks, and thin panels to create visual rhythm that feels both cozy and contemporary.
| Idea | Finish/Effect | Tools |
|---|---|---|
| Rustic-Snowflake Ornament | matte clear oil | Jigsaw or scroll saw, sandpaper |
| Geometric Tree Blocks | Whitewash | Table saw, clamps, sander |
| Hanging Round Ornament | Natural oil | Pocket hole jig or drill, drill bit 1/4″ |
| Miniature Wooden Houses | Black stain | Laser cutter or fine blade |
Get Instant Access to 16,000+ Woodworking Plans →
Finishing Touches for Durability and a Polished Home Holiday Look
Durable, holiday-ready wooden decorations deserve more than a pretty surface-they need a finish that stands up to kitchen steam, candle glare, and kids hoisting ornaments. Start with a clean, smooth surface: sand with 220-320 grit until silky, wipe with a tack cloth, and then choose a protective layer that suits indoor use. For most home décor, a clear water-based polyurethane in satin provides durable protection without yellowing, while giving furniture-grade clarity. If you prefer a natural look, mineral oil or Danish oil boosts the wood's grain without creating a heavy film.Always test your finish on a scrap piece to see color and feel before the main project.
Apply thin, even coats and let them cure fully between applications. Lightly sand between coats with 320-400 grit to knock down dust nibs, then wipe away dust with a damp cloth. Build up at least two to three thin coats for holiday pieces that will be handled or stored. for extra shine or a festive glow, finish with a final light wax buff after the last coat has cured; the wax adds a soft luster and a bit of protection for surfaces that touch tablecloths or tree skirts.
To tailor the look while keeping durability, consider a simple table of finishes to compare options at a glance:
| Finish | Look | Durability | Best For |
|---|---|---|---|
| Water-based polyurethane (Satin) | Clear, low sheen | High | High-traffic areas and kids' ornaments |
| Danish oil | Warm, natural grain | medium | Decorative pieces, keeps a wood's character |
| Shellac | Warm amber, smooth | Low to medium; not water resistant | Indoor, decorative accents |
| Beeswax or wax-based finish | Soft luster, smooth feel | Low | Non-porous surfaces, polishing touch |
store and care for your handmade pieces to preserve the finish. Keep them out of direct sunlight and away from drastic temperature changes; wrap delicate items in a cloth or tissue to prevent scratching. When holiday gatherings end, a quick gentle dusting and an occasional light buff with a soft cloth keeps the look polished year after year.
Get Instant Access to 16,000+ Woodworking plans →
Budget Friendly Materials and Tools to Jumpstart Your Project
Starting with budget-friendly materials doesn't mean sacrificing charm. look for pine boards, pallet wood scraps, or thin birch plywood; these are affordable, easy to shape, and forgiving for beginners. With a few straight cuts, light sanding, and a dab of wood glue, you can craft rustic snowflakes, stars, and mini trees that feel festive without a big investment. Build a compact, essential toolkit so every project stays simple and satisfying.
Here's a quick snapshot of budget-friendly materials and how they pay off on your workbench.
| Material or Tool | Why it's Budget-Friendly | Estimated Cost |
|---|---|---|
| pine boards / wood scraps | Repurposes leftovers; versatile shapes | free – $5 |
| Birch plywood (thin sheets) | Light, easy to cut; great for ornaments | $3 – $6 |
| Sandpaper (60-120 grit) | Smooth finishes for a clean look | $1 – $4 per pack |
| Wood glue | Strong joints without nails | $2 – $5 |
| Painter's tape | Masking and layout guides | $1 – $3 |
As you assemble your starter kit, consider these affordable tools that do most of the heavy lifting. A handsaw or coping saw handles curved shapes; a utility knife is perfect for fine details and scoring; a sanding block or sheets keeps edges smooth; and a few clamps or even clothespins make it easy to hold pieces while glue sets.You don't need a full workshop-focus on the few workhorse tools that cover most ornaments, and upgrade gradually as you save.
Smart sourcing will stretch your budget even further. Check local thrift stores, salvage yards, and scrap bins for inexpensive wood, hardware, and decorative finding ideas.Ask neighbors or join a makers' group to borrow tools or exchange scraps. For finishes, repurpose leftover craft paints, stain samples, or even whitewash with a little water and white paint. A simple display of your handmade pieces-on a mantle or a string of twine with bells-proves that creative upcycling can be just as festive as store-bought decorations.
Get Instant Access to 16,000+ Woodworking Plans →
Display and Hanging Solutions to Show Off Your Wooden Christmas Creations
Display and hanging solutions can transform your wooden Christmas creations from charming to memorable. Use wall-mounted ledges, narrow picture shelves, or a simple pine mantel to give each piece a dedicated stage, letting the grain catch the light. Pair pieces with a natural palette-pine, burlap, and warm brass-and use jute or cotton ribbon to tie elements together without overpowering the wood's character.
Plan your layout before you hang anything. Place the largest piece at eye level as a focal point, then balance with smaller shapes above and to the sides. For a floating effect, suspend lightweight ornaments with clear fishing line or thin nylon thread so the wood seems to hover. For heavier pieces, choose safe hardware-wall anchors or studs for stability-and opt for removable options like Command hooks when you expect to rotate displays through the season.
Create depth and interest by layering pieces at different distances from the wall: taller shapes in the back on a shelf,smaller ones toward the front,with a few glimmers from a string of warm LEDs. If you have a pegboard, grid a few hooks at varying heights to keep your collection flexible and ready for seasonal swaps. Remember to keep display zones away from heat sources and direct sunlight to preserve finishes and color.
| Display Option | Best For | Quick Tip |
|---|---|---|
| Wall-mounted ledges | medium-to-large pieces on walls | Use a level and sturdy anchors |
| Floating line garlands | Suspended ornaments | Trim equal lengths for symmetry |
| Pegboard with hooks | Flexible display and rotation | Arrange by height and color balance |
Get Instant Access to 16,000+ woodworking Plans →
Q&A
Which beginner-friendly wooden Christmas decoration projects would you recommend starting with?
Try simple shapes like star ornaments, tiny trees, or rectangular sign plaques. Use thin,easy-to-cut wood scraps or pre-cut blanks to keep it light and manageable,then sand smooth before finishing. A quick coat of paint, whitewash, or stain plus a clear seal gives a festive look without complexity.
What tools and supplies should I gather before I start?
A basic toolkit is enough: a handsaw or jigsaw, sandpaper, wood glue, and a small clamp. Add nails or pins, a drill with bits, and brushes or sponges for paint or stain. If you don't have cutting tools, opting for pre-cut shapes or wooden blanks can skip the sawing step.
How can I finish and seal wooden decorations so they last through the season?
Choose a finish suited to your display location. For indoor pieces, a water-based polyurethane or acrylic varnish provides protection with minimal odor; for a rustic look, wax or matte stain can work well. Between coats, lightly sand for a smooth surface and follow the product's drying times.
What are the best ways to hang or display these decorations safely and stylishly?
Thread ribbon, jute twine, or thin wire through small holes or drilled slots for hanging. use removable adhesive hooks for light pieces, or nails/screws for heavier ones. Aim for a cohesive display and store finished pieces in a dry box after the season to extend their life.
Final Thoughts
These simple, finish-right projects show that festive woodwork can fit into busy days while sharpening your craft. The key takeaway is clear: you don't need complex kits or fancy tools to make holiday décor that feels personal and warm. For woodworking enthusiasts, these pieces matter as they practice precise measuring, clean joinery, careful finishing, and patient assembly-skills that transfer to bigger builds and gifts. Ready to act? Try one project, skim the steps, and gather a few scraps to begin. if you're hooked, explore more guides or adapt these ideas to your next creation. May your workshop glow with momentum and joy.


These DIY wooden decorations are such a charming way to add a personal touch to the holidays! Can’t wait to try making some myself!
Love the idea of creating my own wooden decorations! They’ll make great gifts too! 🌟
These wooden decorations look so fun to make and will add a rustic feel to my holiday decor! Can’t wait to get started! 🎄✨
These wooden Christmas decorations are perfect for bringing creativity into the holiday season! I love the idea of customizing them to fit my home style! 🎅🪵
I’m so excited to see how these DIY projects turn out; they seem like a perfect way to spend quality time with family while making beautiful decorations together! 🛠️❤️
I love the idea of crafting my own Christmas decor! It makes each piece feel so special and unique, plus it’s a wonderful way to get into the holiday spirit! 🎁🌲
These DIY projects sound like a perfect way to add a personal touch to the holidays; I can’t wait to see the creative designs everyone comes up with! 🎨❤️
I’m thrilled to dive into these DIY projects; they not only allow for creativity but also create lasting memories with loved ones while decking the halls for Christmas! 🎉🪄
I can’t wait to give these DIY wooden decorations a try; it’s such a fun way to craft unique pieces that truly reflect the spirit of the season! 🎄✨
I’m all in for these DIY wooden decorations; it’s a fantastic opportunity to unleash my creativity and make heartfelt gifts for friends and family this season! 🎅🎨
I’m so excited to start making these wooden decorations; there’s something so fulfilling about creating festive items that can be cherished for years to come! 🌟🪵
I’m so inspired by these ideas! Crafting my own wooden decorations not only brings out my artistic side but also makes for wonderful conversation starters during family gatherings! 🛠️🎄
These DIY wooden decorations look amazing! I love the idea of personalizing my home for the holidays and making special keepsakes that my family will cherish for years to come! 🌲🛠️
I love the idea of making my own wooden Christmas decorations; it’s such a wonderful way to get into the holiday spirit and create lasting memories with loved ones while adding a personal touch to our home! 🏡❤️
I can’t wait to dive into these DIY wooden decorations; they seem like the perfect blend of creativity and holiday cheer, and I love the thought of making unique pieces that will brighten our home during the festive season! 🎉🖌️
These DIY wooden Christmas decorations are just what I need to get into the holiday spirit! I love that I can unleash my creativity while crafting special pieces that will bring joy and warmth to my home and my family’s celebrations! 🎅✨