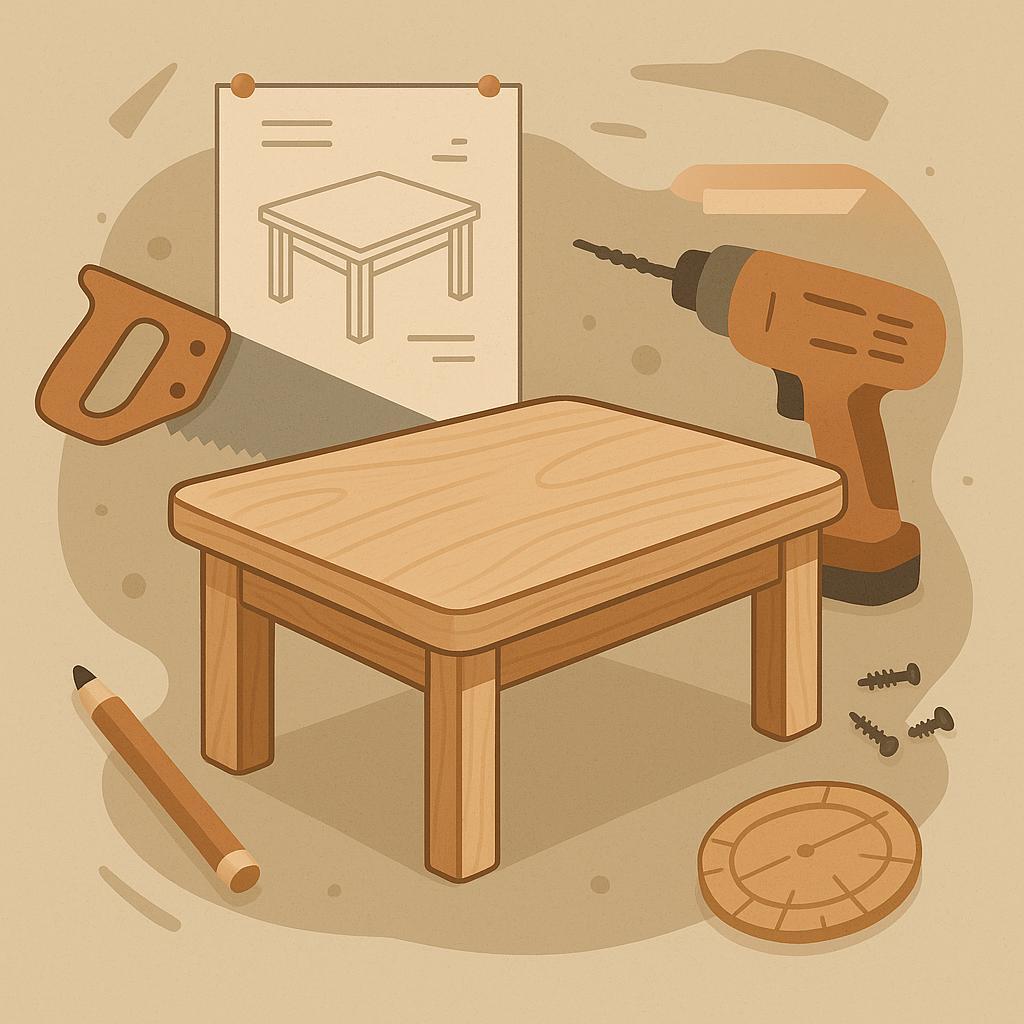
Imagine a sturdy, stylish coffee table you built yourself, using basic tools and a weekend's worth of planning. This approachable project matters too woodworking enthusiasts as it turns theory into hands-on skill-measuring, cutting, joining, and finishing-while building confidence for bigger, more ambitious builds. In this guide, you'll learn how to select materials, set practical dimensions for common living rooms, lay out simple joints, and apply a durable finish. By the end, you'll have a clear, adaptable plan you can replicate or customize, plus practical tips to troubleshoot along the way.
Mastering materials and Tools for a Beginner Friendly Wooden Coffee Table
Selecting materials that forgive mistakes and finish cleanly is the first step in a beginner-friendly build.For a coffee table that's easy to assemble and affordable, start with forgiving woods like pine or poplar. These woods cut smoothly, sand quickly, and take finishes well. A top assembled from 3/4″ plywood or a set of matched boards with a uniform edge gives a sturdy,flat surface without heavy milling. Keep the design simple and square-straight edges reduce misalignment and make assembly manageable for first-timers.
| Item | Notes | Estimated Qty |
|---|---|---|
| Wood stock (top) | 3/4″ plywood or boards; approximate size: 24″ x 40″ | 1 sheet or equivalent |
| Legs & apron | 4 legs (2x2s or 3/4″ boards); apron stock to frame the top | 1 set |
| wood glue | PVA glue for joints | 1 bottle |
| Screws | 1″-1-1/4″ wood screws; finish washers optional | 1 small pack |
| Sandpaper | 60, 120, 220 grit | 1 pack |
When it comes to joints, simplicity wins. For beginners, butt joints reinforced with screws or pocket holes provide sturdy connections with minimal setup. Plan your layout so the screws are hidden under the edge or inside the apron, and pair the joinery with a quality wood glue for extra rigidity.A dry-fit run before gluing helps you catch any alignment issues early,saving time and frustration while you learn the process.
To bring the project to life, assemble a basic starter toolkit that covers the essentials without breaking the bank. Here's a compact overview to guide your shopping list and workflow.
| Tool category | Starter pick | Why it helps |
|---|---|---|
| Sawing | Miter saw or hand saw | Accurate straight cuts |
| Drilling & driving | Cordless drill | Drill holes and drive screws easily |
| Finishing | Orbital sander | Fast, even surface readiness |
| Holding | Clamps | Keeps pieces secure while assembly |
Finishing brings the project to life and protects it from daily use. Choose a beginner-friendly finish such as a water-based polyurethane or a wipe-on poly for a clear, durable result with low odor. Steps: dry-fit the parts, predrill and countersink screw holes, apply glue and assemble, clamp until set, then sand lightly between coats and apply 2-3 thin layers. allow the piece to cure fully before use. Work in a well-ventilated area, wear a mask while sanding, and enjoy the process of turning simple materials into a durable, stylish table.
Get Instant Access to 16,000+ Woodworking Plans →
Planning a Clear Roadmap for a Simple Wooden Coffee Table project
Starting with a clear roadmap means defining the scope and constraints of the project. Decide on a compact, functional look with clean lines, a single lower shelf, and a simple protective finish. Pin down the rough dimensions first: about 36 inches long, 18 inches wide, and 17-18 inches tall, which fits common seating and still feels approachable for a beginner. when you wriet these numbers down, you also set a baseline for material needs and time estimates, helping you avoid mid-project shopping trips.
Next, map out a phased plan with concrete milestones you can check off. A straightforward approach keeps momentum and reduces surprises:
- Create a precise cut list by measuring the plywood and stock twice.
- Cut parts with a beginner-friendly saw setup, then dry-fit to verify joins.
- Assemble using wood glue and screws, clamping tightly for solid joints.
- Sand progressively from rough to fine grits, then apply a finish and cure time.
To keep budgeting obvious, draft a speedy materials breakdown so you can shop once and avoid impulse buys. The following snapshot covers the essentials and keeps costs in check for a simple, sturdy table.
| Item | Quantity | Notes | Est. Cost |
|---|---|---|---|
| 3/4″ plywood | 1 sheet | Tabletop + shelf backing | $25 |
| Lightweight boards (for apron/legs) | 5-6 pcs | 1×2″ to 1×3″ stock | $15 |
| Wood screws | 1 box | 3″ exterior screws | $5 |
| Wood glue | 1 bottle | $3 | |
| Plywood sandpaper & finishing kit | Per pack | 60/120/180 + polyurethane | $7 |
| Finish (polyurethane) | 1 can | $6 |
build-in contingencies for a calm, productive workflow. Allocate a realistic timeline-perhaps a weekend or two evenings-and set buffer time for sanding and finish drying. Document measurements as you go,and keep a small spare stock of screws and glue for quick fixes. By anchoring decisions to these milestones, you'll avoid scope creep and finish with a clean, satisfying result you can proudly call yours.
Get Instant Access to 16,000+ Woodworking Plans →
Wood Selection and Cutting Techniques for Safe Precise Results
moisture content with a meter and acclimating boards in your shop for 1-2 weeks before cutting. Wood that is too wet or too dry can move after assembly, causing gaps or misalignment. If you opt for solid stock, look for straight grain, minimal knots, and boards that run within the same moisture range. For the tabletop, consider a plywood panel or veneer-core board to resist warping, while using solid wood for legs and aprons to keep strength where it's needed. choosing a mix that's well-matched helps ensure a flat,stable table over seasons.
| Material | Pros | Cons |
|---|---|---|
| Pine (softwood) | Inexpensive, easy to work, takes finishes well | Soft dents easily; can check with moisture |
| Maple (hardwood) | Smooth surface, strong, durable | Harder to machine; can chip on end grain |
| Birch plywood | High stability, minimal warping, good for tabletops | Veneer edges require careful finishing |
| oak (hardwood) | Very durable, attractive grain | Heavier, more expensive; may warp if not acclimated |
Cutting with care is the practical bridge from plan to planed surface. Establish a flat, sturdy work surface and secure your stock with clamps before you touch a blade. Use a guide fence or track system to keep edges true, and always run the blade at the lowest height that clears the stock. Employ push sticks for narrow pieces and a riving knife/anti-kickback pawls if your saw supports them. A zero-clearance insert reduces tear-out on both plywood and end grain. Mark each cut clearly, measure twice, and test-fit on scrap before committing to the final piece. When making miters or bevels, start with full-depth test cuts on scrap to dial in angles.
Finishing and assembly are where precision becomes durability. Dry-fit all joints first, then drill pilot holes to prevent splitting. Predrill and countersink fasteners for a neat appearance, and consider glue with pocket-hole joinery for quick builds, or traditional joinery for added strength. Align grain direction so the tabletop grain runs across the legs if possible to minimize warping; keep panels flat by using appropriate fasteners and shims. choose a finish that suits your wood type and environment-polyurethane for durability, oil for a smoother feel-and apply according to product instructions, sanding between coats for a crisp, smooth surface.
Get Instant Access to 16,000+ Woodworking Plans →
Joinery Methods and Assembly Tips for Durability and Style
Choosing the right joinery sets the foundation for a durable, stylish coffee table. For a beginner-friendly build, prefer joints that are forgiving and easy to align. A simple butt joint reinforced with wood glue and screws creates a sturdy frame without fancy equipment,while pocket-hole joinery hides fasteners for clean edges. If you're feeling adventurous about the legs-to-apron connections, consider dowels for a reliable, mid-weight option or try mortise-and-tenon on a small scale to learn a classic technique.
| Joinery Method | Best Uses | Pros / Cons / Quick Tips |
|---|---|---|
| Butt Joint | Frame corners and basic connections | Pros: simple, inexpensive; Cons: weaker; Tips: reinforce with screws, glue, and corner blocks |
| Pocket Hole Joinery | Hidden fasteners on frames and panels | Pros: strong, quick; Cons: requires a jig; Tips: align holes on inside faces, plug holes for a clean look |
| Dowels | Edge-to-edge alignment and panel assembly | Pros: clean edges; Cons: alignment critical; Tips: mark hole positions and use tight clamps |
| Mortise and Tenon | leg-to-apron and heavy-frame joints | Pros: strongest; Cons: more work; tips: use a jig or router guide for consistent fit |
When assembling, start with a careful dry-fit to check squareness and alignment. Use clamps generously to hold pieces in place while applying glue, and predrill pilot holes before driving screws to prevent splitting. Countersink fasteners so they sit flush,especially if you plan to plug or fill them later to maintain a clean exterior. For concealed joints such as pocket holes, keep fasteners on the inside surfaces and opt for color-matched plugs to preserve the table's smooth lines. Take your time with alignment-a precise start leads to a solid end result that feels sturdy and well-made.
Finish choices should complement the wood and your room. sand progressively from 120 to 220 grit to achieve a smooth surface, then consider edge profiles like eased edges or subtle chamfers to soften the look. A water-based polyurethane offers durable indoor protection with minimal color change,while oil-based finishes provide warmth and depth but require longer curing. For a natural, easy-care feel, try a hardwax oil that enhances the grain without a glossy sheen. After finishing, wipe away dust, test for smoothness under light use, and address any uneven spots before placing a mug or tray on top.
Maintenance and future adjustments: periodically check fasteners and joints, especially in varying humidity. Tighten screws if needed and touch up finish where wear appears. If you expect seasonal wood movement, leave a little clearance at top-to-base connections or use elongated holes to accommodate expansion without stressing the wood.
Get Instant Access to 16,000+ Woodworking Plans →
Finishing Techniques and Protective Coatings for Longevity
Finishing is the final seal of longevity on a beginner wooden coffee table project. Start by prepping the wood: remove dust, smooth any rough edges with fine 220-320 grit sandpaper, and wipe the surface with a tack cloth. If you encounter knots or resin pockets, test a small scrap first to see how it reacts to stain and sanding. For a forgiving result, pick a finish that suits your climate and tolerance for odor: oil-based options add a warm amber glow, while water-based formulas stay crisper and dry faster. Keep joints masked and surfaces dust-free between coats to avoid nibs and uneven patches.
To help you choose, consider how the table will be used day to day. durability versus ease of application is the trade-off,so pick a coating that matches your comfort level. The quick-reference table below highlights common options in plain terms, letting you compare at a glance.
| finish | Pros | Cons |
|---|---|---|
| Oil-based polyurethane | Very durable; warm amber tone; excellent abrasion resistance | Strong odor; longer cure time; cleanup with mineral spirits |
| Water-based polyurethane | Low odor; fast-drying; clear finish | Softer protection; can raise grain if not applied carefully |
| Danish oil / tung oil blends | Natural look; easy to apply; builds with thin coats | Moderate protection; requires periodic re-coating |
| Shellac / varnish blends | Warm, rich appearance; easy touch-ups | Not highly water-resistant alone; often needs a top coat |
Application technique matters as much as the finish you choose. Work in a dust-free space, apply thin coats with steady, even strokes, and sand lightly with 320-400 grit between coats to knock down dust fibers. For beginners, a wipe-on polyurethane or a water-based option can be especially forgiving, offering smooth coverage and simple cleanup. If you opt for oil-based products, use appropriate brushes and mineral spirits for cleanup, and allow each coat to cure fully before handling. Finish with a final coat that aligns with the table's moisture exposure-kitchens demand tougher protection than a quiet living room.
Maintenance is the secret to lasting beauty. Use felt pads under cups,wipe spills promptly,and perform periodic light re-coats as you notice micro-scratches or dull spots. A well-applied multi-coat finish can hide minor wear and extend the life of your table without needing a full refinishing. With careful prep, the right coating, and mindful daily use, your beginner build will stay looking great and ready for years of daily coffee rituals.
Get Instant Access to 16,000+ Woodworking Plans →
Safety guidelines and Troubleshooting for DIY Beginners
Safety starts before you touch a tool. Put on PPE-safety glasses,hearing protection,and a dust mask or respirator. Tie back long hair and avoid loose clothing or jewellery. Create a clean, well-lit workspace with a sturdy workbench, clamps within reach, and a clear path for moving boards. Inspect each tool before use: sharp blades, intact bits, and no frayed cords. Take a moment to double-check your cut list and measurements; purposeful planning prevents surprises down the line.
Technique matters as much as intent. secure your wood with clamps or a vise, and use a push stick or featherboard when guiding stock through a saw. Set saws to the correct height and angle, unplug before changing blades, and keep fingers well away from the cutting line. When you handle power tools, keep the workpiece flat, feed steadily-do not rush-and let the blade do the work. dust collection helps visibility and lung safety; if you don't have it, wear a mask and sweep regularly to keep the workspace tidy.
Troubleshooting mindset: measure twice, cut once, and dry-fit joints before glueing. If a surface is uneven,check for warps or twists and correct with planing or sanding. If pieces don't join cleanly, reassess the joint type and adjust with shims or small modifications. For glue-ups, apply even glue, clamp with balanced pressure, and wipe excess glue quickly. If a finish looks blotchy, blot with a clean cloth and consider a light sealer between coats.
| Issue | Root Cause | Action |
|---|---|---|
| Warped board | Moisture or uneven drying | Choose dry stock; flatten or surface plane |
| Gaps at joints | Poor fit or wood movement | Dry-fit, adjust, or re-cut |
| Loose joints | inadequate glue surface or insufficient clamp pressure | Increase glue area; clamp firmly until set |
| Saw marks | Dull blade or fast feed | Sharpen/replace blade; slow steady pass |
| Rough finish after sanding | Underfinishing or coarse grit | Progress to finer grits; wipe dust |
Post-project safety and maintenance: unplug tools when not in use, store blades with protection, and keep liquids away from the bench to prevent slips.After finishing, power down and clean your area. Regularly inspect hardware for looseness and tighten as needed. A quick checklist can definitely help: eye protection stored, clamps cleaned, stock moisture checked, and a dry, well-ventilated space used for finishing.
Get Instant Access to 16,000+ Woodworking Plans →
Q&A
What tools and materials do I need to start this project?
Gather a saw (hand or circular), drill, screwdriver bits, measuring tape, square, sandpaper, clamps, and a countersink bit. Use straight, affordable woods like pine or poplar; a sheet of plywood can serve as the top.You'll need wood glue and a few screws or brads; optional but handy: a router for crisp edges.
What wood and finish are most beginner-friendly?
Pine is affordable and forgiving, while poplar and birch are also good beginner choices. Use 3/4-inch boards or a plywood top for a balanced look. Finish with a clear polyurethane (oil- or water-based) to protect the wood; staining is optional.
How do I ensure the table is level and sturdy?
Plan the layout, cut parts accurately, and dry-fit before assembly. Glue joints and clamp tightly, then drive screws with predrilled holes to prevent splitting. check level with a spirit level and shim under any uneven legs if needed.
what are common mistakes to avoid?
Skipping a dry-fit, rushing glue, or over-tightening screws can lead to misalignment. Forgetting to sand edges or seal end grain shortens finish life and creates snags. Always wear safety gear and keep blades sharp.
Key Takeaways
Ultimately,the key takeaway is that beginner-friendly projects demystify woodworking: clear steps,measured cuts,and patient sanding add up to real,useful furniture. When you start with a simple design, you gain confidence, practice, and a tangible sense that your hands can shape quality wood. This matters to woodworking enthusiasts becuase it builds a foundation of skills-accuracy, safety, and problem-solving-without overwhelming frustration. If you're itching to create, try the project, browse more guides, or adapt the design to your space. Let curiosity steer the plan, and let each completed piece remind you that progress compounds. Stay curious, stay persistent, and keep building your craft.


These plans are fantastic! I love how detailed they are-perfect for someone just starting out in woodworking. Can’t wait to give it a try!
I agree, Philip! The step-by-step instructions make it so approachable, and the end result looks amazing. I’m excited to tackle this project over the weekend!
These plans are so inspiring! I’m new to woodworking too, and it’s great to see how achievable this project seems. Looking forward to seeing everyone’s creations!
Thanks for sharing these plans! They really make woodworking feel accessible for beginners like me. I can’t wait to start my own coffee table and learn through the process!
I love how straightforward these plans are! It’s encouraging to see that even beginners can create something beautiful like a coffee table. I’m excited to give it a shot and share my progress!
This is such a great resource for beginners! I’m looking forward to diving into woodworking with this project and creating something special for my living room. Can’t wait to see all the amazing coffee tables everyone makes!
I love that these plans cater to beginners! It’s really motivating to see how manageable this project is, and I’m eager to put my skills to the test and create a beautiful coffee table for my home. Can’t wait to share my journey with everyone!
This is exactly what I needed to boost my confidence as a beginner! The detailed plans make it so much less intimidating, and I can’t wait to get started on my own coffee table-it’s going to be such a rewarding experience!
I’m so thrilled to find these beginner-friendly plans! The step-by-step instructions make it easy to follow, and I can’t wait to take on this project and show off my new coffee table in my living room!
I’m so excited to see all these positive comments! It’s amazing how these beginner-friendly plans can empower us to try woodworking. I’m ready to roll up my sleeves and get started on my own coffee table; I’ll definitely share my progress with everyone!
I’m so inspired by all the enthusiasm here! These plans truly make woodworking feel accessible, and I’m excited to tackle my own coffee table project. I can’t wait to see the finished results and share my progress with everyone!
I’m so glad to see everyone so excited about these plans! As a fellow beginner, I appreciate how achievable this coffee table project seems. I’m really looking forward to diving in and hopefully creating something special that I can be proud of-can’t wait to share updates with the group!
I’m so impressed by the supportive community here! These DIY coffee table plans have reignited my passion for woodworking, and I feel equipped to tackle this project. I love seeing everyone’s excitement, and I can’t wait to join in and share my own journey as I bring my coffee table to life!
I’m loving the enthusiasm from everyone! It’s so refreshing to see how these plans are bringing together a community of beginners who are ready to explore woodworking. I can’t wait to start my own coffee table project, and I’m excited to see the creativity everyone brings to their builds!
I love the positive energy in this community! It’s amazing to see so many of us feeling inspired by these DIY wooden coffee table plans. I’m eager to start my own project and can’t wait to share my experiences as we all embark on this woodworking journey together!
This community is truly a gem! The energy and support here are contagious, and I feel so motivated to start my own coffee table project. It’s amazing to see everyone’s ideas and know we’re all learning and growing together-can’t wait to join in and share my journey!
This community truly inspires creativity and collaboration! I’m thrilled to see so many beginners excited about these coffee table plans. I’m eager to get started on my own project and share tips and progress along the way. Let’s build something amazing together!
I absolutely love the camaraderie in this group! It’s inspiring to see so many beginners ready to dive into woodworking with these coffee table plans. I’m excited to start my own project and can’t wait to exchange ideas and progress updates with everyone-let’s transform our living spaces together!
I’m so excited to see all this enthusiasm for the DIY wooden coffee table plans! It’s inspiring to be part of a community of fellow beginners eager to learn and create something special. I can’t wait to start my own project and share tips and ideas as we all build our unique pieces together!
I’m really enjoying the sense of community here! It’s wonderful to see so many beginners motivated to take on these DIY wooden coffee table plans. I’m looking forward to starting my own project and sharing my progress and ideas with all of you-let’s inspire one another as we craft our unique tables!