
A quiet workshop holds a simple truth: when you learn teh basics, every cut becomes a confident choice rather than a gamble. For woodworking enthusiasts, understanding tools, tips, and first steps is the bridge from curiosity to real craft. This guide will help you identify essential tools, grasp safe handling, and build a foundation you can trust. You'll learn how to read plans, select appropriate equipment, and approach a first project with a clear plan. By the end, you'll move from hesitation to momentum, turning rough ideas into precise, satisfying results.
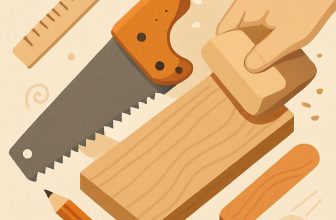
Selecting the Right Tools for a Beginner Workshop
Starting a beginner workshop means choosing tools that balance versatility, safety, and price. Build a starter kit around a few reliable core tools that can handle many small projects, then grow as you gain space and confidence. Think quality over quantity, and plan for a dedicated workspace and smart storage to keep tools organized and easy to reach.
when evaluating tools, separate considerations into hand tools and power tools, and test for comfort and accuracy.Look for ergonomic handles, minimal wobble, clean sharpening edges, and straightforward safety features.If you're unsure, visit a local hardware store or makerspace to try tools before buying, and don't hesitate to ask for a test cut or live presentation. A practical decision framework can help: 1) Do I have common projects that require this tool? 2) How often will I use it? 3) Can I replace or upgrade parts easily? 4) Is it safe for a beginner to use without advanced training? 5) Is there a warranty or service support? 6) Will it fit my space and budget?
Here's a concise starter-kit you can aim for. The table below outlines essential tools by category, why they matter, and a rough budget to help you plan purchases without overcommitting.
| Tool | Why it's essential | Starter budget (approx.) |
|---|---|---|
| Measuring tools (tape measure, combination square) | Precise layouts and checking accuracy | $10-$30 |
| Handsaw | Controlled, quiet cuts without power | $10-$40 |
| Chisels (set) | Cleaning joints, fine fitting | $15-$40 |
| Block plane | Smoothing edges and fitting joints | $20-$60 |
| Hammer | Assembly and tapping | $10-$25 |
| Drill/driver (cordless) | Holes and driving screws | $50-$150 |
| Sander (hand or small power) | Surface prep and finish prep | $15-$60 |
Get Instant access to 16,000+ Woodworking Plans →
Building a Safe and Efficient Workspace for Woodworking
Designing a safe, efficient woodworking space starts with layout and posture. Designate distinct zones-material prep, cutting, assembly, finishing-and keep a wide, unobstructed path between them. A sturdy workbench at a pleasant height reduces back strain and improves control. Add focused task lighting, and keep eyes on yoru plan by routing cords along walls or using cable channels. Personal protective equipment should be within reach: safety glasses, hearing protection, and a dust mask or respirator for dusty steps. Building good habits, like wiping your feet before entering and cleaning up shavings regularly, pays off over time.
Workflow matters as much as the tools you own. Place your most-used tools within arm's reach to minimize risky movements and sudden reaches. Use a dust-collection system or shop vac at the source of each cutting or planing task to keep air clean. Label drawers and bins, and store blades and bits in their guards or original containers. Plan your power layout: a surge-protected outlet strip mounted near the bench, with a clearly accessible master switch. Do a speedy daily check of PPE and tool blades before you start.
| Zone | Key Considerations | Typical Tools |
|---|---|---|
| Material Prep | Flat, stable surface; good lighting; nearby dust control | Squares, hand planes, measuring tools |
| cutting | guides and fences aligned; guards in place; use push sticks | Table saw, miter saw, track saw |
| Assembly & Finishing | Secure clamping; minimize reach and movement | Clamps, mallets, sanders |
| storage & Maintenance | Clear labeling; tidy cords and bins; routine cleanup | Dustpan, brushes, lubricants |
Keeping the space clean is a safety practice that compounds over projects. Clean as you go to prevent trips from offcuts and cords, and schedule a weekly sweep of the floor and an inspection of blades for dullness or damage. For finishes, store coatings upright in a ventilated cabinet and seal lids tightly. The layout and habits you establish now set the tone for safer, more confident woodworking-one well-organized session at a time.
Get Instant Access to 16,000+ Woodworking Plans →
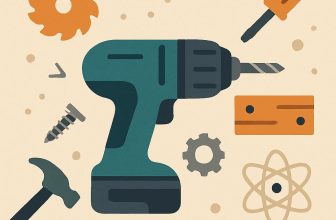
Essential Tools to Add to Your Beginner Toolbox
Starting a beginner toolbox means focusing on versatility, quality, and learning.choose tools that help you complete common tasks like measuring, cutting straight, and assembling joints with confidence. A small,well-chosen set keeps projects enjoyable and reduces the temptation to upgrade before you're ready. Remember: safety gear and a clean workspace are as essential as the tools themselves.
Here are the foundational hand tools every beginner should consider, with a quick note on what to look for and how to start using them:
| Tool | Why it's essential | Starter tip |
|---|---|---|
| Hammer – Claw | Driving and pulling nails, tapping pieces into place | Choose a 16-20 oz weight with a comfortable grip; hold near the end of the handle for control |
| Measuring tools – Tape measure & square | Accuracy for cuts and layouts | Use a reliable 25′ tape and a steel try-square; always double-check measurements |
| Chisel set | Clear, clean joints and mortises | Keep blades sharp; use a push-stroke away from your body |
| Combination square | marking and verifying 90°/45° angles | Calibrate before first use; test against a known square |
| handsaw or backsaw | Controlled cuts when a saw fits your project | Practice on scrap; let the saw do the work, not your muscles |
| Clamps | Hold pieces securely during cutting and gluing | Start with 2-4 assorted sizes; F-clamps are versatile |
beyond hand tools, you'll want a modest power-tool lineup that respects your budget and projects. A dependable cordless drill/driver handles drilling pilot holes and driving screws, while a lightweight orbital sander keeps surfaces smooth without burning edges. For most beginner projects, a basic drill/driver, one sander, and a compact dust collection method are enough to start. Always wear eye and hearing protection, and create a simple dust-control plan for your workspace.
plan a practical path to growing your toolbox. Prioritize quality where it counts,seek secondhand deals,and learn maintenance-keep measurements precise,blades sharp,and fasteners clean. A simple purchasing order like: 1) measuring and marking, 2) cutting and shaping, 3) assembly and finishing, helps you build projects step by step without overwhelm. Track what you use most and reallocate your budget to the tools that save you the most time.
Get Instant Access to 16,000+ Woodworking Plans →
Core Techniques and First Projects to Build Confidence
Strong measurement, careful marking, and purposeful tool prep form the backbone of reliable woodworking. Set up a small, clean workspace with good lighting, clamps within easy reach, and a clear path for your workpiece. Practice safety and control with every cut: keep fingers clear, use push sticks when needed, and slow down to check alignment before you cut. Before any cut, verify the plan on paper or on the board with a quick layout, then make your first light passes to confirm your line.
For your first projects, choose tasks that reward accuracy over speed: a simple wooden box to learn joints, a wall-mounted shelf to practice square edges and mounting, and a basic cutting board to get comfortable with flat stock and finishes. Start by selecting short, straight stock, marking all pieces, cutting to size, and then doing a final pass to true the edges. clamp everything firmly during assembly, fit joints snugly, and finish with a light sand and a food-safe finish if appropriate.
Use a simple roadmap to track your progress. The following table highlights core techniques, what to practice, and a starter project to pair with each skill. It's a loose guide-adjust it to your pace and workspace.
| Technique | What to Practice | Starter Project |
|---|---|---|
| Measuring & Marking | Accurate layout with a steel rule, square, and pencil | Box base layout |
| Cutting & Edge Prep | Keep lines true; practice clean, square edges | Side pieces for a small shelf |
| smoothing & Finishing | Progressive sanding to a smooth surface | Finish a sample panel |
Get Instant Access to 16,000+ woodworking Plans →
Tool Maintenance and Sharpening for Longevity
Regular maintenance begins with clean blades, proper storage, and a habit of quick post-work care. Wipe away dust and pitch, dry the metal thoroughly, and apply a light coat of oil to slow rust. store chisels, plane irons, and saw blades in their own slots or a dedicated roll to prevent nicks and accidental contact. A little maintenance after each session adds up to noticeably smoother cuts and longer tool life.
Sharpening is the heart of longevity. Choose a setup that keeps edges true without turning your shop into a chemistry lab. For most chisels and plane irons, start with a flat stone to establish a precise bevel, then progress through progressively finer grits to remove scratches and achieve a keen edge. Use a honing guide or jig to maintain a consistent angle, and finish with a high-grit stone or stropping to maximize edge polish. To gauge sharpness quickly, perform a gentle paper cut or a light hair shave test; if the edge snags or tears, refine.
- Coarse work: 180-240 grit (repair nicks and reshape a dull edge).
- Bevel refinement: 400-1000 grit to flatten burrs and establish the bevel.
- Finish and polish: 4000-8000 grit or a leather strop for a razor-like edge.
- Test regularly: shave test or clean paper cut to verify readiness.
Maintenance routines reduce rust and maintain geometry. Clean blades with a lint-free cloth, wipe dry, and apply a light oil coat on metal surfaces to deter moisture. Keep tools separated in a dry cabinet or roll to prevent contact and accidental dulling. Periodically check for burrs, warping, or uneven edges, and address them with a quick re-flattening and re-beveling where needed.
| Tool | Sharpening Grits |
|---|---|
| chisels & Planes | 180-240 → 400-1000 → 4000-8000 |
| Knives & Turning Tools | 120-220 → 600-1000 → 8000 |
Weekly checklist to keep edges consistent without overhauling your workflow:
- Inspect edges for nicks and flatten backs as needed.
- Re-establish bevels with a coarse stone if damage is present.
- Advance through grit progression and finish with polish or stropping.
- Do a quick test cut on scrap stock to confirm readiness before starting a project.
Get Instant Access to 16,000+ Woodworking Plans →
Budget Smart Strategies for a Practical Starter Set
Starting small doesn't mean settling for less; it means choosing a plan that stretches your budget while building real skills. Focus on three core tasks-accurate measurement, clean, straight cuts, and a smooth finish-and let those guide what you buy first. A budget-smart approach favors high-quality blades and durable hand tools where precision matters, while keeping other items lean. Map out a few beginner projects, set a realistic monthly spend, and treat your shop as a growing toolkit rather than a single splurge.
Plan purchases in deliberate phases. Month 1 covers layout and cutting with a reliable hand tool set and a basic square; month 2 adds a drill/driver and essential bits; month 3 focuses on sanding and finishing. Look for used tools in good condition, bundled kits that cover multiple needs, and warranties that survive the learning curve. Before buying, ask yourself if a cheaper option will truly suffice or if investing in a solid item now will save money and frustration later.
The table below bundles the essentials into four focused categories, each pairing why it matters with a practical budget tip.
| Tool Category | why it's essential | Budget tip |
|---|---|---|
| Hand tools & layout | Foundation for accuracy and safe operation | Buy reliable used marking gauges and squares; check for straight edges |
| Cutting tools | Primary means to shape wood (handsaw or backsaw) | Look for a single versatile saw in good condition; inspect teeth |
| Drilling & fastening | Drill/driver speeds project assembly | Start with a drill/driver kit; include a basic bit set; seek kit deals |
| finishing & smoothing | Leaves surfaces ready for use or finish | Basic sanding block + a few grits; extend life by reusing scraps and abrasive sheets |
Use the table as a decision aid: aim for durable hand tools, a single versatile saw, a reliable drill/driver, and essential finishing basics. The budget tips are meant to steer you away from impulse buys and toward long-term value that pays off as you tackle real projects.
Beyond the initial purchases, plan for growth: upgrade gradually as your projects demand it. Swap in sharper blades, a better plane, or a small benchtop router when you're ready, and keep tools clean, sharp, and properly stored. A well-rounded starter set is less about perfection at the first buy and more about consistent practice and smart upgrades over time.
Get Instant Access to 16,000+ Woodworking Plans →
Q&A
What are the essential tools a beginner should own?
Start with a basic, versatile set: a claw hammer, a combination square, a tape measure, a sharp chisel set, a backsaw or handsaw, and a small block plane. Add marking tools (pencil, marking gauge) and a sturdy work surface. Keep safety gear like safety glasses and a dust mask handy, and learn to keep blades sharp and wood clean for smoother cuts.
How should I select wood for a simple starter project?
For beginners, softwoods like pine or poplar are forgiving and easy to work with. Look for boards with straight grain, few or no knots, and minimal warping. If possible, check moisture content and choose pieces that feel dry and stable for indoor use.
What safety practices are essential when starting woodworking?
Always wear eye protection and hearing protection when using power tools,and a dust mask for sanding. Clamp your work firmly, keep fingers away from blades, and never remove safety guards or unplug tools while adjusting them. Maintain a tidy workspace and regularly check tools for dull blades or loose parts.
What is a good first project to practice the basics?
A small storage box, picture frame, or simple shelf is ideal for learning measuring, squaring, cutting, and joining. Plan the project, lay out straight lines, cut accurately, test fit, then glue or nail pieces together with clamps. Start simple, keep fits snug but not forced, and learn from any adjustments you need to make.
How do I care for and maintain basic hand tools?
Keep blades sharp and rust-free by wiping clean and applying a light oil after use. Wipe away dust, store tools dry and organized, and protect sharp edges by keeping them sheathed or in a proper tool roll. Regularly inspect handles, tighten hardware, and tune planes or saws to maintain proper performance.
Future Outlook
Mastery in woodworking starts with small, steady steps: choosing safe basics, handling tools with respect, and turning curiosity into practice. The key takeaway is simple: progress comes from doing, not just reading-build confidence by starting with a patient plan, proper measurements, and clean, sharp tools. This matters because every project trains your eye, your hands, and your problem-solving mind, turning scraps into something useful and personal.So pick a project that fits your space, consult the guides you enjoyed, and apply one tip you learned here today-safely. Your bench awaits, and with it, a little daily craft that adds up to real craft and pride.


This guide is a fantastic resource for beginners! I love the breakdown of essential tools and practical tips-it really helps demystify the craft. Can’t wait to start my first project!
This guide is incredibly helpful! The clear explanations of each tool and the step-by-step tips make it easy to understand where to start. I’m excited to finally dive into woodworking!
This is just what I needed! The comprehensive overview of tools and the straightforward tips have given me the confidence to kick off my woodworking journey. Thanks for creating such an approachable guide!
I’m so glad I found this guide! The tips for beginners and detailed tool descriptions make it feel less intimidating. I can’t wait to get started on my woodworking projects with this solid foundation!
This guide is absolutely essential for anyone looking to get into woodworking! I appreciate the way you explained the tools and provided practical advice for starting out. I’m feeling inspired to tackle my first project!
This guide has been a game changer for me! The way you broke down each tool and offered clear, actionable steps makes it so accessible. I’m thrilled to start my woodworking journey and finally bring my creative ideas to life!
This guide is fantastic! The way you presented the basics and simplified the process makes it feel achievable. I’m excited to explore woodworking and put these tips into action-thank you for the inspiration!
This guide is a must-read for anyone starting out in woodworking! Your clear explanations and helpful tips provide a perfect starting point, and I love how you’ve made the tools feel less overwhelming. Can’t wait to dive into my first project with this invaluable resource!
This guide is just what I needed! The way you demystified woodworking tools and offered practical tips is incredibly helpful for beginners like me. I’m feeling motivated and ready to tackle my first project-thank you for sharing this amazing resource!
This guide is just what I needed to boost my confidence in woodworking! The detailed breakdown of tools and practical tips makes it so approachable, and I’m excited to get started on my first project with this solid foundation. Thanks for sharing such valuable insights!
This guide is exactly what I was looking for! Your step-by-step approach to understanding the tools and techniques takes away the intimidation factor for newcomers like me. I’m eager to start crafting my own pieces and appreciate all the tips you’ve provided. Thank you for such a motivating resource!
This guide is incredibly helpful for anyone looking to get started in woodworking! I appreciate how you broke everything down into manageable steps, which makes the learning process so much less daunting. I’m looking forward to picking up my first tools and bringing some of these tips to life in my projects. Thanks for the amazing insights!
This guide is fantastic for beginners! I love how you’ve laid out everything so clearly, making it easy to grasp the essentials of woodworking. I feel much more prepared to choose my first tools and start crafting my own projects. Thank you for such an encouraging and informative resource!
This guide is a perfect starting point for anyone interested in woodworking! The way you’ve explained the tools and techniques makes it feel achievable, and I’m excited to dive in and try some of these tips. Thank you for creating such a supportive and informative resource for newbies!