
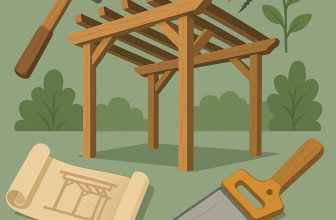
What if your next weekend project could turn a bare patch of yard into a welcoming workshop-and a usable shed-built with nothing more than simple tools? For woodworking enthusiasts, that kind of project is a practical invitation to sharpen planning, measurements, and hands-on problem solving, all while producing a sturdy structure you'll rely on for years. In this guide, you'll walk through a clear, step-by-step routine that starts with a solid plan, safe tool use, and a forgiving materials list.By the end, you'll gain a proven workflow, confidence with basics like framing and roofing, and a shed you built with your own hands.
Selecting the Right Simple Tools for a Backyard Shed
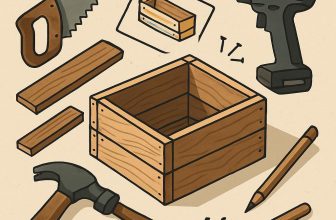
Before you start assembling a backyard shed, map out the tasks you expect to tackle-framing walls, installing a roof, hanging shelves, and fitting the door. With a clear plan, you can build a compact, versatile toolkit instead of chasing every gadget. A simple, durable set keeps the project moving and the budget in check, letting you focus on steady progress rather than chasing new tools.
Core tools to begin with form a practical starter kit.Consider these essentials and choose items with comfortable grips and reliable parts:
- Cordless drill/driver for holes and fasteners
- Handsaw or circular saw for cutting lumber to length
- Claw hammer for driving and removing nails
- Set of screwdrivers
- Measuring tape
- Combination square
- Level
- Utility knife
- Chisel set
| Tool | Primary Use | Tip |
|---|---|---|
| Cordless drill/driver | Drilling pilot holes and driving fasteners | 18V is a common sweet spot |
| Handsaw or circular saw | Cut lumber to length | Keep blades sharp and aligned |
| Claw hammer | Driving/removing nails | 16 oz is a comfortable standard |
| Tape measure | Accurate measurements | Lockable blade is handy |
| combination square | Marking right angles | useful for framing |
| Level | Ensuring flat, straight assemblies | 22″ or 24″ is common |
| Utility knife | Scoring and trimming | Replace blades regularly |
| Chisel set | Fine fitting and joinery | Keep sharp; use a wooden mallet |
Balance power and practicality. If you're starting small, a single-battery platform keeps charging and storage simple and protects your budget.Prioritize dependable basics over a glut of specialized tools; you can borrow or rent higher-demand items for bigger tasks and upgrade gradually as your shed project grows. Consider brands with solid warranties, easy parts availability, and a straightforward replacement-supply chain.
plan for organization and safety. A compact chest or wall-mounted rack keeps tools accessible, while a simple labeling system prevents mixups. Wear eye and ear protection, keep blades sharp, and store batteries in a cool, charged state. With a lean, well-organized tool set, you'll move through framing, fastening, and finishing with confidence and minimal waste.
Get instant Access to 16,000+ Woodworking Plans →
Planning a Practical Layout to Maximize Shed Space
Planning a practical layout starts with a clear sense of how you'll actually move and work in the shed. Begin by outlining the footprint and marking door swings, windows, and any fixed fixtures. Identify three zones: a durable storage wall for seldom-used items, a primary work area for projects, and a flexible space for carts or last-minute tasks. Keep traffic flowing: leave unobstructed paths to the door, outlets, and ventilation so you're never twisting around clutter.
frame your plan around a strong work anchor by dedicating one wall to your most-used tools and keeping frequently reached items within arm's reach. Use vertical storage to free floor space: wall-mounted cabinets, pegboards, and sturdy hooks keep hand tools visible and accessible. Prioritize a long tool wall for shovels, rakes, levels, and power cords. reserve at least 2 ft (60 cm) of clear floor space in the center for moving big projects or rolling a cart.
Here are layout templates you can adapt to your shed size.
| Option | Primary Use | Benefits |
|---|---|---|
| A | Storage wall + narrow work bench | Maximize floor space and tool visibility |
| B | Central aisle with back cabinets | Open space for large projects and easy flow |
| C | Loft storage + wall storage | Extra storage without crowding the floor |
To finalize, consider these practical checks and adjustments as you go.Draft the layout on paper, then verify with cardboard cutouts to simulate workflow and movement. Ensure doors, vents, and outlets won't clash with stored items, and make provisions for future additions like loft storage or a larger workbench.
- Test fit by laying out cardboard templates for each zone and moving around with a cart.
- Leave at least a 2 ft (60 cm) aisle to comfortably pass and handle large items.
- Place power outlets and lighting to minimize cords across the main floor.
- Tag future-growth areas (loft storage, additional shelves) so you can expand without rework.
Get Instant Access to 16,000+ Woodworking Plans →
Foundation and Ground Preparation for a Stable Shed
Foundation work starts with a solid plan and clean ground. Choose a dry, accessible corner with good sun exposure if possible to reduce moisture. Remove grass,roots,and debris,then lay out the shed footprint with stakes and string; confirm corners are square by measuring diagonals. Use a level or a simple string line to check that the planned base will sit flat under load. aim for a base that slopes slightly away from the walls to shed water, and consider how frost movement might affect the site in colder climates.
Next,prepare the base with the right materials. For a budget-friendly option, install a compacted gravel or crushed stone pad about 4-6 inches thick, then lay down a weed barrier and edging to keep the fill in place. If you expect heavier loads or want a longer-lasting foundation, a concrete slab or a pier-and-beam system may be more reliable; each has its own preparation steps, from vapor barriers to precise reinforcement. No matter which path you choose, keep the surface level and the slope directed away from the shed.
| Foundation option | Pros | Cons | Best for |
|---|---|---|---|
| Gravel pad | Good drainage; low cost | Limited load; potential settling | Small, light sheds |
| Concrete slab | Very stable; durable | Higher cost; longer install | Heavy equipment or long-term use |
| Pier and beam | Frost-friendly; adjustable | Requires precise spacing | Sloped or uneven ground |
With the base laid, proceed to the actual installation. For a gravel pad, excavate a shallow trench, lay geotextile, sprinkle gravel lifts, and compact in layers until firm. check flatness with a long straightedge and adjust with more fill as needed. For a concrete slab, build a solid form, install a vapor barrier, and pour concrete to the recommended thickness, then cure with proper moisture control. If you go with pier-and-beam, space and prepare the piers, set posts on stable supports, plumb and level each, and top with a continuous main beam.
run a speedy drainage test by lightly watering the surface and watching water flow away from the planned walls. Ensure water does not pool, and consider adding a small trench or swale on the downhill side if you have persistent moisture. Add anchors or tie-downs if the shed will face strong winds, and leave expansion gaps at edges to accommodate movement. A well-prepared foundation not only prevents shifting but also keeps your shed level and ready for doors, floors, and future upgrades.
Get Instant Access to 16,000+ Woodworking Plans →
Simple Framing Techniques for Quick Assembly
For quick framing, start with a minimal, scalable plan that uses standard lumber sizes to minimize cuts and maximize accuracy.Choose a simple platform frame or a four-wall setup with two long top and bottom plates and evenly spaced studs. Set up a clean work area, lay out the floor frame on the ground, and use string lines to ensure a square base before any pieces go up. Consistency is key: measure twice, cut once, and label each piece as you go.
Prepare a cut list and color-code pieces to avoid mix-ups. On the ground, assemble wall panels on a flat surface: attach the bottom and top plates, then add studs at 16 inches on center. Use temporary bracing to keep panels square while you secure them with screws (not nails) for a sturdier build. when ready, raise each panel with help and stand it upright, bracing it until you can fasten it to the floor frame. Tip: pre-drill pilot holes to prevent splitting and maintain alignment.
| Component | Standard Size | Spacing | Quick Tip |
|---|---|---|---|
| stud | 2×4 | 16″ OC | Use a framing square to mark lines |
| Top/Bottom Plate | 2×4 | Full length | Pre-cut to match wall height |
| Corner Braces | Hardware | N/A | Help keep corners plumb |
As you assemble, routinely check for squareness. Use a carpenter's square to confirm right angles, and verify diagonals with a tape measure to ensure frames are square. Keep studs aligned with clamps and a straightedge, then secure joints with screws at every connection. A simple brace of diagonal 2x4s can stabilize the structure temporarily; once the wall is bolted to the floor frame, those braces can come down.
For speed, consider preassembled wall panels or modular sections that you can slide into place with a helper. Label panels by wall so you know where they belong, then lift into position one by one and bolt them to the frame. Use weather-resistant screws and corrosion-resistant fasteners, and seal the openings with a basic bead of sealant to keep the shed weather-tight without slowing you down.
Get Instant Access to 16,000+ Woodworking Plans →
Weatherproofing and Insulation for Comfort and Longevity
Weatherproofing a shed isn't just about keeping rain out-it's about creating a comfortable, durable space for projects year-round.Start by tightening the envelope: seal gaps around the walls and roof, cap the door with a tight seal, and add a simple overhang to direct water away from the threshold. A well-sealed, moisture-resistant shell reduces cold drafts in winter, heat gain in summer, and the chance of mold after wet seasons.
Air leaks sneak in through outlets, sill plates, and rim joists. Use a combination of caulk for small gaps and low-expansion spray foam for larger cracks. Install weatherstripping on doors, add a door sweep, and ensure any vents or openings are flashed and sealed. For windows or skylights, prioritize tight seals and consider storm panels or fasteners that keep panes snug without creating cold spots.
Choosing insulation means balancing cost, ease of installation, and climate needs. The table below outlines common shed insulation types, typical performance, and practical pros and cons to help you pick confidently:
| Insulation Type | Typical R/in | Best Use | Pros | Cons |
|---|---|---|---|---|
| Fiberglass batt | R-3 to R-4 | Walls, attics | inexpensive; Easy to install | Gaps can reduce performance; Moisture sensitivity |
| Mineral wool | R-3 to R-4 | Walls, roof | Fire resistant; Mold resistant; Good sound dampening | Heavier; More expensive |
| Polyiso foam board | R-6 to R-6.5 | Exterior sheathing, roof decking | High R value per inch; Continuous insulation | more costly; Needs careful edge sealing |
| XPS foam board | R-5 | Under slabs, foundation walls | Moisture resistant; Lightweight | Higher cost; Environmental concerns |
| EPS foam board | R-4 | floors, roof decks | Budget-friendly; Easy to handle | Lower R per inch; Moisture risk if not sealed |
| Reflective radiant barrier | Not directly comparable (low R) | Roof assemblies in hot climates | Reduces radiant heat; Lightweight | Limited insulation value alone |
After insulation choices are made, finish with ventilation strategies and moisture control to preserve the interior climate. If you're in a colder climate, consider a vapor barrier on the warm side and ensure intake and exhaust vents are balanced. In hot, humid areas, prioritize airflow with soffit and ridge vents or a small ceiling fan to keep air moving and condensation down. A routine check after seasonal shifts-looking for gaps, warped boards, or roof flashing damage-will help you catch issues before they become costly repairs. With thoughtful weatherproofing and insulation, your shed stays drier, warmer in winter, cooler in summer, and ready for years of use.
Get Instant Access to 16,000+ Woodworking Plans →
finishing Touches and Organization for a Functional Shed
After the frame is up, finishing touches start with weatherproofing and a practical interior layout. Seal gaps around doors and windows, caulk corner joints, and apply a durable exterior finish or stain that withstands sun and moisture.Inside, install a simple, energy-efficient lighting plan and a small vent to cut humidity. Choose finishes and hardware that are low-maintenance, resist chipping, and stay clean with minimal care.
Organization is the backbone of a functional shed. design work zones so you can cut, sort, and store without stepping over clutter. Install pegboard for frequently used hand tools, mount wall rails for power tools, and add adjustable shelves for bins. Label containers, use clear plastic bins, and reserve a corner for cleaning supplies and spare fasteners. A rolling cart keeps moving gear together, while a bright layout reduces unnecessary searches.
| Storage Option | Best Use | Tip |
|---|---|---|
| Pegboard | Hand tools | Color-code hooks |
| Shelves | Bins, paints, quick-access items | Adjustable if possible |
| Wall Rails | Power tools | Keep cords tidy |
Finishing touches also mean safety and upkeep. Fit door weatherstripping to minimize drafts, install outdoor-rated lighting and GFCI outlets if you'll run electricity, and position a small ventilation grill or attic vent to move air. Establish a light maintenance schedule: inspect caulk and seals yearly, recoat exterior as needed, and check the roof for loose fasteners. A tidy, well-organized shed saves time and makes your simple-tools project feel like a real workspace rather than a cluttered shed.
- Weekly: sweep the floor and return items to labeled spots
- Quarterly: test lighting and inspect seals
- Annually: repaint touched surfaces and reseal edges
Get Instant Access to 16,000+ Woodworking Plans →
Q&A
What tools do I really need for a backyard shed project?
Start with essentials: a hammer, a tape measure, a carpenter's square, and a level. Add a drill with bits, a saw (hand or circular), and a box of nails and screws.Clamps and safety gear round out the core kit,and a circular saw can save time if you'll be cutting a lot of plywood.
How do I choose the right shed plan or size for my yard?
Think about what you'll store and how you'll move inside the space. Check local setback rules, height limits, and permit requirements before choosing a plan. Start with a simple rectangle that fits your spot, then scale up if you expect extra storage or workspace.
How long does it typically take to complete a small shed with basic tools?
Plan for a few days to a long weekend, depending on prep, weather, and helpers. Break the job into foundation,framing,walls,roof,and finishing,tackling one area per day. Set realistic daily goals to stay on track.
Do I need a permit, and how should I prep the site?
Check your local codes; many areas require a permit for larger sheds. Prepare a level, dry foundation-such as a concrete pad or a pressure-treated frame-and clear the area of debris. Ensure good drainage and clear access for future maintenance.
In Conclusion
Building a backyard shed with only simple tools shows that solid results come from clear steps, careful measurements, and steady patience. The key takeaway is that planning, safety, and repeatable tactics unlock bigger projects without needing fancy gear. For woodworking enthusiasts, this topic matters because it builds confidence, expands practical skills, and creates a tangible, lasting space you designed yourself. Ready to act: try the project start-to-finish, dip into more guides on framing or finishing, or apply these habits to your next build. With focus and persistence, every board you set brings you closer to a satisfying, enduring workshop dream-and a brighter weekend ahead.


This guide is so helpful! I can’t wait to start my shed project this weekend-thanks for breaking everything down step-by-step, makes it feel doable!
I agree, Abigail! The step-by-step approach really makes it easy to follow. I love that you can build something practical while enjoying time outdoors-can’t wait to see everyone’s finished sheds!
This is a fantastic resource! I’m excited to start my shed soon; the step-by-step instructions really take the intimidation out of building for beginners like me. Let’s share our progress!
Absolutely love this guide! It’s not only straightforward but also inspiring-I’m looking forward to seeing everyone’s unique designs. Let’s all share tips and ideas as we build!
I’m thrilled to see all the excitement around this project! It’s amazing how something like a backyard shed can bring people together. I can’t wait to dive into my own build, and I hope we can all swap ideas and tips along the way to make our sheds truly unique!
I’m so glad to see everyone excited about this project! It’s great to have such a supportive community where we can all learn from each other and share our progress. Can’t wait to see the creative twists everyone puts on their sheds!
I’m really excited about this project too! It’s such a great opportunity to get creative while also working with our hands. I can’t wait to see how everyone’s sheds turn out and share my progress as well!
I’m so glad to see so much enthusiasm for this project! Building a shed can be such a rewarding experience, and I’m looking forward to seeing how everyone puts their personal touch on theirs. Let’s keep the inspiration flowing and support one another through our progress!
This project sounds fantastic! I’m excited to start building my shed and can’t wait to see everyone else’s creativity shine through. Let’s keep sharing tips and ideas to make this journey enjoyable and collaborative!
I love the positivity and support in this community! Building a shed is such a fun way to unleash our creativity while also enhancing our outdoor spaces. I’m eager to see everyone’s unique designs and share my own experiences as we tackle this project together!
I’m thrilled to see all the excitement surrounding this shed-building project! It’s wonderful to be part of such a supportive group where we can all share ideas, tips, and inspiration. I can’t wait to see everyone’s unique creations and to contribute my own experiences along the way!
I absolutely love the energy and creativity in this group! Building a shed not only adds functionality to our backyards but also allows us to express ourselves. I’m eager to dive into this project, share my journey, and see all the amazing designs everyone comes up with!
I love how this group is filled with such positive energy and enthusiasm for building sheds! This project is a fantastic opportunity for us all to learn from each other and showcase our creativity, and I can’t wait to share my own design while seeing everyone else’s unique takes on their sheds!
I’m really looking forward to this shed-building journey! It’s such a great way to get hands-on experience and connect with all of you talented builders. I can’t wait to share my progress and see the innovative designs everyone comes up with-let’s inspire each other along the way!
I’m so excited about this shed-building adventure! It’s amazing to see such a passionate group come together to share tips and creativity. I can’t wait to see all the different designs and learn from everyone’s experiences-let’s make this an awesome journey!
I’m really pumped for this shed-building journey! It’s so refreshing to be part of a community where everyone is eager to learn and share their unique ideas. I can’t wait to roll up my sleeves, tackle this project, and see the amazing sheds that everyone creates-let’s make this collaboration truly inspiring!
I’m thrilled to join this incredible shed-building journey with all of you! It’s fantastic to see such a supportive and creative community coming together to share tips, designs, and experiences. I can’t wait to start my project, learn from everyone’s unique approaches, and contribute to this inspiring collaboration!
I’m super excited to dive into this shed-building project with all of you! It’s inspiring to see such a diverse group of builders ready to share ideas and experiences. I’m eager to learn, contribute my own design, and cheer everyone on as we bring our visions to life-let’s make this an unforgettable experience together!