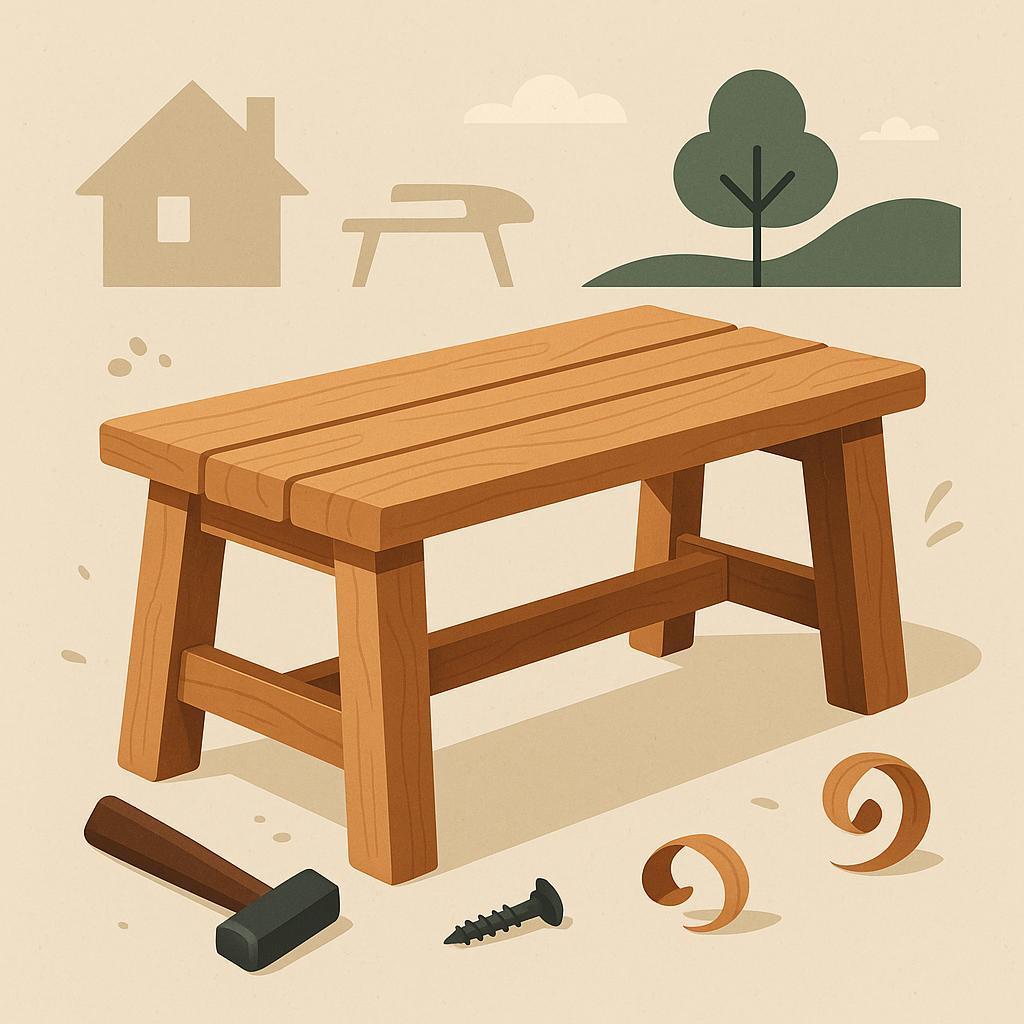
Picture a bench that looks timeless and yet stands up too sun, rain, and daily use without wobble or splinters. That kind of reliability is more than furniture; it's a teacher for woodworkers,a place to clamp,plan,and dream up new projects. In this article, you'll learn how to design a bench suitable for indoor or outdoor use, pick durable woods, and choose joints, fasteners, and finishes that survive whether and wear. You'll gain a practical blueprint for scale, comfort, and stability-plus tips on maintenance so your bench stays true year after year.
:
Choosing durable wood and fasteners for a sturdy indoor outdoor bench
Choosing wood for a bench that will live indoors or outdoors means balancing beauty with longevity. Prioritize species that resist decay and handle moisture well, especially for outdoor positions or damp spaces like entryways. Look for straight grain, minimal knots, and boards that are kiln-dried to around 6-12% moisture content to reduce warping as seasons change. If you plan a bench that ages gracefully,favor woods that accept finishes evenly and resist cracking when exposed to sun and rain.
Here are common durable wood choices you can rely on, along with typical maintenance needs and notes to guide your pick.
| Cedar (Western Red Cedar) | High | Annual sealing/oiling | Naturally rot-resistant, lightweight |
| redwood | High | Seal ends; reseal 1-2 yrs | Attractive grain, good outdoor performance |
| Pressure-Treated Pine | Moderate | Rinse and re-seal every 1-2 yrs | Affordable; monitor for cracks |
| Teak | Vrey High | Oil or varnish every 1-3 yrs | Durable; handles weather well |
| Ipe | Excellent | Oil as needed | Dense, long-lasting; color darkens |
Fasteners and hardware matter just as much as the wood itself. For outdoor use, choose stainless steel fasteners (316-grade if you can) or high-quality hot-dip galvanized screws rated for exterior exposure. Avoid plain iron or untreated hardware that can rust and stain the wood over time. For dense hardwoods, predrill to prevent splitting, and consider longer fasteners or carriage bolts with washers for structural joints. When joining panels, keep a consistent grain orientation to reduce stress; use weatherproof wood glue in appropriate joints and seal all exposed ends.
Finish and assembly care makes the difference between a bench that lasts a decade and one that needs replacement every season. Seal cut ends to slow moisture uptake, apply a UV-protective finish if the bench will live in direct sun, and plan for seasonal wood movement with forgiving joinery.Regularly inspect hardware, re-tighten screws, and reapply finish as needed-typically every 1-2 years outdoors. With a well-chosen species, proper fasteners, and a simple maintenance routine, your bench remains sturdy and pleasant through rain, shine, and changes in temperature.
Get Instant Access to 16,000+ Woodworking Plans →
Designing a stable frame to tolerate indoor and outdoor conditions
starts with prudent wood selection and thoughtful frame geometry. Choose exterior-grade species such as cedar, redwood, white oak, or pressure-treated pine that resist moisture and UV exposure when properly kiln-dried.Plan a rectangular frame with strategic cross-bracing and a solid base to distribute weight evenly and minimize racking.anticipate seasonal movement and allow small clearances at joints so wood can swell and contract without binding or loosening.
Joinery and hardware are the second line of defense. Use corrosion-resistant fasteners-stainless steel screws, through-bolts, and reinforced brackets-to endure rain, humidity, and sun. Avoid relying on a single line of screws; add diagonal or cross-bracing on both sides for stability.Pre-drill to minimize cracking, seal end grains to slow moisture uptake, and if the bench sits on uneven ground, include adjustable feet to keep the top level over time.
Finish and maintenance strategies turn a good frame into a long-lasting one. Apply a penetrating exterior sealer or UV-protective stain with a durable topcoat, repeating cycles as weather demands. Treat end grains with extra sealant or oil and lightly sand between coats. Elevate the frame above ground with feet or a base to minimize ground moisture wicking, and schedule regular checks to tighten hardware and refresh finishes every season or two.
| Category | Proposal | Rationale |
| Hardware | Stainless steel screws, through-bolts, exterior brackets | Resists corrosion in all conditions |
| Finish | Exterior sealant or UV-stable stain with topcoat | Protects against moisture and sun |
| End grain | Sealant or penetrating oil | Reduces moisture uptake |
Get Instant Access to 16,000+ Woodworking Plans →
Selecting weather resistant finishes and protective coatings
Selecting a weather resistant finish begins with how and where your bench will live. Outdoor exposure, sun, rain, and seasonal swings demand a coating that resists moisture, blocks UV damage, and remains flexible enough to resist cracking. Finishes come in two broad flavors: surface films that sit on top of the wood, and penetrating oils that soak in for a natural look. For a bench placed outdoors, a durable spar varnish or marine-grade varnish with UV blockers provides the strongest all-around protection; for indoor or sheltered use, a water-based polyurethane or penetrating oil can deliver solid protection with lower odor and easier cleanup.
Here's a concise comparison to help you pick quickly:
| Finish Type | Best Use | Pros | Cons |
|---|---|---|---|
| Spar varnish (marine varnish) | Outdoor, sun and rain exposure | flexible film; strong UV resistance | Longer cure; can amber over time |
| Exterior oil-based polyurethane | outdoor seating with heavy use | Durable; good abrasion resistance | Long odor and cure; may darken wood |
| Exterior water-based polyurethane | Outdoor or bright indoor spaces | Low odor; fast dry; clear finish | UV protection not as strong as spar varnish |
| Penetrating oil (tung oil / linseed with UV blockers) | Natural look; easy refresh | Deep penetration; simple reapplication | Limited moisture barrier on its own |
Before you apply any finish, prep is king. Start with clean, dry wood and a smooth surface.Sand progressively from 120 to 180-220 grit, wipe with a tack cloth, and ensure the wood is free of dust or oils. Choose the application method that matches your finish: brushing thin coats, or light spray where allowed. Apply thin coats and maintain a consistent direction; allow each coat to cure fully and sand very lightly between coats. For outdoor benches, plan for at least 2-3 coats for robust protection.
Maintenance and recoat strategy ensures your bench stays protected for years. Inspect the finish annually when you clean the bench; look for peeling, dulling, or water darkening. Clean the surface, scuff slightly with fine sandpaper, and recoat with the same product if needed. In exposed locations, recoat every 1-3 years depending on climate; indoors, you can stretch to several years. Pro-tip: store inside during heavy rain or winter extremes if possible, and avoid letting water pool on the surface for long periods.
Get Instant Access to 16,000+ Woodworking Plans →
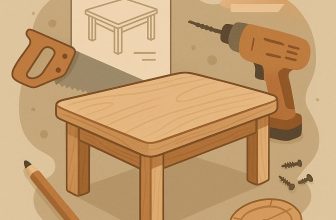
Mastering joinery for strong connections and easy assembly
is the backbone of a bench that stays flat and serviceable, indoors or outdoors. Begin by laying out every joint on a clean, square workspace and dry-fitting pieces before glue touches wood. when you connect legs, rails, and the seat frame, small errors multiply into wobble later, so precision cuts, proper orientation, and solid clamping are essential. Mark lines with care, check the fit with a square, and test-assemble the whole frame before committing to glue or fasteners.
Choose joinery that balances strength with assembly speed, guided by how the bench will be used and stored. Mortise-and-Tenon joints deliver near-immovable connections for legs to rails, while dowels or pocket-hole screws offer quicker alignments when reinforced with wood glue. Rabbet and Dado joints can register rails to the legs for a tidy seat frame, and biscuits help with alignment when you need a forgiving fit. For outdoor use, pair any method with exterior-grade glue and corrosion-resistant fasteners.
| Joinery Type | Best Use | Pros | Notes |
|---|---|---|---|
| Mortise-and-Tenon | Legs to rails | Extremely strong; minimal hardware | Requires precise cutting |
| Dowel Joints | General frame alignment | Simple setup; good alignment | Not as strong as tenons |
| Pocket-Hole Joints | Quick assembly | Fast; hides holes | Visible holes on some faces |
| Rabbet/Dado | Register rails & panels | Rigid seating; straight edges | Requires setup and masking |
assemble with care: dry-fit again, then apply glue to joints and clamp until set. Pre-drill pilot holes for screws to prevent splitting, and countersink fasteners so the surface stays smooth. Keep the whole frame square using a pair of corner clamps, and check for wobble after you add the seat. Finish with a protective coat suited to your climate, and consider stainless hardware for lasting outdoors performance.
Get Instant Access to 16,000+ Woodworking Plans →
Planning ergonomic dimensions and seating comfort for versatile use
Planning for versatile use begins with human-centered measurements. For a bench that will live indoors or outdoors, set ergonomic baselines that fit a broad range of users and tasks. A comfortable starting point is a seat height of 17-19 inches from the floor, a seat depth of 12-14 inches, and a width of 18-20 inches per person.With these targets, a two-seat bench runs around 3 feet (36 inches) long, and a three-seat version sits around 4.5 feet (54 inches) long. Build with a little tolerance to accommodate footwear, clothing, and seasonal seating variation.
To translate numbers into a plan, draft a straightforward cut-list and test-fit with a dry frame. If space allows, set the seat height at the mid-point of the range (18 inches) and verify that the depth leaves generous room for thighs without rubbing the front edge. Keep the width per person within 18-20 inches, and reserve a little extra length for comfortable spacing when guests are present. The table below consolidates these ergonomic targets, helping you size rails, supports, and fasteners with confidence.
| Dimension | Recommended Range | Notes |
|---|---|---|
| Seat height | 17-19 in | Fits most adults |
| Seat depth | 12-14 in | room for thighs |
| Per-person width | 18-20 in | Comfortable spacing |
| Total length (two seats) | 3 ft (36 in) | Compact seating |
| Total length (three seats) | 4.5 ft (54 in) | Cozy for three |
| Backrest height (optional) | 8-12 in above seat | Supportive without crowding |
Beyond measurements, choose features that boost comfort across seasons and settings. Rounded edges and a smooth, splinter-free surface reduce snag risk, while a slightly bevelled front edge invites you to slide in and out with ease. For outdoor use, select weather-resistant wood and fasteners, apply a durable penetrating finish, and ensure there is a practical drainage plan so water doesn't pool on the seat.
test and adapt. Build with modular or removable back support options and consider cushions that are easy to remove for cleaning or storage. If the bench is likely to serve as a work surface, include a lower shelf or a fold-down accessory rail, and use robust joints (mortise-and-tenon or screw-and-peg) that hold up to daily use.With careful planning and a few practical adjustments,your bench will feel comfortable,stable,and ready for indoors or outdoors.
Get Instant Access to 16,000+ Woodworking Plans →
Maintenance tips to extend the life of your indoor outdoor bench
Keeping an indoor-outdoor bench looking and performing its best starts with a simple, regular routine. Wipe down the surface weekly with a soft cloth to remove dust, pollen, or outdoor grime, using a mild soap solution if needed. Avoid harsh cleaners or abrasive pads that can scratch the finish. Check joints and fasteners every few months and tighten loose screws before they loosen more. If you notice any warping or cracks, address them early to prevent larger damage.
For finishes, choose a coating that matches the bench's habitat. A penetrating oil or water-repellent sealer keeps indoor wood supple, while an exterior varnish or deck sealer adds weather resistance for outdoor use. Reapply according to the product's instructions-usually once a year for heavily used areas or every 1-2 years for milder exposure. Before applying, lightly sand the surface and wipe away dust; let the coat cure fully before use. Use this quick maintenance schedule to stay on track:
| Maintenance task | Recommended frequency | Notes |
|---|---|---|
| Cleaning | Weekly | Soft cloth + mild soap |
| Joint inspection | Every 3-4 months | Tighten screws if needed |
| Refinishing | Outdoor: 1-2 years; Indoor: as needed | Follow product instructions |
| Protection when not in use | Seasonal or during harsh weather | Use a breathable cover |
Hardware and fittings deserve attention too. Inspect bolts, screws, and any metal brackets for signs of rust or looseness; replace corroded parts and tighten all connections to maintain stiffness and safety. If your bench has armrests or legs that meet the ground, seal the base with a water-repellent treatment to slow moisture uptake.for added longevity, consider a breathable cover during rainier seasons and place the bench on a dry, elevated surface to prevent standing water from soaking the wood.
Position the bench in a sheltered spot-under eaves or a well-ventilated shade-to reduce direct sun and moisture swings. Elevate it slightly on feet or a tray to promote airflow, and place a small cushion or mat that can be washed or swapped to protect the wood from oils and pigments. If you rotate placement between rooms or porches, perform a quick wipe-down and recheck fasteners after each move to keep the structure solid.
Get Instant Access to 16,000+ woodworking Plans →
Q&A
What materials are best for a sturdy bench that lasts indoors or outdoors?
Choose wood that resists moisture and warping. For outdoors, cedar, redwood, or pressure-treated pine are reliable; teak is ideal but pricey. Use exterior-grade screws and fasteners, and seal end grain to slow moisture uptake.
How should I size and design the bench for comfortable seating and stability?
Aim for a seat height around 17-19 inches and a depth of 12-14 inches for comfortable seating. Plan a length that fits your space, but keep generous leg clearance and a sturdy frame with square or pegged joinery. Add a lower shelf or diagonal braces to increase stiffness and resist racking.
What joinery and fasteners work best to prevent wobble and rot?
Use joinery that resists racking, such as mortise-and-tenon or high-quality dowel joints with glue. Pair with corrosion-resistant screws or bolts (stainless steel or hot-dip galvanized) and add corner braces or cross braces for extra stiffness. Internal blocking helps prevent wood movement and split ends.
What finishes or maintenance steps protect the bench in different environments?
Apply an exterior-grade finish that protects against moisture and UV when outdoors, such as penetrating oil, stain, or a sealant. Reapply per manufacturer guidance-typically every 1-3 years outdoors, less often indoors. Keep the bench clean and dry; wipe spills promptly and sand lightly before refinishing.
The Way Forward
From the first straight cut to the final finish, a sturdy bench reminds us that good woodworking is a conversation between plan and patience. The core takeaway is simple: thoughtful materials, solid joinery, and a finish suited to the environment create a bench that stands up to use and weather alike. For woodworking enthusiasts, that resilience is more than practicality-it's a doorway to confidence, experimentation, and a growing toolkit of techniques you can reuse in future projects. Ready to try? Build this bench, check the finishes, or dive into more guides to sharpen your craft. With careful steps,you'll craft something reliable-and you'll feel inspired to build again,and again.


This looks like a great project! I love the idea of a versatile bench that can be used both indoors and outdoors. Can’t wait to give it a try!
This is an awesome DIY project! Having a sturdy bench that fits both settings is brilliant; I’ll definitely be adding this to my weekend plans!
What a fantastic idea! A DIY wooden bench that adapts to both indoor and outdoor use is super practical-I’m excited to see how it turns out!
This is such a creative project! A flexible bench that can serve multiple purposes is exactly what I need for my space. Looking forward to seeing everyone’s finished results!
I love the versatility of this project! A solid wooden bench that can transition between indoor and outdoor use is going to be such a great addition to any home-can’t wait to see what everyone creates!
I really appreciate the practicality of this project! A sturdy wooden bench that’s perfect for any space is exactly what I need for my home-I can’t wait to start building!
This project sounds amazing! A sturdy and stylish wooden bench that works for both indoor and outdoor spaces is such a smart choice for any home; I can’t wait to get started and see everyone’s unique designs!
This project is just what I was looking for! A beautifully crafted wooden bench that can be used both indoors and outdoors is such a functional and stylish addition to any home-I can’t wait to start my own build!
I’m so excited about this project! A robust wooden bench that can be used both indoors and outdoors is a fantastic idea, and I can’t wait to bring my vision to life and see how everyone else puts their own spin on it!
This project is exactly what I needed! A well-built wooden bench that serves both indoor and outdoor purposes is perfect for maximizing space and functionality; I’m excited to see the creative designs everyone comes up with!
I love the versatility of this project! A solid wooden bench that fits both indoor and outdoor settings is a brilliant addition to any space; I’m eager to see the innovative styles everyone chooses to create!
I’m thrilled about this project! A durable wooden bench that seamlessly transitions between indoor and outdoor use is a fantastic idea; I’m looking forward to getting creative and seeing everyone’s unique interpretations!