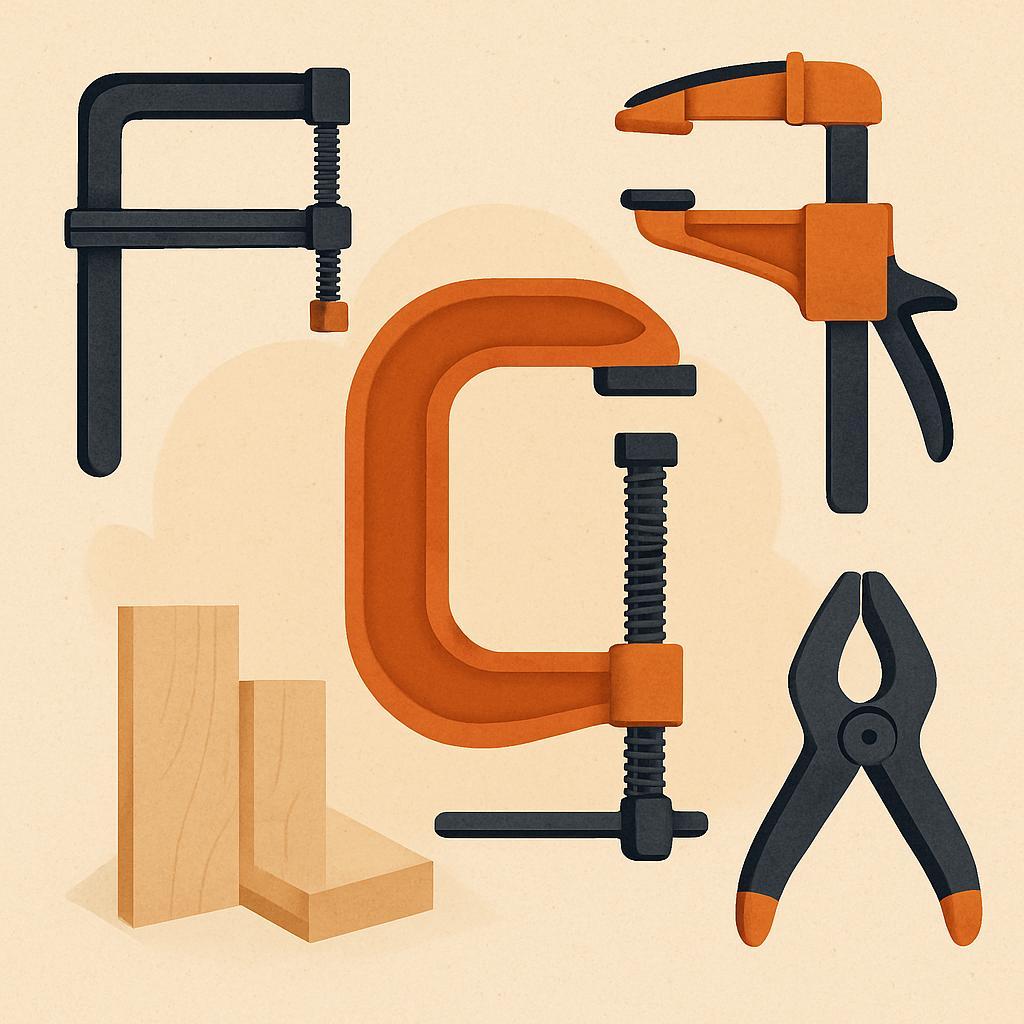
in a quiet corner of the workshop, a clamp does more than grip-it guides. Clamps matter as precision, control, and safety hinge on the right hold, especially when gluing up or detailing joints. This guide untangles the world of clamps for woodworkers: bar clamps, C-clamps, pipe clamps, quick-release, cone or corner clamps, and specialty models, wiht plain-language explanations of when to reach for each. By the end, you'll understand which clamp fits which task, the signposts of a solid setup, and practical tips for selection, use, and maintenance-so your projects stay true, repeatable, and cleanly finished.
:
Clamp fundamentals for Better Projects
Clamps are more than just “tighteners” – they're pressure-distribution tools that protect workpieces while keeping components perfectly aligned. Before you squeeze, consider how the load will spread across the surface: a small contact area can leave marks or cause warping, while a broad contact pad or a caul can share pressure evenly. Always plan clamp placement around grain direction, glue lines, and any routing or finishing you'll perform later.
Choose clamps with appropriate grip and padding. For long runs and wide faces, bar or pipe clamps with non-marring pads minimize indentations. For small parts or delicate materials, low-profile C-clamps or spring clamps provide control without overpowering the joint.if you're building jigs or repeatable assemblies,consider toggle or parallel clamps to maintain consistent pressure without shifting parts.
Set up in stages to avoid surprises: rough clamp the assembly to hold rough alignment, then fine-tune with a second pass and cauls to distribute pressure across glue joints. Lightly snug clamps and check for even squeeze before applying final force.Remember to protect surfaces with scrap plywood or cloth-backed pads, and leave a little margin for glue squeeze-out so you can clean up cleanly after curing.
| Clamp Type | Best For | Key Tip |
| Bar clamp | Long spans and panels | Protect surfaces with pads; distribute pressure |
| Pipe clamp | Heavy-duty holds across wide gaps | Add cauls to spread load |
| C-clamp | Small parts or fixed positions | Keep pad square; avoid overtightening |
| Spring clamp | Quick holds and alignment | don't rely on it for final glue pressure |
| Toggle clamp | Jigs and repeatable holds | Use with a fixture plate for consistency |
Build Your Dream Workshop on a Budget →
Types of Clamps and Their Best Use Cases
Choosing the right clamp begins with the work you're tackling: consider the material, the edge you're grabbing, and whether you need a quick hold or long, even pressure. Alignment and holding power are the two levers to prioritize, as a clamp that slips or leaves marks can ruin a project as quickly as it helps. In this section, we map the most common clamps to their strengths so you can build a versatile kit without guesswork.
Many projects start with a C-clamp for their bite and fine control in tight spots. For longer edges, switch to a bar clamp (often called an F-clamp) to distribute pressure evenly along the joint. for very long spans,a pipe clamp lets you extend reach and adjust the clamping length to suit the job. Each option has a different footprint and potential for surface marking, so pair them with pads or soft jaws to protect your stock.
| Clamp Type | Best For | Pros | Notes |
|---|---|---|---|
| C-clamp | small parts, precise holds | Strong bite, fine adjustment | Limited throat depth |
| Bar clamp / F-clamp | Edges and panels | Even pressure over length | Can leave marks without pads |
| Pipe clamp | Long spans, frames | Very adjustable length | Requires setup and pipes |
Beyond the basics, light-duty options shine for quick-work and delicate materials. Spring clamps are ideal for holding pieces while glue sets or for dry-fitting tiny parts. For repeatable, locked-in pressure at defined points, toggle clamps ensure consistent placement across multiple assemblies. If you need a one-handed hold that can be repositioned on the fly, locking pliers (vise-grips) become a flexible, temporary solution. Look for rust-resistant finishes and soft jaws to protect finished surfaces.
To get the most from your clamp collection, plan the layout before you start, protect delicate surfaces with pads, and avoid over-tightening that can squeeze joints or deform stock. Store clamps neatly in a rack or cabinet so you can grab the right style at a glance, and service threads or moving parts periodically to keep action smooth. Practical tip: use the table above as a quick reference to pair tasks with clamp types, and keep a few backups of each style for common job sizes.
- Protect delicate surfaces with soft pads or scrap wood when clamping.
- Test clamping pressure on a scrap piece before applying glue to your project.
- Keep clamps clean and lightly lubricate threads to maintain smooth operation.
Build your Dream Workshop on a Budget →
How to Choose the Right Clamp for Material and Task
Choosing the right clamp starts with understanding the material you're holding and the task you're performing. for delicate surfaces, prioritize protective features and even pressure distribution to avoid marring. For tough workholding, look for higher clamping force and hardware that stays square as you tighten. In all cases, plan for accessibility– can you reach the screw, turn the handle, and release the workpiece quickly when the job is done?
Start with a quick decision framework to match clamp type to material and task:
- Material protection – use cushioned jaws or pads on wood, plastic, or finish surfaces.
- Holding force vs. contact area - more pressure isn't always better if it concentrates pressure on a small patch.
- Accessibility – ensure you have room to tighten,align,and release without disturbing nearby work.
- Clamp length and reach – longer bars or pipes suit wide panels or long assemblies.
- Repeatability and speed – quick-release or toggle action helps with frequent setup changes.
The quick reference table below helps you compare clamp families at a glance:
| Clamp Type | Common Materials | Typical Holding | Best For |
|---|---|---|---|
| C-clamp | Wood,metal | Low to moderate | Quick,small jobs,temporary holds |
| Bar / F-clamp | Wood,metal | Even pressure across long jaws | Edge gluing,long workpieces |
| Pipe clamp | Any | High pressure,adjustable length | Large assemblies,woodworking |
| Spring clamp | Any | Light,quick grabs | Hold pieces during marking or light assembly |
| Toggle clamp | Fixtures,jigs | High force,repeatable | Machining,assembly lines |
To put it into practice,plan a quick setup routine: inspect surfaces,apply protective pads,estimate the pressure you'll need,verify opening fits the workpiece,and test with a light grip before committing to full tightening. If you're building a workflow around clamping, keep a small set of versatile sizes on hand and store them where you work to speed up every project while reducing mistakes.
Build Your Dream Workshop on a Budget →
When to Use Quick Release Versus Traditional Clamps
Choosing between quick-release clamps and traditional clamps isn't just about brand-it's about how you work. Speed and adaptability define quick-release clamps, letting you set up and reconfigure pieces without wrestling with handles or threaded rods. They shine during glue-ups, dry fits, and repetitive assemblies where you want to iterate quickly. Traditional clamps, by contrast, deliver steadier pressure and a more robust grip, which matters when you're aligning edges, resisting twist, or clamping large or heavy panels for longer holds.
Consider these factors when deciding which clamp to reach for in a given project:
- Clamping force: Quick-release clamps provide light to moderate pressure; traditional clamps offer higher holding power for stubborn joints.
- Time sensitivity: For rapid layout and frequent adjustments,QR clamps save time; for final,repeatable holds,traditional clamps are safer.
- Workpiece protection: Use pads or scrap wood to protect delicate surfaces, especially with high pressure.
- Hybrid workflows: Start with quick-release to tack pieces, then switch to traditional clamps for the final squeeze.
Here's a quick-reference snapshot to scan before you start clamping:
| Clamp Type | Strengths | Best Uses | Notes |
|---|---|---|---|
| Quick-release bar clamp | Fast setup; easy adjustment | Glue-ups, dry fits, repetitive fixtures | Lower holding power; consider pads |
| Traditional bar/pipe clamp | Strong, consistent pressure | Edge joining, large panels, long runs | Heavier; slower to adjust |
| C-clamp or toggle clamp | Localized hold | Small parts, corner fixtures | Not for long parallel runs |
| Spring clamp | Immediate, light hold | Temporary holds, quick positioning | Limited force |
Build Your Dream Workshop on a Budget →
Practical Clamping Techniques for Secure Joints and Alignment
Planning is the foundation of a secure joint. Begin with clean, flat surfaces and dry-fit the pieces to confirm they sit square before any clamp touches wood. Use sacrificial pads to protect faces and prevent marring, and snap reference lines onto the workpiece to guide bite and alignment.When you apply pressure, do so gradually in stages, watching for creeping or shifting after each pass. Plan your clamp layout: two opposing bar clamps to establish true edges, plus an intermediate clamp at the center to lock alignment and reduce wobble.
Choosing the right clamp type and clamping pattern makes the difference between a flush joint and a misaligned mismatch. For flat panels, edge-to-edge clamping with bar or F-clamps works well; for small or delicate assemblies, quick-action spring clamps maintain position without marring. For repeatable accuracy, toggle clamps or cam-action clamps on a jig provide repeatable holds.use this quick reference to match task to tool:
| Clamp Type | best Use | Padding/Notes | Pros/Cons |
|---|---|---|---|
| Bar Clamp | Edge-to-edge panels | Use pads to protect faces | Powerful; long reach, heavier |
| F-Clamp | Medium joints | Protect faces with pads | Versatile, compact footprint |
| Toggle Clamp | quick holds on flat surfaces | Good contact area | Fast; risk of edge bow if over-tightened |
| Spring Clamp | Light holds, alignment | Low pressure | Very quick; not secure for glue-up |
After the clamps bite, verify the joint and alignment before any adhesive sets. Use a carpenter square to confirm 90-degree corners and measure diagonals to ensure the piece is square; if a diagonal is off, loosen slightly and nudge until both diagonals balance. Avoid over-tightening; excessive pressure can bow lumber, squeeze out glue, or shift pieces. When glue is involved, maintain even pressure across the joint and wipe away squeeze-out promptly. For future projects, organize clamps by type and keep padding clean so they're ready when you need them.
Build Your Dream Workshop on a Budget →
Clamp Care and Maintenance for Longevity and Performance
Clamps are built to hold parts securely, but their performance hinges on routine care. A small, consistent habit-cleanliness of surfaces, light lubrication on moving joints and threads, and a quick inspection for wear-extends life and steadies grip.After each project, wipe away dust and metal fragments with a dry cloth, then inspect jaws for nicks or burrs. If you use metal clamps in damp conditions, apply a thin coat of lubricant to exposed threads to slow rust and keep action smooth.
To keep performance predictable, follow a simple maintenance cadence and use the quick reference table below as a checklist.For each clamp type, choose appropriate lubrication and avoid over-request that can attract dust. Remember: proper storage and periodic inspection prevent creeping wear from becoming a failure point.
| Step | What to Do | Frequency |
|---|---|---|
| Clean | Wipe surfaces and jaws; remove debris; avoid solvents that can degrade rubber pads | After every project |
| Lubricate | Apply a light lubricant to threads, pivots, and adjustment screws; wipe off excess | Monthly or after moisture exposure |
| Inspect | Check jaws for wear, alignment, and burrs; test release mechanisms | Weekly during heavy use; quarterly otherwise |
| Store | Keep in a dry, rust-free area; consider a protective coating on metal surfaces | When not in use |
Storage and handling habits impact longevity as much as the initial material choice. Store clamps in a dry, ventilated space and avoid stacking heavy items on top of delicate jaw edges. When a clamp is not in use for an extended period, loosen tension slightly to relieve stress on springs and threads, and periodically open and close to prevent seizing. In fast-paced work, protect the clamp's critical surfaces with soft jaw pads or corner guards to prevent accidental damage to workpieces and to the clamp itself.A thoughtful approach to care keeps clamps ready for the next build and ensures consistent, safe performance.
Build Your Dream Workshop on a Budget →
Q&A
What are the most common types of clamps and how do I choose among them?
Clamps come in several families: spring clamps provide quick grip, C-clamps offer solid, focused pressure, bar or F-clamps span longer workpieces, and pipe clamps extend even further with adjustable pipe sizes. For precision and small parts, choose locking pliers or corner clamps; for long edges or panels, bar and pipe clamps are more practical. pick based on the pressure you need, the workpiece length, and how you want to protect surfaces.
when is a C-clamp better than a bar clamp?
C-clamps excel in tight spots and for quick, heavy-duty grips on small parts. Bar clamps win when you need to span long pieces and apply steady, distributed pressure. If you can't clear a long reach or require adjustable distance, choose a bar clamp; otherwise, a C-clamp is handy for small, fixed holds.
How do I prevent marring delicate surfaces when using clamps?
Place protective pads, scrap wood, or cardboard between the clamp jaws and the workpiece. Lighten the pressure and tighten gradually while keeping the piece aligned.Check frequently for indentations and adjust as needed.
What safety tips should I keep in mind when clamps are in use?
Avoid overtightening, which can crack material or strip threads. Inspect clamps for damage before use and replace worn parts. Keep the workspace organized so clamps don't become trip hazards, and release pressure slowly when finished.
Concluding Remarks
Across the range of clamps-bar, C-clamp, spring, pad, and pipe-the common thread is control. The key takeaway is simple: the right clamp for the job keeps pieces steady, prevents slips, and reveals precise joinery and clean finishes. When you match clamp type to task, you stop fighting gravity and start listening to your project's needs. This matters to woodworking enthusiasts as consistent clamping turns rough ideas into predictable results, boosts safety, and speeds assembly. So pick a project, try a new clamp category, or revisit a favorite technique with fresh hands. Apply these insights, and watch your work tighten together-and your confidence rise, ready for the next project.


This is a fantastic overview of clamps! I never realized how many types there are and when to apply each one-definitely bookmarking this for my next project!
Great article! I love how you broke down the different types of clamps and their specific uses. It’s so helpful for both beginners and experienced DIYers. Thanks for sharing this!
This is such an informative post! I appreciate the clear explanations and visuals for each type of clamp; it’s definitely making me rethink my toolbox strategy for future projects. Well done!
This post is incredibly helpful! I had no idea there were so many specialized clamps out there. The tips on when to use each type are particularly useful, and I can’t wait to apply this knowledge to my upcoming projects!
This is a great resource for anyone looking to expand their knowledge on clamps! The detailed descriptions make it easy to identify which clamp to use for different tasks. I’ll be referring back to this guide often!
This post is a goldmine for anyone tackling DIY projects! The clarity in explaining the functions of each clamp type is unmatched, and it really helps in making the right choice when working with different materials. I’m looking forward to putting these tips into practice!
This article is fantastic! The way it categorizes each clamp type and highlights their uses is incredibly useful for anyone looking to improve their DIY skills. I can’t wait to incorporate these insights into my next projects-thanks for the valuable information!
This article is a must-read for anyone into woodworking or DIY! The thorough breakdown of each clamp and its specific applications really opens up new possibilities for projects. I’m excited to see how these insights will enhance my work-thank you for sharing such comprehensive information!
Absolutely love this guide! The clear explanations and practical tips on when to use each type of clamp make it super accessible, even for beginners like me. I’m definitely going to keep this as my go-to reference for future projects-thanks for such an informative post!
This guide is incredibly helpful! The breakdown of different clamp types and their specific uses is super informative, making it so easy to understand when to use each one. I appreciate the effort put into this post and can’t wait to use this knowledge in my upcoming projects!
What an outstanding resource! The detailed explanations and practical usage scenarios for each type of clamp really demystify the process and will undoubtedly save time and effort on future projects. Thanks for providing such a fantastic reference!
This post is a game changer! The clear definitions and practical examples for each type of clamp make it so much easier to choose the right one for any project. I’m really looking forward to applying these insights in my own work-thanks for such a well-crafted guide!
This is such a valuable resource! The way each clamp type is detailed along with its practical applications really simplifies the decision-making process for projects. I’m eager to put this knowledge into practice and ensure I’m using the right clamps for the job. Fantastic work on this guide!
This guide is simply brilliant! The way it breaks down the various clamp types along with real-world applications is extremely helpful for both novices and seasoned pros. I appreciate the clarity and detail, and I can’t wait to implement these tips in my upcoming projects. Thank you for creating such an informative resource!
This guide is exceptional! The thorough descriptions and practical examples for each clamp type really streamline the selection process for various projects. I’m excited to incorporate these insights into my work and make better choices with my clamps. Great job on this informative post!
This post is incredibly insightful! The comprehensive breakdown of different clamps and their specific uses takes the guesswork out of the equation, making it accessible for everyone. I’m really looking forward to utilizing this information in my next project-thanks for sharing such a practical guide!
This post is incredibly handy! The detailed overview of each clamp type and their specific uses really makes it easy for anyone to understand and choose the right tools for their projects. I can’t wait to put this knowledge to good use and improve my woodworking skills. Excellent job on this informative guide!
This guide is fantastic! The clear breakdown of different clamp types and their uses not only makes it easy to understand but also empowers both beginners and experienced craftsmen to make informed choices. I’m looking forward to applying these insights in my upcoming projects-great work on such a valuable resource!
This post is a game changer! The way it categorizes different clamps and explains their practical applications is so beneficial for anyone looking to enhance their craftsmanship. I’m eager to utilize this information in my future projects-what a fantastic resource for both amateurs and experts!
This post is a treasure trove of information! The way it dives into the various clamp types and their specific applications truly simplifies the decision-making process for both newbies and seasoned pros. I’m excited to leverage this knowledge in my projects and take my craftsmanship to the next level-thank you for this invaluable resource!