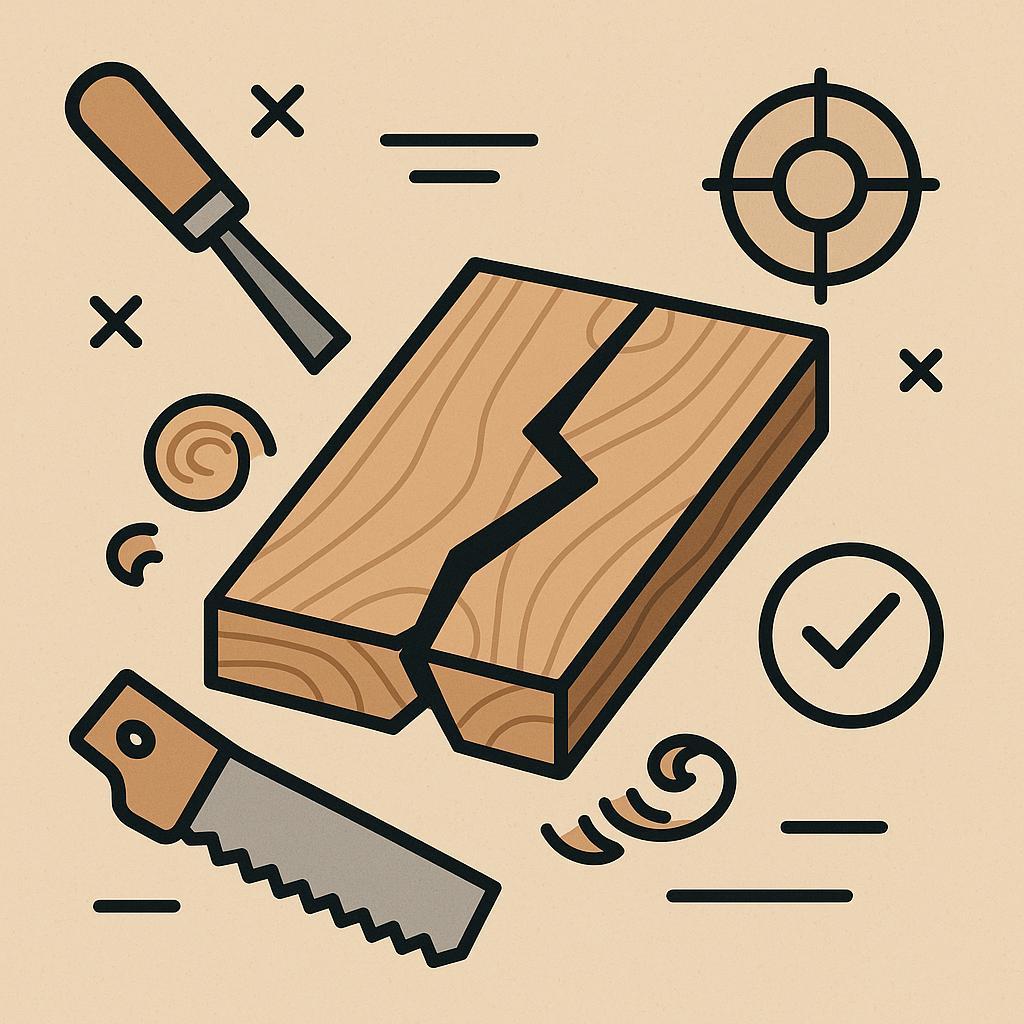
one miscut can turn a dream project into a scrap pile, but the real skill is spotting trouble before it happens. Common Woodworking Mistakes: A Beginner's Guide unpacks the traps most newcomers stumble into-from metric mistakes and tool setup to cut planning and finish choices. This matters because precision, safety, and efficiency compound into every project-and even small errors compound quickly. By reading, you'll gain a checklist of dos and don'ts, speedy diagnostic tips, and practical habits that boost accuracy, reduce waste, and build confidence to tackle future builds with steadier hands.
:
Common Woodworking Mistakes Beginners Make and How to Avoid Them
Rushing through a build invites mistakes that compound quickly. Start with a plan: verify every measurement against your cut list, align stock with the grain, and set up your tools for accuracy. Measure twice, cut once is more than a motto-it's a habit: mark your lines, double-check with a square, and test-fit components before you commit.
Another common pitfall is poor workholding and rough setup. A board that shifts during a cut can ruin parts in seconds.Always clamp securely, check your fence for true alignment, and verify your already-marked lines before you touch the blade. Secure,square,and check at every step,and when in doubt,do a quick test cut on scrap stock to confirm settings rather than risking a live piece.
| Mistake | Why it happens | Fix |
|---|---|---|
| Stock shifts during cutting | Lack of clamps or unstable supports | Clamp securely, use stops, and backer boards |
| Inaccurate squareness | Fence or workpiece not aligned | Check with square; align pieces before cuts |
| Dull blade or wrong blade for material | Blade wear or mismatched blade | Keep blades sharp; choose the right blade for the stock |
After the cut, perform quick checks before assembling. Test-fit joints, evaluate gaps, and run a light pass to even surfaces. Progress with intention by pausing after each stage to assess alignment, joint tightness, and finish quality. A tidy, dust-free workspace helps you spot irregularities that a cluttered bench might hide.
invest in ongoing tool maintenance. A sharp, well-tuned blade, a true fence, and clean arbor hardware reduce surprises and accelerate your progress. Establish a simple routine: inspect and sharpen blades regularly, zero or true your fence, and store tools in dedicated, organized spaces. By making these habits automatic, you'll cut frustration and gain confidence with every project.
Get instant Access to 16,000+ Woodworking Plans →
Mastering Precise Measurements to eliminate Waste
Precise measurements begin with a solid reference system. Establish a reliable zero from the stock's fixed edge and keep it consistent for every piece.Use sharp pencils or marking knives, and select tools that you trust: a steel ruler or tape, a combination square, a marking gauge, and calipers for critical tolerances. Calibrate your measuring tools regularly, and lock any adjustable parts before you transfer a measurement to the wood. By building a routine of measuring twice and cutting once, you dramatically reduce the risk of waste from misreads.
Understand kerf and how your saw blade eats into stock. Subtracting the correct amount from each piece is non-negotiable for accurate fits. Bottom line: a single miscalculated kerf can compound across a project. The table below gives typical ranges to guide planning, but always measure your blade on the day you cut.
| Cut type | Kerf (approx.) |
|---|---|
| standard blade (finish cut) | 0.125 in / 3.2 mm |
| Ripping/narrow-kerf blade | 0.100 in / 2.5 mm |
| Wide blade for heavy cuts | 0.140 in / 3.6 mm |
Plan your cut sequence before you touch the wood. Create a simple cut list that totals the stock length with kerf allowances included. A practical workflow might look like this:
- Lay out all piece lengths on the stock using a fixed reference edge.
- Mark all dimensions clearly with a sharp line; use transfer marks from a calibrated ruler or marking gauge.
- Cut from the largest pieces to the smallest to keep waste to a minimum and minimize setup changes.
- Use stop blocks and a sacrificial fence to ensure repeatable cuts.
- After each cut,recheck the remaining stock length to catch drift caused by blade wander.
Consistency and maintenance matter as much as technique. Keep your measuring tools clean and free from burrs, check for wear on the saw blade that could alter the kerf, and re-check your reference edge after every few cuts. Use a marking gauge for consistent widths on repeated pieces, and consider keeping a small notebook of standard widths and board lengths you use often. By integrating these checks into every project, you can cut with confidence and dramatically reduce waste.
Get Instant Access to 16,000+ Woodworking Plans →
Selecting the Right Tools and Setting Up for Safe Accurate Cuts
Choosing the right tools for a beginner is less about owning every specialty machine and more about building a dependable, controllable setup that grows with you. Start with a solid baseline: a circular saw or miter saw for straight cuts, a drill/driver, a router or palm router, a couple of good handsaws, clamps, squares, and a few push blocks. Look for safety features that actually work: a responsive blade guard, a sturdy fence that stays true, and clearly marked measurement scales. Prioritize reliability and ease of use over chasing every gadget; sharp blades and well-calibrated equipment make cuts safer and cleaner from day one.
Set up your workspace so the first cut comes from control, not luck. Secure the workpiece with clamps or a vise, and verify that fences and miter gauges are square to the blade. Calibrate blade height so the teeth clear the wood by a small margin, and consider a zero-clearance insert to reduce tear-out. Use a straightedge or guide for long pieces, and keep a push block or featherboard within easy reach to protect your hands. Regularly check that the power switch is accessible and that cables or batteries stay out of the cutting path.
Develop a simple, repeatable workflow that minimizes drift and surprise. Before every cut, inspect the tool: is the blade sharp, is the alignment true, are clamps secure, and is the dust collection functioning? Mark pieces clearly and set the fence to the exact dimension, then run a test cut on scrap to confirm fit. If stock is narrow, use a push block or featherboard and always unplug the tool before changing blades. After the cut, examine the edge, adjust if needed, and wipe down the area to keep tools in good condition.
Get Instant access to 16,000+ Woodworking Plans →
Smart Planning and Clear Cut Lists for Smooth Workflow
Smart planning and a clear cut list set the tempo for a smooth woodworking session. Start by locking in finished dimensions, confirming what stock you have on hand, and choosing the grain orientation that suits both strength and appearance. A well-constructed cut list keeps parts organized and measurable: Part name, quantity, exact size, and any notes about grain direction or hardware. When this plan is solid, you can estimate material needs accurately, avoid costly trips to the store, and keep your workflow moving without bottlenecks.
Below is a compact cut-list example you can adapt for any project. The layout helps you scan each item quickly, know how many pieces to cut, and keep grain direction clear as you lay out your stock.
| Part | Qty | Size (L×W×T) | Notes |
| Top | 1 | 24″ × 12″ × 3/4″ | Grain along length |
| Shelves | 2 | 24″ × 12″ × 3/4″ | evenly spaced |
| Back | 1 | 24″ × 24″ × 1/4″ | Face grain |
With the table in place, transfer values to a simple dashboard in your shop notebook or a digital sheet. Use a consistent template across projects: Part, Qty, Size, and Notes. Group related parts by stock sheet to cut down on flips and tool changes, and mark grain orientation clearly before the first cut. This upfront discipline reduces errors and waste during assembly.
build in a quick review step: re-check all measurements against the finished design, verify stock thickness, and confirm waste allowance for kerf.Keep cut lists accessible in the workshop-prefer a printable copy at the saw and a digital copy for revisions. A steady planning habit makes smooth workflows and confident builds certain.
Get Instant Access to 16,000+ Woodworking Plans →
Finishing Techniques That Elevate Durability and Appearance
A thoughtful finish not only guards the wood but also elevates its character. Start with a dust-free surface: sand progressively from 120 to 220-320 grit, then wipe with a tack cloth to remove all particles. Always test your chosen finish on a scrap piece to confirm color, gloss, and compatibility under your workshop conditions. Note drying times and optimal coat thickness so the final piece doesn't trap dust or fibers.
- Sand with the grain direction, using light pressure.
- Wipe clean between grit changes with a tack cloth.
- Test your finish on scrap and record the results.
- Match climate conditions to improve cure and adhesion.
Understanding finish types at a glance can prevent costly missteps. The right choice depends on use, exposure, and how you want the wood to look. Below is a quick table to compare common options so you can pick with confidence.
| Finish | Best for | Pros | Cons |
|---|---|---|---|
| Oil (Danish/Tung) | Open-pore look, warm glow | Deep color, easy recoat | Requires maintenance; longer cure |
| Water-based Poly | Light woods, low odor | Fast dry, easy cleanup | Can feel less durable with heavy use |
| Oil-based Poly | High-traffic surfaces | durable, amber-toned finish | Stronger odor, longer cure |
| shellac | Sealing wood, quick projects | Fast-drying, easy to repair | Poor water resistance alone |
Apply coatings in thin, even coats to minimize runs and sags. Stir finishes gently; never shake to avoid air bubbles. Use the right tool for the job-brush for wide panels, lint-free cloth or wipe-on for curved surfaces. Sand lightly between coats with 320-400 grit and remove dust before the next coat. Maintain a stable temperature and humidity to ensure even curing, and plan for a light abrading pass before final polish.
- Keep brushing direction consistent with the grain.
- Maintain a wet edge to avoid lap marks.
- Work in a clean surroundings to minimize dust nibs.
- Finish with a final polish or wax only after full cure.
Finishes aren't permanent-minor scratches or dullness can be refreshed with targeted care. For small damage, lightly sand the area and recoat with a thin layer. If a finish looks cloudy, check humidity and cure time, then gently level the surface with 400-600 grit sandpaper and reapply a fresh coat. For water exposure, ensure you seal the edges and consider a tougher topcoat in the next project. Document your process so future projects benefit from your observed best practices.
Get instant Access to 16,000+ Woodworking Plans →
Lessons from Real Projects and Practical Fixes for Ongoing Improvement
Real projects teach more than theory. The best lessons come from what went wrong and how you adjusted on the fly. Keep a simple project log that captures the task,the exact setup,and the tweak that made the cut. before you cut, measure twice and check against your markings; a quick double-check saves a single mistake from spiraling into scrap.By building a habit of recording decisions, you turn missteps into a roadmap for the next project.
When you encounter common woodworking glitches, start with your setup.If stock tears out, sharpen your blade and back up the cut with a sacrificial board; if your parts drift, re-check the fence alignment and clamp strategies; if joints are loose, revisit material grain and clamping pressure. Small adjustments-like a sharper blade, clean fence rails, and consistent clamping-compound into big gains over time. Embrace a bias for deliberate slow cuts over fast passes; speed often hides sloppy technique.
| Issue | Root Cause | Practical Fix |
|---|---|---|
| Tear-out | Dull blade or wrong cut direction | Sharpen/replace blade; use backer board |
| Misalignment | Fence not square or stock shifts | Square fence; use stop blocks; re-clamp stock |
| Ragged edges | Rough stock or improper feed rate | Finish with smoother cuts; support stock |
| Loose joints | Inadequate clamping or grain direction | Apply glue with proper clamping pattern; ensure grain alignment |
Beyond fixes, cultivate a routine that tracks your progress. Set small, measurable goals for each session-shore up one technique, improve one joint, or introduce a new jig. Celebrate tiny wins by updating your project log with what you tried, what worked, and what to adjust next time. The discipline of reflection turns practice into skill, and skill into consistent results across projects.
design your workspace around flow and safety. Create zones for measuring, cutting, and finishing, with clear cues to remind you of best practices: check alignment, secure every piece, wear eye protection. As you accumulate accomplished sessions, your mistakes will shrink, and your ability to recover from unforeseen challenges will grow. Start small, stay curious, and let each project sharpen your eye for the next one.
Get Instant Access to 16,000+ Woodworking Plans →
Q&A
How can I avoid measuring errors when marking cuts?
Double-check every measurement against the plan and mark from a true reference edge. Use a marking gauge or a sharp square to lay out lines, and verify lines on scrap before committing to the final piece. A quick test cut on scrap helps confirm your kerf and line accuracy.
What's a common misstep in material selection and grain direction,and how can I prevent it?
Choose stock with straight grain and minimal defects,and avoid boards that are cupped,warped,or have heavy runout. Plan the grain direction to maximize strength and appearance by laying out parts accordingly. Inspect every board for knots, splits, and glue lines before cutting.
How can I reduce tear-out and splintering when cutting or planing?
Keep blades sharp and use the right blade for the wood and cut. Make a scoring pass or use tape/zero-clearance inserts to minimize tear-out, especially on end grain. Support the workpiece and back it up so fibers don't lift as the blade exits.
How do I choose the right blade, bit, or feed rate for different woods?
Match the tool to the wood: softer woods can use finer-tooth blades, while hardwoods benefit from tougher blades and slower feed rates. Follow the blade and tool manufacturer's guidance,and keep edges sharp for clean cuts. Start conservatively and test on scrap,adjusting based on results.
Concluding Remarks
Mistakes aren't detours; they're rough cuts that teach you where the grain runs and where the blade should tread. the core takeaway is simple: plan, measure twice, test, and adjust. When you treat errors as data, progress becomes steady and satisfying. For woodworkers, this matters because patience, precision, and curiosity turn raw timber into reliable workmanship-and into confidence in your own hands. So pick a project, study a guide, and put one measured move after another into motion. May your shop be patient, your tools faithful, and your next creation a little brighter than the last.


Great tips! I wish I had this guide when I first started; it would have saved me so many frustrating hours.
Thank you for sharing these insights! It’s so helpful to know what common pitfalls to avoid right from the start.
I completely agree, Dylan! Knowing these mistakes early on really makes a difference in building confidence as a beginner. Thanks for the great advice!
You’re welcome, Corey! It’s all about learning and improving, and I’m sure these tips will help many beginners avoid the same mistakes we all faced. Happy woodworking!
I love this guide! It’s so reassuring to see that others have made the same mistakes, and the tips provided are super practical for getting started on the right foot.
This is an essential read for anyone starting their woodworking journey! Avoiding these common mistakes will definitely set you up for success and make the learning process much smoother. Thanks for putting this together!
This guide is a game-changer for newbies! Knowing what to avoid can really help streamline the learning process and make woodworking a lot more enjoyable. Appreciate all the tips shared!
This is such a helpful resource! It’s so important for beginners to recognize common pitfalls before they even start, and your insights will certainly help many people enjoy woodworking more and avoid frustration. Thanks for sharing this!
This is fantastic advice for beginners! Recognizing common mistakes early on can save so much time and materials, allowing new woodworkers to build confidence and skills more quickly. Thanks for sharing these valuable insights!
This post is incredibly useful for anyone new to woodworking! It’s great to have a comprehensive list of common mistakes that can easily derail projects, and your tips will help beginners feel more prepared and less overwhelmed. Thanks for sharing your knowledge!
This guide is a must-read for all woodworking novices! Identifying and understanding these common mistakes early on can truly enhance your skills and keep your projects on track. Appreciate the effort in compiling such practical advice!
This post is invaluable for anyone starting out in woodworking! Addressing common errors right from the beginning is key to developing solid skills and preventing discouragement. Thank you for putting together such a helpful resource!
This is an excellent guide for those just stepping into woodworking! By highlighting common mistakes, you’re helping beginners navigate challenges more effectively, which is essential for building confidence and competence. Thank you for this valuable information!
This guide is a treasure trove of wisdom for novice woodworkers! Acknowledging common pitfalls is a crucial step in honing one’s craft, and your insights will undoubtedly pave the way for smoother projects and greater satisfaction. Great job sharing this essential knowledge!
This guide is a fantastic resource for beginners in woodworking! Recognizing typical mistakes is essential for learning and growth, and your tips will definitely help newcomers approach their projects with more confidence and clarity. Kudos for sharing such helpful advice!
This guide is a wonderful tool for anyone new to woodworking! Understanding and avoiding common mistakes can make a world of difference in a beginner’s journey, and your insights provide invaluable support in this learning process. Thank you for sharing such practical and encouraging advice!
This guide is a fantastic starting point for anyone embarking on their woodworking journey! By shedding light on common mistakes, you empower beginners to learn and grow without unnecessary frustration. Your practical tips are sure to boost confidence and help develop essential skills. Thank you for sharing such a valuable resource!
This guide is an invaluable resource for beginners eager to dive into woodworking! By addressing common mistakes, you not only highlight potential pitfalls but also provide the knowledge needed to tackle projects with confidence and skill. Your practical advice is sure to inspire many to embrace their creativity without fear of making errors. Thank you for sharing this insightful guide!