
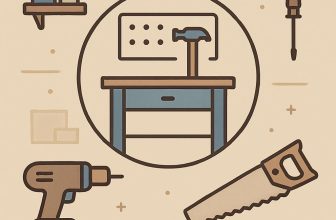
Small space, big precision. In a compact workshop, the difference between clutter and clarity isn't luck-it's layout, habit, and a smart setup. A compact setup can unlock bigger projects, when every tool has a home and every movement has purpose. This guide, Compact Workshop Mastery: A Step-by-Step Setup Guide, shows you how to design a powerful, tidy workspace you can actually use: step by step, from measuring and zoning to selecting multi-function machines, plug placement, dust control, and safety. by the end, you'll have a reproducible setup plan, practical optimization tips, and the confidence to tackle aspiring builds in any room.:
Space Optimization Techniques for a Compact Workshop
Start with a clean, deliberate layout that respects the constraints of a compact workshop. Map your primary tasks from material prep to assembly, so every motion has a purpose. Prioritize accessibility: keep frequently used tools within arm's reach and reserve dedicated zones for materials that move through each step. A well-planned footprint reduces wasted motion and makes even a small shop feel expansive.
Adopt vertical and modular storage to liberate benchtop space. use a Pegboard Wall for hand tools, a Magnetic Strip for blades, and a Fold-down Workbench that tucks away when not in use. Color-code zones for different operations and label bins to speed setup. For safety, place often-used items at chest height and heavier items near the floor to lower the center of gravity.
| Option | Space Need | Pros | Best For |
|---|---|---|---|
| Pegboard Wall | 6-8 ft length | Easy access; scalable | Hand tools, small parts |
| Magnetic Tool Strips | 2-4 ft vertical | Fast grabbing; minimal footprint | Blades, metal tools |
| Fold-Down Workbench | wall-mounted; folds away | On-demand workspace | Small benches; space saving |
| Overhead Storage Shelf | Ceiling height; clearance 12-18 in | Reduces floor clutter | Bulkier items |
Design your space around workflows: create a rough “incoming, processing, finishing” sequence and align clamps, jigs, and measuring tools along the path. Build a lightweight rolling cart for mobile tasks and a dedicated waste corner to keep airways clear. Conduct a quarterly layout audit-test whether relocating a tool saves steps, and adjust accordingly to keep momentum high.
Build Your Dream Workshop on a Budget →
Selecting Essential Tools and Smart Storage for Small Spaces
In a compact workshop, select tools that cover multiple tasks and stay tucked away when not in use. Prioritize a minimal set with a high degree of versatility, and choose models with compact footprints and integrated dust management where possible. A well-chosen base kit becomes the backbone of your workflow, letting you tackle jobs without crowding the space.
Begin with a core set that balances capability and footprint. consider:
- Hand tools: 25 ft tape measure, combination square, chisels, and a pry bar
- Power tools: a compact drill/driver, an oscillating tool, and a small jigsaw or saw
- Accessories: driver bits, drill bits, sanding pads, and fasteners stored in shallow organizers
- Measuring & layout: marking knife, square, and calipers for accurate work
- Safety & dust: safety glasses, dust mask, and a compact vacuum or shop vac
Smart storage unlocks usable space.Build vertical walls with pegboard or slatwall, add magnetic strips, and use modular drawers to keep frequently used items within arm's reach. A rolling cart or compact tool chest on locking wheels can roll away when you finish, preserving floor space for a project table.
| Storage zone | Best fit | Notes |
| Wall space | Pegboard / Slatwall | Hang tools, cords, and accessories |
| Benchtop | Small drawers / inserts | Screwdrivers, bits, fasteners |
| Under-bench | Rolling cart | infrequently used tools, consumables |
To implement efficiently, map your space first. Measure tool footprints and sketch a layout that places high-frequency items within an easy reach and less-used gear toward the periphery.Invest in modular solutions-stackable bins, removable organizers, and adjustable shelves-so your setup can evolve with projects. Label bins and use clear containers to reduce search time and keep the workflow steady.
Build Your Dream Workshop on a Budget →
Lighting Strategies and Ergonomic Setup for Precise Work
Precise work starts with thoughtful lighting that reveals minute details without casting harsh shadows. In a compact shop, layer your illumination: a diffuse overhead fill, a dedicated task light near the front edge of the bench, and a minimal brightness under cabinets for pocket spaces. Choose flicker-free LEDs with a color temperature in the daylight range (roughly 5500-6500K) and a high CRI to render true colors. Use a dimmer or adjustable lamp so you can ramp brightness up for small parts and down for careful inspection.Position diffusers to soften any glare from glossy surfaces and make sure your eyes never strain from a single harsh light source.
Ergonomic setup should be the backbone of precision work. Set your bench height so your forearms rest comfortably on the surface with wrists straight and shoulders relaxed. If you switch between sitting and standing, consider a stable adjustable stool or sit-stand workstation to keep posture neutral across tasks. Keep frequently used tools within a short reach to avoid bending or twisting; use tool rails or a modular tray that places eyes and hands in a direct line of sight with the workpiece. An anti-fatigue mat underfoot and good foot placement help maintain steadiness during long sessions.
Lighting layout strategies and task zoning help you eliminate shadows and glare. place the main ambient light behind or to the side at about a 45-degree angle to the work area, so light wraps around the piece rather than bouncing straight into your eyes. Add a secondary task lamp that can be aimed at the exact spot you're inspecting, especially when working with fine marks, holes, or edges. Consider adding under-cabinet strips or a slim linear fixture along the back edge to reduce edge shadows and reveal texture. For very tiny work,a magnifying loupe with its own LED can pair with a cold,high-CRI light to boost contrast without changing color balance.
| Light Type | Position | Color Temp | Recommended Brightness |
|---|---|---|---|
| Ambient overhead | Center above bench | 4000-5000K | 300-600 lux |
| Task Lamp | Front edge, dominant hand side | 5500-6500K | 800-1200 lux |
| Under-Bench | Under edge or cabinet lip | 3000-4000K | 200-400 lux |
| Detail Light | Close to workpiece | 6500K | Varies with task |
Maintenance and quick-start protocol: regularly check lamp angles and diffusers as you reconfigure the bench for different tasks.Calibrate color perception by comparing against a white card in daylight; replace flickering bulbs instantly and keep lens surfaces clean to prevent glare. Reserve a short weekly routine to realign lighting zones when you add new tools or change the work queue. A steady, well-lit setup is not a one-time fix – it evolves with your workflow and grows with your skill.
Build Your Dream Workshop on a Budget →
Safe Power Planning and circuit Management in a compact Shop
Smart power planning in a compact shop starts with a precise map of every tool,light,and accessory you intend to run. List each device with its rated amperage (or wattage) and typical runtime, then separate continuous loads from intermittent ones. Apply the 80% rule for continuous loads to reserve headroom for startup surges and motor inrush. with that profile in hand, sketch a simple circuit plan that assigns dedicated circuits to heavy tools and leaves general outlets for lights and smaller devices.
Protective and code-driven choices keep the workspace safe and dependable. Install GFCI protection in moisture-prone zones and consider AFCI devices on circuits serving storage and work areas. Use properly rated wiring, avoid daisy-chaining extension cords for high-draw tools, and raise outlets to convenient heights to minimize cable clutter.label each breaker and each outlet with its assigned task so future changes don't compromise safety.
To translate planning into a practical layout, map out a concise plan and maintain visible safety margins. Use a compact reference table below to guide allocations, and practise tidy cable management to reduce trip hazards.The goal is a balanced, scalable setup that protects equipment and makes expansion simple.
| Load | recommended Circuit | Notes |
|---|---|---|
| Dust collection | 20A dedicated | Startup surge; keep separate |
| Table saw | 20A dedicated | High inrush current |
| Air compressor | 20A dedicated | Match startup current |
| General outlets & lighting | 15A shared | Plan for 80% loading |
Build Your Dream Workshop on a Budget →
Streamlined Workflows to Reduce clutter and Speed Projects
As you tighten the flow of work, clarity becomes your most reliable tool. Map every recurring task into a repeatable sequence, and you'll dramatically reduce back-and-forth decisions. Start by defining three core zones in your workshop: planning, in-progress work, and finished storage. Create one-page SOPs that spell out the exact order of steps, the roles responsible, and the target duration for each task. With a shared rhythm,equipment and materials stop drifting into corners and projects move with surprising speed.
- Label and color-code every tool, bin, and cord so you can grab what you need in seconds.
- Standardize setup and teardown steps into a short checklist that travels with every project.
- Batch similar tasks to minimize tool switches and measurement recalibration.
- Adopt templates for parts, drawings, and notes so every project starts from the same starting point.
- End each day with a 5-minute tidy-up and a quick scan for stray items that aren't where they belong.
The compact baseline workflow is shown below to give you a quick, repeatable reference that you can tailor.
| Stage | Action | Tools | Target Time |
|---|---|---|---|
| Plan & prepare | Define goal, gather specs, set timeline | SOPs, notebook, pencil | 5-10 min |
| Gather Materials | Pull parts, verify quantities | Bins, inventory sheet | 5-15 min |
| Execute Work | Assemble/finish | Main tools, PPE | 30-120 min |
| Review & Handoff | Inspect, document, store | Checklist, camera/notes | 5-10 min |
Beyond the table, embrace lightweight automation like templates and consistent naming conventions, and schedule a brief weekly review to calibrate timings, reclaim misfiled items, and keep clutter from creeping back.
Build Your Dream Workshop on a Budget →
Dust Control and Air Quality Management in a Tight Workspace
In a tight workshop, dust control is not merely an annoyance-it shapes visibility, health, and tool performance. A layered approach works best: control dust at the source,capture what escapes,and dilute remaining particles with proper air exchange. Begin by mapping the space into functional zones-cutting and sanding near a dedicated extraction point, storage kept separate from the workbench, and clear aisles that promote airflow. Prioritizing source control reduces the burden on every other system and creates a safer, more precise workspace.
Adopt a quick-reference setup that guides daily decisions. The table below highlights common methods, their primary benefits, and when to apply them in a compact shop. Treat it as a checklist during task planning or when reconfiguring for a new project.
| Method | Primary Benefit | Best For |
| Local dust collection | Capture at the source | Sanding, grinding, routing |
| Portable HEPA/air scrubbers | Improve general air quality | Smaller spaces, mixed tasks |
| Enclosed storage or dampers | Contain dust-prone materials | Dry powders, bulk material handling |
| Ventilation optimization | Supports dilution of airborne particles | Open-plan layouts, high activity |
Designate dust zones and use simple barriers to prevent cross-contamination. Position local extraction close to the dust source, and deploy portable HEPA units to pull residual particles through a defined path of airflow. Keep hoses,cords,and debris out of walkways to minimize disturbances that launch dust into the breathing zone. A practical workflow tip: transfer waste directly into sealed containers and only open them away from the main work area.
Maintenance and habit are powerful allies. schedule routine filter checks and replacements, and perform a quick air-quality check at shift end or after high-dust tasks. Equip workers with appropriate PPE-fold in task-specific guidance, such as respirators for fine dust and eye protection for splinters-and train everyone on tool shutoffs to prevent accidental dust bursts. By coupling a clean environment with consistent practices, you protect health, extend tool life, and keep projects on a steady, predictable track.
Build Your Dream Workshop on a Budget →
Q&A
What is the best way to plan a compact workshop layout?
Begin with your workflow. Sketch the main tasks-material prep, assembly, finishing-and lay out zones to minimize unneeded movement. Measure the space and look for vertical storage or folding surfaces to free floor space.
Which tools are essential in a very small space?
Prioritize versatile, compact tools that cover common tasks: a drill/driver, a benchtop saw or a compact oscillating tool, clamps, squares, measuring tools, chisels, and a utility knife. Choose space-saving models and keep the most-used items within arm's reach. Store batteries and cords on a dedicated, low-profile charging station.
How can I maximize safety and ergonomics in a tight workspace?
Keep walkways clear and lighting bright; add an anti-fatigue mat and an adjustable stool or chair to reduce strain. Mount tools at elbow height and organize around your primary tasks. Use push sticks, guards, and a simple dust-collection plan to keep air and surfaces clean.
What are practical storage ideas to keep a small workshop organized?
Use vertical walls for pegboards, slat walls, and magnetic strips to keep frequently used tools accessible. Add labeled bins, clear containers, and a rolling cart for end-of-day cleanup. Group items by task and keep a simple inventory to avoid overstuffing.
What budget-pleasant upgrades deliver the biggest impact?
Upgrade lighting with bright, energy-efficient LEDs to improve detail work.Add a compact workbench with integrated storage or a wall-mounted fold-out surface. A small yet effective dust collector or shop vac paired with a dedicated cleanup routine makes a noticeable difference.
Wrapping Up
Ultimately, the message is simple: a well-planned, modest footprint can unlock serious workflow. By defining your space, carving it into zones for cutting, assembly, and finishing, and keeping the essentials within easy reach, you turn setup time into productive time and misfires into insights. This matters to woodworking enthusiasts as safer, more focused spaces unleash creativity, accuracy, and steady momentum. Now is the moment to act: try a small project in your current layout, sketch a better floor plan, or dive into another guide to refine your setup.With intention and courage, your compact workshop becomes a gateway to bigger ideas.


This guide looks incredibly helpful! I love how it breaks everything down into manageable steps. Can’t wait to start organizing my space!
This is exactly what I needed! I’ve been wanting to set up a more efficient workshop but felt overwhelmed-this step-by-step approach makes it seem achievable!
I’m excited to try out these tips! I’ve been searching for a way to maximize my workshop’s potential, and this guide makes it look so straightforward. Thanks for sharing your expertise!
I couldn’t agree more with everyone! This guide is a game-changer for anyone looking to optimize their workshop. The clear structure and practical tips will definitely make the setup process feel less intimidating. Thanks for putting this together!
This is fantastic! I appreciate how thorough and easy to follow this guide is. It’s inspiring to see that creating an efficient workspace doesn’t have to be complicated. Looking forward to implementing these strategies!
This is an excellent resource! The practical advice and structured steps make it so much easier to tackle the workshop setup. I’m eager to dive in and transform my space!
This guide is a breath of fresh air! I’ve always found workshop setups to be daunting, but the clear, actionable steps provided here make it incredibly approachable. I can’t wait to start implementing these ideas and see how my space transforms!
This guide is just what I needed! I’ve struggled with organizing my workshop efficiently, but the step-by-step approach here feels manageable and inspiring. I’m looking forward to applying these tips and enhancing my workspace!
This guide is exactly what I’ve been searching for! The step-by-step instructions are straightforward and motivating, making it easy to envision my dream workshop. I’m excited to put these strategies to work and see the positive changes unfold!
This guide is a game changer! The detailed yet simple steps take the intimidation out of workshop setup, and I’m feeling energized to revamp my own space. Can’t wait to see the results!
This guide is fantastic! The clear, methodical steps take the confusion out of setting up a workshop, and I love how motivating it is. I’m ready to roll up my sleeves and bring my workshop vision to life!
This guide is incredibly helpful! The step-by-step format makes it easy to follow, and I appreciate the practical advice on maximizing space and functionality. I’m excited to get started on transforming my workshop!
This guide is a true gem! The clear, concise steps make it so easy to tackle setting up my workshop. I’m looking forward to implementing these tips and creating a space that inspires creativity and productivity!
This guide is absolutely brilliant! The step-by-step approach is not only easy to understand but also incredibly inspiring. I can’t wait to implement these ideas and create a workshop that truly reflects my passions and boosts my productivity!
This guide is nothing short of amazing! The step-by-step instructions are so straightforward, making it easy for anyone to understand and apply. I’m excited to start organizing my workshop and turn it into a productive and inspiring environment!
This guide is a lifesaver! The step-by-step instructions are so easy to follow and genuinely empowering. I can’t wait to start implementing these strategies to create a workshop that is both functional and inspiring. Thank you for such a valuable resource!
This guide is fantastic! The clear step-by-step instructions are perfect for someone like me who loves DIY projects but needs a little guidance. I’m eager to put these tips into action and create a workshop that truly reflects my vision!