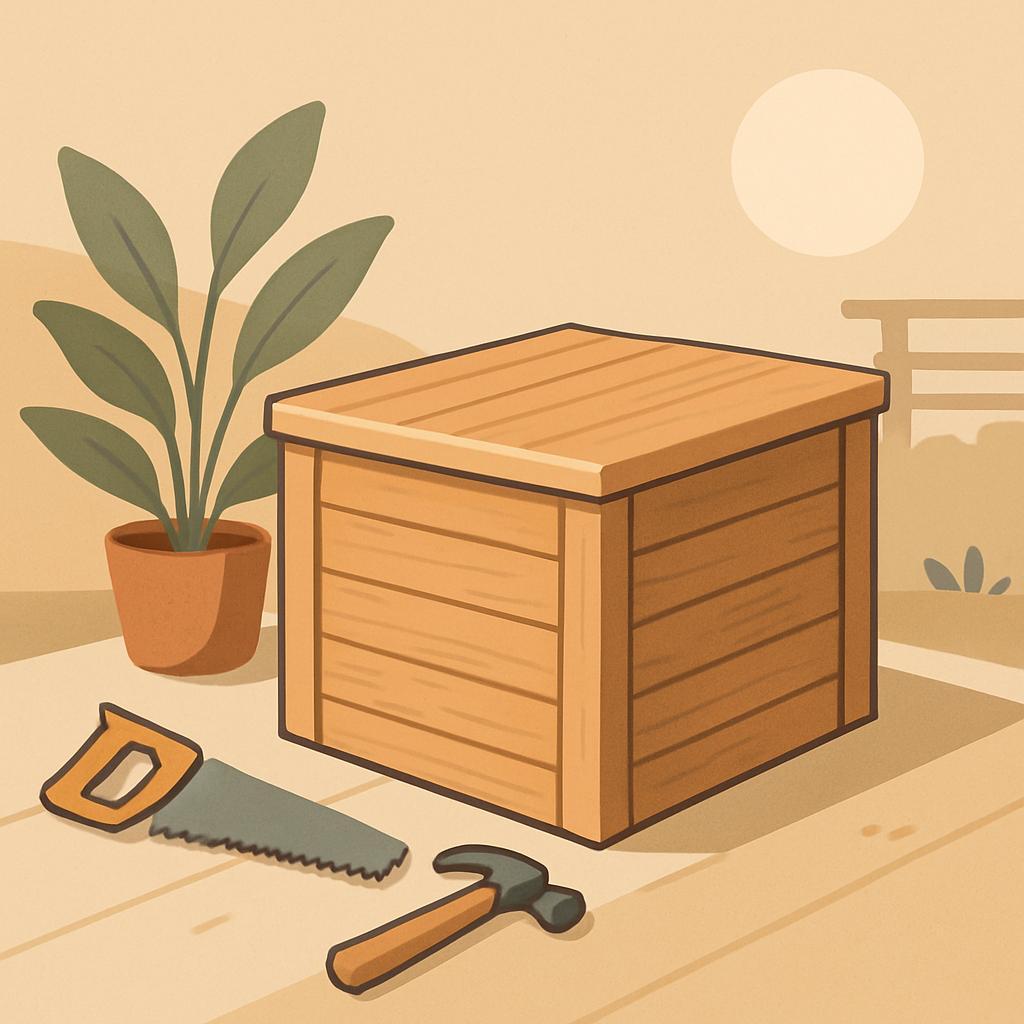
Sunlight, sawdust, and a little ingenuity can turn a simple board into a perennial outdoor asset. Build a DIY wooden storage box for your patio or deck and you'll gain not just a place to stash cushions, tools, and toys, but a compact studio for design and problem solving. For woodworking enthusiasts, this project blends practical joinery, finishes that stand up to rain, and efficient use of reclaimed or budget lumber. In this article you'll learn how to plan for size and airflow, choose durable hardware, cut and assemble confidently, and seal the box for years of outdoor service – with style.
:
Plan Your DIY Wooden Storage Box to Fit Your Patio or Deck
Before you cut a single board,map out the footprint of your box on the patio or deck. Measure available width and depth, account for the lid's clearance, and leave space for easy opening and for drainage. Think about how the box will interact with traffic: place it where it won't block doorways, stairs, or seating, and consider whether you want it to double as a bench. Create a simple checklist covering dimensions, weight, and access so your cuts stay precise.
Choose outdoor wood and realistic dimensions. For durability and a long life outdoors, opt for , , or pressure-treated pine. Aim for boards at least 3/4 inch thick, with a frame that resists sagging. Pair your frame with a weatherproof finish and stainless or coated hardware.A compact example: a box roughly 48 inches long,20 inches wide,and 18 inches tall leaves room for a liner and bulk storage. See the swift material comparison below:
| Wood Type | pros | Cons |
| Cedar | Rot resistant,natural look | More expensive |
| Pressure-Treated pine | Affordable,widely available | Can warp if not sealed |
| teak | Excellent durability,low maintenance | High cost |
Design details that protect the contents and the deck: a gasketed lid or a small air-vent to prevent moisture buildup,a drain hole or raised base,and a lid that stays open with a hinge or a simple magnetic catch if you want to access hands-free.For assembly, plan the order: cut panels, assemble the box frame with exterior-grade screws, install the bottom, attach a lid with sturdy hinges, and seal all joints. Then run a test: confirm clearance,test lid action,and check for pinch points. Quick steps:
- Double-check measurements and mark pilot holes to prevent splitting.
- Assemble the frame square and secure with weatherproof screws.
- Attach the bottom panel with evenly spaced fasteners and seal joints.
- Install the lid mechanism, then apply a weatherproof finish over all exterior faces.
finish and care: apply two coats of outdoor sealant or marine varnish, let dry fully between coats, and reapply annually or after heavy weather. If you'll sit on the box, consider a padded cushion and a weatherproof cover. Anchor the box to the deck if you have strong winds or a spirited crew, using exterior brackets or anti-tip hardware. plan a simple maintenance routine, like a yearly sand-and-seal and a quick check for loose screws.
Get Instant Access to 16,000+ Woodworking Plans →
Choose Durable Wood and Precise Dimensions for Outdoor Use
Durable wood choices set the foundation for a long-lasting outdoor storage box. For patio and deck environments,aim for rot resistance,dimensional stability,and minimal maintenance. Classic options include cedar and redwood, which weather gracefully and resist decay. If budget is tight, pressure-treated pine can work well, provided you seal and refresh the finish to keep moisture out. When possible, favor wood with straight grain and few knots to reduce warping and cracking.
Plan precise dimensions by mapping interior space and exterior clearances. Subtract hardware thickness and hinge swing from the overall length and width, and leave small drainage gaps so water doesn't pool on top. Outdoor lumber expands and contracts with moisture, so include expansion gaps of about 1/8 inch per foot of width along exposed joints. Build a sturdy frame with corrosion-resistant fasteners-stainless steel or hot-dipped galvanized-and pre-drill to prevent splitting. Finish the end grains with a weatherproof sealant to slow moisture ingress.
To help you choose quickly, refer to this concise guide on common outdoor woods. Here is a quick reference table with at-a-glance pros, cons, and ideal uses.
| Wood Type | Pros | Cons | Best For |
| Cedar | Rot-resistant,lightweight | Can be pricier | Low-maintenance containers |
| Redwood | Stable,natural oils | Color variation | deckside boxes |
| Pressure-Treated Pine | Affordable,strong | Chemicals; may warp | Budget builds |
| teak | Excellent durability | Very expensive | Premium outdoor pieces |
finish and maintenance. Apply an exterior-grade sealant or paint to all surfaces, paying special attention to end grains. Use stainless or galvanized hardware to resist corrosion and check fasteners annually. Re-seal every 1-2 years or as weather dictates to keep rot away and your box looking good season after season.
Get Instant Access to 16,000+ Woodworking Plans →
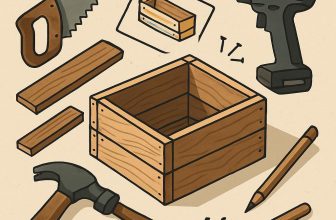
Gather Tools and Follow a clear construction Guide
Gather your tools with intention and select a clear construction guide that matches the size of your planned wooden storage box. Having the right gear at hand speeds up assembly and helps you stay consistent with joints and edges.Before you cut, lay out a clean workspace, put on safety glasses, and organize fasteners in a tray.A prepared setup keeps mistakes to a minimum and makes the process enjoyable rather than stressful.
Kick off with a careful review of your plan and a concise cut list. Mark every line on your stock with a square and a pencil, then dry-fit the pieces to confirm they align before you glue or screw anything together. To help you stay organized, here's a quick reference of essential tools and their roles:
| Tool | Why it's essential | Tip |
|---|---|---|
| Measuring tape | Accurate dimensions for a snug fit | Measure twice, cut once |
| cutting tool (circular saw or hand saw) | Make straight, clean cuts | Use a straightedge guide |
| Drill/driver | Pilot holes and secure fasteners | Pilot holes prevent splitting |
| Clamps | Hold parts during glue-up | Two hands free for alignment |
| Wood glue | reinforces joints | Spread evenly along edges |
| Sandpaper or sander | Creates a smooth surface | Finish with 120-180 grit |
Follow these practical steps to assemble cleanly:
- Cut pieces to size according to your plan, ensuring faces are square.
- Drill pilot holes to prevent wood from splitting when you drive fasteners.
- Dry-fit the components to check alignment before glueing.
- Apply a thin bead of wood glue along joints, then clamp firmly until tack-free.
- Attach fasteners, staying mindful of alignment and edge clearance.
- Sand the assembled box smoothly and round any sharp corners.
Finish with moisture resistance in mind: apply an exterior-grade sealant or finish, especially on the deck where weather exposure is common. Consider a lightweight lid with a small handle and a simple gasket if you want extra rain protection. Proper finishing extends the life of the box and keeps your stored items safe from the elements.
Get Instant Access to 16,000+ Woodworking Plans →
Weatherproofing and Finishing for lasting Outdoor Durability
Weatherproofing starts with selecting the right wood and preparing the surface. For a patio or deck box, choose wood that handles moisture well-pressure-treated pine, cedar, or tropical hardwood. Before applying any finish, wipe away dust, repair cracks with a lightweight filler, and sand smooth with 120-180 grit until the surface feels even. Clean,dry wood helps finishes adhere and reduces peeling down the line. Route or seal any exposed ends to minimize water ingress, and use galvanized or stainless fasteners to prevent rust staining over time.
choose a finish strategy that balances appearance with protection. Penetrating oils or water-repellent sealers preserve a natural look while blocking moisture, but they may require more frequent reapplication. If you prefer color or stronger protection, pair a stain (or sealer) with a durable topcoat such as marine-grade polyurethane, spar varnish, or exterior acrylic. Apply thin coats, following the manufacturer's directions for cure times, and sand lightly between coats for adhesion. In high-sun areas, opt for a UV-resistant topcoat to slow color fading and surface checking.
| Finish Type | Pros | Best Use | Recoat |
|---|---|---|---|
| Penetrating Oil | Deep moisture resistance, natural look | unpainted wood, warm tones | 1-2 years |
| Marine Spar/Urethane | UV resistance, flexible film | Exposed surfaces | 1-3 years |
| Stain + Topcoat | color + protection | Sun-exposed to shaded areas | 2-4 years |
Maintenance and practical considerations keep your project durable year after year. Regularly inspect seams and hardware for peeling, rust, or cracks, and touch up with matching sealant when needed.allow for ventilation and avoid sealing every joint completely; a small gap under the lid helps moisture escape.For best results, plan recoat cycles around your climate: more sun, rain, or humidity means sooner refreshes, typically every 1-3 years, with full cure before heavy use.
Get Instant access to 16,000+ Woodworking plans →
Design Wise Lids and Interior Organization for Easy Access
Design wise, the lid should balance protection with easy access. A flat, overhanging lid with a recessed grip keeps rain off the interior and gives you a clean place to grab, while minimizing weight.If you want hands-free or single-handed operation, a simple lid stay or light-duty hinge with a gentle lift helps. Use exterior-grade lumber such as cedar or pressure-treated plywood, and seal all edges to resist moisture. A weatherproof finish on the lid before assembly prevents soaking and warping and lengthens the life of the box.
Interior organization begins with modular storage that can flex with the seasons. A shallow, removable top tray keeps nails and fasteners at hand, while a deeper main compartment handles larger tools or gloves. Use adjustable dividers or slotted bins so you can reconfigure as tools change. Label compartments with durable stickers or a small chalkboard panel on the inside of the lid, and consider pull-out features for easy reach.
| Layout | Best for | Notes |
|---|---|---|
| Shallow top tray + deep main | Small fasteners,hand tools | Simple,quick access |
| Removable bins | Separation by item type | Reconfigurable |
| Pull-out drawer | Easy reach for deeper items | Requires guides |
Smart access details can make a big difference in daily use. Install a pair of magnetic catches to hold the lid open at a safe angle, and add a thin rubber gasket along the lid edge to keep moisture out without sticking. For visibility, affix durable labels on the inside of the lid or along the front of trays-color-coded dividers help family members grab the right items first try. If you anticipate tools being used outdoors,consider windproof strapping to prevent flip-through on breezy days.
Finish the build with practical maintenance in mind. Use exterior-grade sealants and consider a weatherproof, UV-resistant finish that won't crack in sun. Add a removable liner or tray system that can be taken indoors when rain is forecast. design the interior with modularity in mind so your box grows with your patio toolkit, keeping everything accessible and organized for relaxed outdoor living.
Get Instant Access to 16,000+ Woodworking Plans →
Maintenance and Safety Tips to Extend the Life of Your Wooden box
Regular cleaning and moisture management are essential to extend the life of your wooden storage box. After seasons of outdoor use, wipe the surface with a soft cloth and a mild soap solution to remove pollen, dust, and humidity buildup. Keep the wood dry and inspect for small cracks or splinters that could trap moisture. Since outdoor wood swells and shrinks with rain and sun, allow for slight movement and avoid sealing it airtight. A quick annual inspection for mold or mildew on shaded spots helps prevent staining and deterioration.
Protective finishes matter.Choose an exterior-grade, breathable sealant or a UV-rated solid stain to repel water while letting the wood breathe. Before applying, lightly sand, remove dust, and apply thin coats according to the product instructions.Refinish every 1-3 years depending on climate,sun exposure,and wear. Test a small area first to confirm color and compatibility with existing finish.
| Task | Frequency | Tip |
|---|---|---|
| Clean & inspect | Monthly | Wipe with mild soap; look for cracks |
| Refinish/seal | 1-3 years | Use exterior-grade, breathable finish |
| Check hardware | Every 6-12 months | Tighten screws; replace rusted parts |
Hardware health and structural integrity are the backbone of a long-lasting box. Periodically inspect screws, hinges, and corner joints for looseness or rust. Replace any weathered hardware with stainless steel or galvanized fasteners to resist corrosion. If you notice cracks along joints or loose boards, address them promptly with wood filler and light sanding to maintain a tight seam and prevent water intrusion.
Placement and usage practices also matter. Elevate the box above ground level with short legs, pavers, or a small base to reduce moisture wicking from soil. Position it in a shaded area when possible, or use a breathable outdoor cover during heavy rain to prevent soaking. A light rain guard and a ventilated lid help shed water away from the interior, while keeping cushions or tools dry inside with a breathable liner.
Get Instant access to 16,000+ Woodworking Plans →
Q&A
What materials and tools do I need to build a sturdy, weatherproof wooden storage box?
Choose exterior-grade wood such as cedar or exterior plywood rated for outdoor use. Use stainless or galvanized hardware, weatherproof screws, and a good wood glue; add a base frame to lift the box off the ground. Stock up on a water-repellent sealant or exterior stain and a UV-protective finish, plus a hinge set and lid support for smooth operation.
How should I size and design the box for a patio or deck?
Size the box to fit the space and the items you'll store. Plan interior dimensions a bit smaller than the outer frame to allow for framing and weatherproofing, and consider a lid that's easy to lift or held open by a prop or gas struts. Include ventilation gaps or small slots to prevent moisture buildup.
What finishes keep the box protected without harming the habitat or making it slippery?
Use a UV-protective exterior stain or paint and a water-repellent sealant to keep wood from warping or cracking. Choose non-slip, low-toxicity finishes if kids or pets frequent the deck. Reapply the finish according to the product guidelines, typically every 1-2 years.
How can I make the box secure and safe around kids or pets?
Install a latch or hasp to secure contents, and consider soft-close or stay hinges to prevent finger pinches. Use a safe lid-preferably with a gas strut or prop-so it won't slam shut. Place the box on a stable base and avoid mounting it where it could tip or trap fingers.
What practical tips help with assembly, drainage, and long-term upkeep?
During assembly, leave a small gap around edges to allow for wood movement and consider adding tiny drainage holes near the base. Place the box on a raised base or feet to prevent standing water and rot. Inspect screws, hinges, and the finish at least once a year and reseal or touch up as needed.
Closing Remarks
Whether you build for sunlit afternoons or stormy decks, the wooden storage box proves that simple parts and patient finishing can transform outdoor space. The key takeaway: plan for weather, choose durable joinery, and finish with protection that suits your climate. This project matters to woodworking enthusiasts as it blends form and function, tests layout, and reinforces core skills-measuring, cutting, aligning, and sealing. So roll up sleeves, sketch your dimensions, and try a build today. If you're not ready, explore more guides or adapt the design to your style. Every box you craft brings you closer to a kinder, more capable workshop-and a brighter patio.


This looks like such a fun project! Can’t wait to try it out and finally get my outdoor space organized. Thanks for the inspiration!
This is such a great idea! I love that it adds both style and functionality to my patio. Looking forward to customizing it with my own paint colors!
This project is awesome! I can’t wait to make one for my deck; it’s the perfect way to keep things tidy and add some personal flair to my outdoor space!
This is exactly what I need for my patio! I’m excited to get creative with the design and make it a unique piece that shows off my style while keeping everything organized.
I’m so inspired by this post! A DIY wooden storage box will not only help keep my patio tidy but also give me a chance to infuse my personal touch with some fun wood stain and hardware. Can’t wait to get started!
This project is exactly what I’ve been looking for! I love the idea of having a stylish storage box on my deck while also getting to be creative with the design. It’s the perfect blend of practicality and aesthetics-count me in!
I’m really excited about this DIY wooden storage box idea! It seems like a fun project that will not only add character to my outdoor area but also solve my storage issues beautifully. Can’t wait to see how it turns out!
I’m thrilled to see so much enthusiasm for this DIY wooden storage box! It sounds like a fantastic way to enhance our patios while maintaining organization. I love hearing everyone’s ideas and can’t wait to share my own creations once I get started!
I love the idea of a DIY wooden storage box for the patio! It’s not only a great way to declutter but also allows for some personal flair. I’m eager to get my tools ready and start creating something functional and beautiful for my outdoor space!
What a fantastic project! I can’t wait to try my hand at making a DIY wooden storage box for my deck, combining functionality with a touch of my own style. It’s inspiring to see everyone sharing their excitement and creativity-let’s build something amazing together!
I’m so inspired by all the enthusiasm for this DIY project! A wooden storage box sounds like a perfect addition to my patio, offering both practicality and a chance to express my creativity. I can’t wait to start planning my design and see how everyone else’s projects turn out too!
I absolutely love the buzz this DIY wooden storage box is creating! It’s such a clever way to marry function with style on our patios or decks. I’m looking forward to diving into this project and seeing all the unique designs everyone comes up with-let’s make our outdoor spaces even more inviting!
I’m really excited about this DIY wooden storage box project! It’s a perfect opportunity to combine practicality and aesthetics, and I can already envision how nice it will look on my patio. Can’t wait to see everyone’s innovative designs and share my progress too!