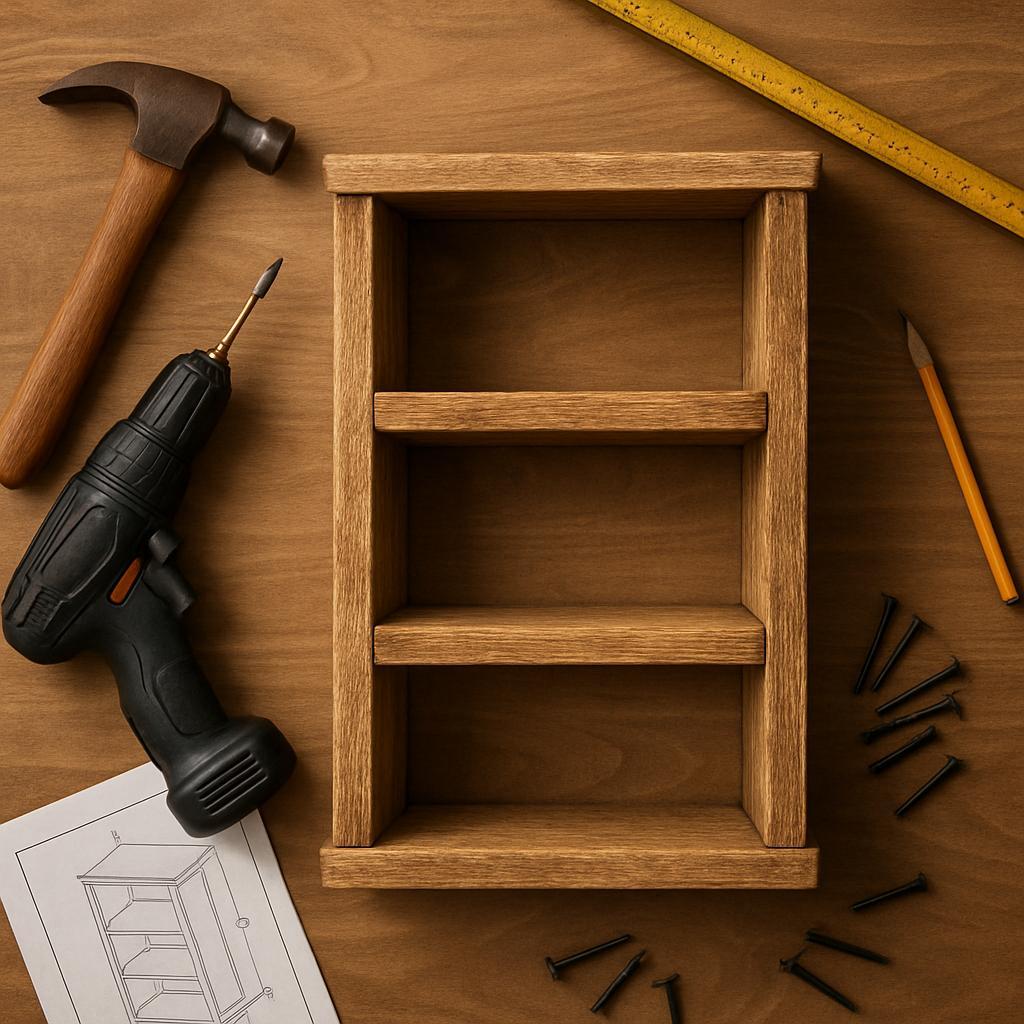
Picture this: a rustic bookshelf emerging from a handful of planks as if shaped by time itself. For woodworking enthusiasts, it's more than a shelf-it's a compact masterclass in planning, joinery, and finish that yields a sturdy, heirloom-ready piece. You'll learn to read grain, select boards, cut with accuracy, and assemble with durable joints while cultivating a weathered, living finish. This article lays out a clear,step-by-step path from lumber selection to final touch,with practical tips on measuring,hardware,and distressing to capture rustic charm. By the end, you'll have a proven build and reusable techniques you can apply to future projects.
Choosing the right wood for a rustic bookshelf
Choosing the right wood sets the tone for a rustic bookshelf more than any finish. start by considering were the piece will live and how much weight it will bear. Wood that is kiln-dried to about 6-8% moisture resists warping in typical indoor climates, making assembly and upkeep easier. If you love the character of knots and grain, plan for a few natural imperfections, but balance aesthetics with structural needs to prevent sagging shelves over time.
Below are wood options that balance rustic charm with practicality, depending on yoru budget and skill level:
- Knotty Pine - budget-friendly, warm tone, easy to work with; best sealed to resist dents and stains.
- Reclaimed Timber – unique character, sustainable, but check moisture and pest history; expect variation.
- Oak - durable, classic grain; holds finish well and resists wear.
- Walnut – rich color and stability; higher cost and weight,but striking in rustic shelves.
- Cedar – lighter, naturally pest-resistant; great for lighter loads and a fragrant finish.
When shopping, inspect boards for straight grain and minimal twists. Ask for kiln-dried stock and request a moisture reading; aim for moisture content near to 6-8% for indoor use. Consider how you will finish the wood: a matte oil or satin polyurethane enhances grain without glare, while a heavier varnish can obscure the rustic texture. Plan joinery and cut lists with the wood's natural tendencies in mind to keep the shelf level over time.
| Wood | Best for | Notes |
|---|---|---|
| Knotty Pine | Budget-friendly charm | Soft; dents; seal recommended |
| Reclaimed Timber | Character & sustainability | Variable; check moisture |
| Oak | Durability & classic grain | Sturdy; accepts finishes well |
| Walnut | Premium rustic look | Heavy; higher cost |
| Cedar | Pest resistance & aroma | Lightweight; color can vary |
Get Instant Access to 16,000+ Woodworking Plans →
Planning layout and dimensions for a balanced rustic bookshelf
Begin by outlining the bookshelf footprint in the room. Measure the available wall space,noting door swings,baseboards,and nearby windows. A balanced rustic piece frequently enough reads as agreeable size: aim for a width that occupies roughly one-third to one-half of the wall, with space left for art or furniture on either side.Depth should stay practical for a wide range of books and objects-10-12 inches is a sweet spot that keeps the silhouette clean and shelves accessible. consider ceiling height too: a total height around 72 inches suits many rooms while letting you top the unit with a few decorative accents.
| Component | Typical Dimension | Why It Matters |
|---|---|---|
| Depth | 10-12 in | Keeps books within easy reach |
| shelf Height per Bay | 12-14 in | Accommodates most paperbacks and many hardcovers |
| Total Height | 60-84 in | Matches ceiling height and furniture scale |
| Width per Bay | 14-18 in | Balanced look and stable weight |
With footprint and height defined, map a layout that feels harmonious. Decide whether to go with two or three adjacent bays or a wider central section flanked by narrower shelves. Symmetry signals stability, while a touch of asymmetry adds character-just avoid visually lopsided proportions. Build in adjustability where possible: adjustable shelves handle everything from paperbacks to oversized coffee-table editions. Use the table above as a speedy reference to anchor your cut list and ensure consistent spacing across bays.
Finish and safety considerations matter as much as the wood you choose. Select reclaimed or kiln-dried boards with a rustic grain and a protective finish that tolerates sunlight and humidity.For stability, anchor the unit to the wall and distribute weight evenly across shelves, placing heavier volumes toward the bottom.Leave a small gap at the base for dust and ventilation, and consider leveling feet to compensate for uneven floors. sketch the plan on graph paper or with a digital tool, then build a small prototype to verify balance before committing to full-length boards.
Get Instant Access to 16,000+ Woodworking Plans →
Essential tools and materials for rustic bookshelf craft
Before you cut a single board, gather the core woodworking tools that keep lines true and angles clean. Essential items include a reliable measuring tape or ruler, a combination square for accurate marks, a handsaw or circular saw for break-down cuts, and a drill/driver with a set of bits for pilot holes and fasteners. A sturdy work surface, a clamp assortment, and good lighting help you work safely and efficiently. Don't forget safety gear: eye protection, hearing protection, and a dust mask to stay comfortable through longer sessions.
Choose materials that bring rustic warmth and structural stability. for a timeless bookshelf, start with wood stock in pine, poplar, or reclaimed boards with straight grain and minimal warp. Plan for a few inches of excess stock to allow for planing and squaring. Finishes can be simple and tactile-think oil or wax finishes that enhance grain without gloss-paired with corrosion-resistant fasteners such as stainless screws or brass nails for a vintage vibe.
Planning the workflow helps you stay efficient. Having a simple checklist keeps you focused: measure twice, cut once; dry-fit joints before final assembly; and test-fit shelves with temporary supports. For a quick reference, consider the following breakdown of recommended gear and its primary role.
| Tool or Material | Purpose | Examples |
|---|---|---|
| Measuring tool | Accurate dimensions | Tape measure, steel ruler |
| Saw | Cut stock to size | circular saw, backsaw |
| Adhesive | Adds stability to joints | Wood glue, hide glue |
| Finish | Protects and adds character | Oil, wax |
Once you're ready to assemble, clamp pieces firmly, use adhesive sparingly where appropriate, predrill pilot holes to prevent splitting, and sand through grits from 120 to 220 for a smooth, even surface. A light hand with a wax or oil finish deepens the rustic character while preserving wood's natural feel. Keep a small stock of scrap wood for tweaks,and store tools in a dedicated spot so this project can be easily revisited in the future.
Get instant Access to 16,000+ Woodworking Plans →
Joinery and assembly techniques for a durable rustic bookshelf
When building a durable rustic bookshelf, the backbone is solid joinery and careful assembly.Prioritize joints that resist racking and accommodate seasonal wood movement, and plan for a frame that stays square as boards flex with humidity. In rustic style, visible joinery can be a feature, but it should be deliberately chosen for strength and ease of maintenance. Start by labeling pieces, checking grain direction, and imagining how the shelf will bear weight as you work.
Choose joinery that suits solid wood or reclaimed boards. For a bookshelf built to last, consider these reliable joints: mortise-and-tenon for corners, dado or rabbet for shelf supports, and dowel or pocket-hole connections for secondary panels. The key is combining joints that share load paths and keep panels from cantilevering. Below is a quick reference to common options:
| Joint | Best Use | Pros | Cons |
|---|---|---|---|
| Mortise-and-Tenon | Frame corners | Extremely strong, enduring | Requires precise cutting |
| Dado | Shelf dados into sides | Good load transfer, simple to cut | May reduce side thickness |
| Rabbet | Back panel, top/bottom rails | Strong against pullout, easy to assemble | Can weaken edge if overcut |
| Dowel or Pocket-Hole | Secondary panels, quick builds | Fast, repeatable | Less traditional look; requires plug caps |
Assemble with a plan for alignment and square. Dry-fit all pieces before glue, then clamp aggressively while you drive fasteners.For edge-to-edge joints, apply a liberal but controlled amount of wood glue and use cauls to keep faces flush.When using dowels or pocket screws, predrill to prevent splitting and ensure consistent line-up. For rustic aesthetics, consider contrasting screws or wooden plugs that blend with the wood rather than standing out.
Finishing and final setup matter as much as raw strength. use a back panel that resists racking (plywood or a narrow solid strip), and install adjustable or level shelf supports to accommodate wood movement. Check for twist by placing the bookshelf against a wall and testing with a square; adjust clamps and shims as needed. apply a finish that enhances the grain and seals joints without obscuring the joints you designed, such as oil and wax, or a matte polyurethane for durability.
Get Instant Access to 16,000+ Woodworking Plans →
Finishing touches to enhance rustic charm and wood protection
Finish coatings come down to two goals: protect the wood and preserve its rustic warmth. Start with a dust-free surface: vacuum, then wipe with a tack cloth, and give the wood a final light sanding with 220-320 grit to smooth only the high spots. Apply the finish in thin, even layers using a natural bristle brush or a lint-free cloth, and let each coat cure fully before the next. Between coats, a whisper of gentle sanding with 320 grit creates a satin-smooth base that keeps the grain breathing rather than sealing it flat.
To help you compare at a glance, here is a quick guide to common finishes for this bookshelf. The table below highlights practical trade-offs so you can pick what suits your style and habitat.
| Finish | Pros | Cons | best For |
|---|---|---|---|
| Tung oil / penetrating oil | Enhances grain; natural look | Darkens over time; needs maintenance | Rustic warmth, easy refresh |
| Water-based polyurethane | Durable; clear finish; quick dry | Can raise grain if not prepared | High-traffic shelves |
| Wax or wax-paste topcoat | Soft luster; easy touch-ups | Limited protection; needs reapplication | Patina and tactile feel |
| Danish oil / oil-based wipe glaze | Deepens grain; good balance | Slower cure; odor | Aged rustic charm |
Maintenance and protection: after the final coat cures, position the shelf away from direct sunlight and heat sources to reduce fading and cracking. Place felt pads at the feet to protect floors, and keep coasters or mats under any drinks or mugs that might rest on the shelves. Dust regularly with a soft cloth and wipe spills promptly with a dry cloth. If you used a wax topcoat, buff lightly with a clean cloth and re-wax every few months to maintain luster and protection.
Finishing touches to seal the rustic vibe include gentle edge treatment and hardware choices. A light hand with steel wool and a touch of glaze in the grain can bring out character without looking contrived. Choose hardware in a matte black or brushed bronze to complement the warm wood, and consider leather pulls or simple iron brackets for a truly rustic finish. The result should feel timeless, handcrafted, and ready to weather years of use.
Get Instant Access to 16,000+ Woodworking Plans →
Display ideas and maintenance tips for a rustic bookshelf
Let the rugged charm of a rustic bookshelf tell a story. Vary shelf heights and arrange items in staggered clusters: a stack of well-thumbed novels, a woven basket, a ceramic jug, and a framed photo leaning against a vertical spine. Mix textures-rough-hewn wood, soft textiles, and a touch of greenery-to keep the display balanced and lively. Use warm lighting to highlight grain and pockets of negative space, and keep a few empty shelves to preserve air for the wood to breathe.
Maintenance is part of the craft. Dust weekly with a microfiber cloth to prevent grit from scratching the surface, and tighten any loose screws or brackets as part of a quarterly check. Seal the wood with a breathable oil or wax every 6-12 months to preserve the patina; avoid harsh chemical cleaners that can strip the finish. Protect the shelves from water and heat sources, and place coasters or felt pads under glass or ceramic items to avoid ring marks. For seasonal care, keep humidity around 40-50% to prevent warping.
| Task | Frequency | Tip |
|---|---|---|
| Dusting | Weekly | Use microfiber cloth; don't spray cleaner directly on wood |
| Oil/Wax | Every 6-12 months | Apply thin layer; wipe excess |
| Inspect hardware | Every 3-6 months | Retighten screws; check shelf supports |
Display ideas by room to keep a rustic bookshelf visually compelling. In a living room, create a vignette with a mix of books, a vintage lantern, and a small plant in a terracotta pot; in a hallway, lean a narrow framed print and slot in a few slim boxes for mail and keys; in a bedroom, balance a stack of magazines with a ceramic mug and a candle for a cozy reading nook. Aim for a rhythm of heavier items on the lower shelves and lighter, airier pieces up top to maintain stability and flow.
Practical steps to keep it looking intentional: choose a consistent wood tone or complementary accents, avoid overloading any single shelf, and use decorative storage baskets for a neat silhouette. When something new arrives, try a temporary swap-move a few items to a nearby surface and rotate in a couple of different textures to refresh the scene without buying new pieces. The result is a functional display that ages gracefully with the room, rather than a static backdrop.
Get Instant Access to 16,000+ Woodworking Plans →
Q&A
What materials reliably give a rustic shelf that still lasts?
Opt for solid wood or high-quality plywood in warm tones-think pine, oak, or reclaimed boards for instant character. Choose 3/4-inch thick shelves for durability, with sturdy joinery like screws and wood glue.If you're using new wood, consider a simple planing and a light stain to highlight natural grain.
How do I size and space the shelves to fit my room and books?
Measure the available wall height and width, plus the distances to doors and windows, then sketch a layout with shelf heights that fit typical book sizes. Plan at least 6-12 inches of clearance above the top shelf and equal gaps between shelves as needed for broader collections. For freestanding units, ensure a wide base or add a back panel to improve stability.
What are the key steps to assemble the shelf safely and smoothly?
Cut and dry-fit parts, drill pilot holes, and drive screws with wood glue for stronger joints; never skip the pilot holes on hardwood. Assemble on a flat surface, checking level as you go, and use a clamp to keep pieces aligned. If the unit is tall, anchor it to the wall for safety.
Which finishes best bring out the rustic vibe while protecting the wood?
Choose a low-sheen finish-oil, wax, or matte polyurethane-to preserve grain while guarding against wear. A light stain can warm the tone, or skip stain for a natural, weathered appearance. Apply thin coats, sand lightly between applications, and wipe off excess for an even, durable finish.
Future Outlook
Completing a rustic bookshelf isn't about a single trick,but about embracing clear steps,patient measurement,and thoughtful finish. The core takeaway here is that simplicity-preparation, straight cuts, and a durable finish-yields sturdy, character-filled shelves you can be proud of. For woodworking enthusiasts, the project matters as it translates a plan into tangible pride: learning to select joinery, test fits, and refine textures while honoring the wood's story. If you're inspired, pick up a small project today, or dive into more guides to expand your toolkit. Apply these habits: measure, cut, sand, seal. May your workshop stay curious,and your shelves stand strong.


This guide looks fantastic! I can’t wait to try making my own rustic bookshelf-thanks for sharing such detailed steps!
This is exactly what I needed! I love the rustic look, and your detailed guide makes it so approachable. Excited to get started on my project!
This is such a helpful guide! I’ve always wanted a rustic bookshelf, and with your clear steps, I feel confident I can tackle this project. Can’t wait to see how it turns out!
I’m thrilled to find this guide! I’ve been wanting a rustic bookshelf for ages, and your clear steps make it feel achievable. I appreciate all the effort you put into this-it’s going to inspire so many DIY enthusiasts!
What a fantastic guide! I’ve been looking for a project to spruce up my living space, and the rustic bookshelf fits the bill perfectly. Your detailed steps and tips are incredibly motivating-I’m ready to roll up my sleeves and get started!
I’m really impressed with this guide! The step-by-step instructions make it so easy to follow, and I love the rustic aesthetic. Can’t wait to gather my materials and start building my own masterpiece!
What an excellent resource! The step-by-step format really simplifies the process, and the rustic design is just what my home needs. Looking forward to building this bookshelf and adding a personal touch to my space!
This guide is just what I needed! The clear steps make the project feel manageable, and I love the rustic vibe-perfect for my living room. Excited to dive in and create something special!
This is just what I was looking for! The detailed steps are super helpful, and I can’t wait to bring that rustic charm into my home. Thanks for sharing such an inspiring project!
I absolutely love this guide! The step-by-step instructions are easy to follow, and the rustic style is exactly what I’ve been wanting for my home. Can’t wait to start this project and see how it transforms my space!
This is such a fantastic guide! The step-by-step approach really clarifies the process, and I adore the rustic feel you’re promoting. I’m eager to start making my own bookshelf and add some character to my home!
This guide is absolutely brilliant! I love how the step-by-step instructions make it feel doable, and the rustic look is perfect for my style. I’m excited to get started and enhance my home with this beautiful bookshelf!
This guide is simply amazing! The clear and concise steps make it so approachable, and I’m really drawn to the rustic aesthetic-it’s going to add such warmth to my space. Can’t wait to gather my materials and get started on this project!
This guide is fantastic! The detailed steps make it easy to follow, and I’m excited about incorporating that rustic charm into my living room. Thanks for sharing this wonderful project!
This guide is truly inspiring! The step-by-step format makes it so accessible, and the rustic design will really bring a cozy vibe to any room. I’m looking forward to trying it out and giving my home some charming character!
This guide is incredibly well done! The step-by-step instructions are clear and easy to follow, and I love how the rustic style adds a personal touch to any space. I’m excited to dive into this project and create something unique for my home!
This guide is exceptional! The step-by-step format really helps demystify the process, and I’m thrilled about the rustic style-it resonates so much with my decor preferences. Can’t wait to start building my own bookshelf and add some personal flair to my home!