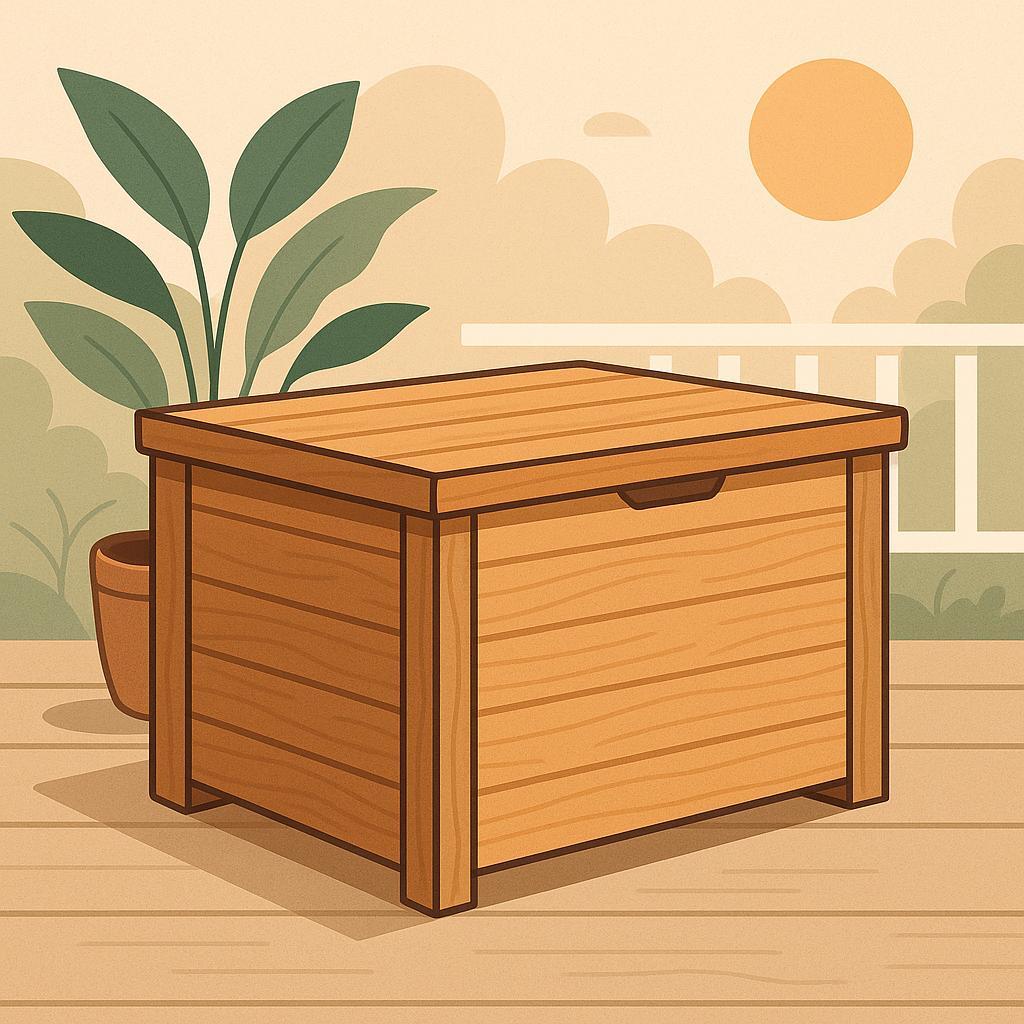
Imagine a weather-ready wooden box that doubles as a bench and keeps cushions, toys, and tools neatly tucked away on your patio. For woodworking enthusiasts, it's a perfect test of design, joinery, and outdoor finishes-where form meets function under the sun. This project matters as a well-built storage box extends the life of outdoor gear and keeps your deck inviting rather than cluttered. In this article you'll learn how too plan dimensions, select materials, and choose a finish that withstands rain and sun. You'll also see step-by-step techniques for simple mortise-and-tenon or box-joint construction, weatherproof lids, and practical hardware choices. By the end, you'll have the skills and a scalable plan to craft your own stylish storage box.
:
Choosing the Right Wood and Materials for a Wooden Storage Box on the Patio
Outdoor woodworking rewards careful wood and material choices that stand up to sun, rain, and humidity. Start by assessing your patio's conditions: is there strong sun all day, a damp corner, or salty breeze nearby? Use rot-resistant woods and exterior-grade finishes, and plan for airflow beneath and around the box to prevent moisture buildup. A vented lid or slatted top can dramatically reduce condensation while keeping items accessible.
Top wood options for a patio storage box balance durability, workability, and personality. Cedar and redwood offer natural rot resistance and pleasant grains, while pressure-treated pine provides budget-amiable strength with proper sealing. For premium endurance in harsh environments, teak or ipe are standout choices-though they come with a higher price tag. If sustainability matters,seek FSC-certified sources and salvage usable boards from other projects to minimize waste.
Paneling and fasteners set the stage for longevity. Use exterior plywood with weather-resistant glue for panels or solid boards for a traditional look.For joints, reinforced screws and corrosion-resistant hardware outperform nails in outdoor settings. Choose stainless steel or hot-dipped galvanized fasteners, and seal cut ends to slow moisture ingress. Finishes range from penetrating oils and transparent exterior stains to opaque deck paints; a UV-blocking top coat keeps color and grain looking fresh. If you prefer a painted finish, choose a mildew-resistant exterior acrylic and apply several thin coats.
To help you compare at a glance, here's a quick table of common outdoor woods and how they fare for a storage box. It highlights durability, maintenance, and typical cost to help you balance budget with performance.
| Wood option | Durability outdoors | Maintenance | Typical cost |
|---|---|---|---|
| Cedar | Excellent rot resistance; natural oils | Low to moderate annual sealant | Low-moderate |
| Redwood | Good rot resistance; stable | Annual sealant; occasional sanding | Moderate |
| Pressure-treated pine | Good; treated to resist decay | Annual sealing; check for cracks | Low |
| Teak | Excellent; very durable | Low maintenance; periodic top-up oil | High |
| Ipe | outstanding; dense and durable | Occasional cleaning and oiling | High |
Get Instant Access to 16,000+ Woodworking Plans →
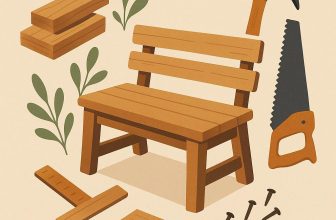
Designing a Stylish and Practical Wooden Storage Box for Your Deck
starts with a clear vision of how you'll use it and where it will live. Think about whether you want a discreet chest for cushions, tools, and outdoor essentials, or a bench that invites a quick seat while concealing items beneath. The box should harmonize with your deck's color and grain, while meeting practical demands like wind resistance, rain protection, and safe lid operation. Plan for pleasant lid height and easy access so you don't have to duck or squeeze to retrieve items.
Material choice and joinery set the foundation for longevity. Favor rot-resistant woods such as cedar or teak,or use high-grade treated lumber with a waterproof finish for budget builds. Use solid joinery-finger joints, mortise-and-tenon, or box joints-for lasting strength, and attach stainless steel hardware to resist corrosion. Add a weatherproof seal around the lid and a shallow drainage base to prevent standing moisture. Consider a lid design that stays open safely, like gas-strut hinges or a soft-close mechanism, so you don't pinch fingers or slam the top in a breeze.
Layout and finishing touches make the box feel intentional rather than utilitarian. Decide whether you want interior dividers or trays to keep cushions, covers, or garden tools organized, and leave a small vent to prevent humidity buildup. For a seamless look, paint or stain the exterior with a UV-safe coating that complements your railing or furniture, and seal the interior to protect stored fabrics from moisture. Regular maintenance-annual cleaning, reapplication of sealant, and inspecting hardware-will extend the life of your box and keep it looking fresh on your deck.
| Wood Type | Pros | Cons | maintenance |
|---|---|---|---|
| Cedar | Naturally rot-resistant; attractive grain | Can be pricier | annual sealing recommended |
| Teak | Remarkable durability; minimal upkeep | Most expensive | Occasional oiling to maintain color |
| Pine (pressure-treated) | Budget-friendly; easy to work | More prone to moisture if not sealed | Seal/finish yearly |
Get Instant Access to 16,000+ Woodworking Plans →
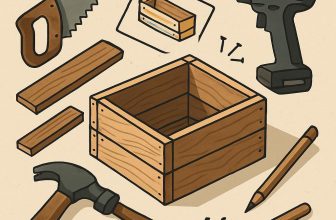
assembly Techniques for a Sturdy Weather Ready Wooden Storage box
To build a sturdy weather-ready wooden storage box, start with precise planning and strong joinery. Outdoor components must withstand sun, rain, and temperature swings, so choose rot-resistant lumber such as cedar or pressure-treated pine, and design a box with thick panels and reinforced corners. Cut all pieces square, label edges, and dry-fit before gluing to catch any misalignments early. Favor corrosion-resistant fasteners-stainless steel or hot-dipped galvanized screws-and consider metal corner braces or battens to keep the frame rigid as the wood expands and contracts with the weather.
Mastering assembly hinges on careful alignment and controlled clamping.Build the base frame first,then attach the side panels squarely,checking for a flat bottom and true corners. Pre-drill holes to avoid splitting, using a bit slightly smaller than the screw shank and a countersink for flush heads. Apply a bead of waterproof wood glue along joints, clamp firmly, and drive screws at regular intervals to distribute the load. For the lid,use a continuous hinge or a pair of sturdy hinges with a support stay to keep it from sagging in rain.
Hardware choices and planning: the right components keep the box sturdy year after year. Opt for corrosion-resistant fasteners,sealed edges,and reliable hinges. Plan to seal joints to prevent moisture ingress and to allow wood to weather evenly. The quick-reference table below summarizes the core hardware recommendations to keep the build resilient in a patio environment.
| Component | Recommendation | Why |
|---|---|---|
| Screws | Stainless steel exterior screws | Resists rust and staining |
| Wood glue | Waterproof exterior glue (e.g., titebond III) | Strong, flexible bonds in moisture |
| Sealant | 100% silicone or polyurethane exterior sealant | Keeps joints watertight and flexible |
| Hinges | Stainless steel exterior hinges | Corrosion-resistant operation |
| Corner brackets | Corrosion-resistant metal brackets | Additional rigidity at joints |
Finish with a weatherproof outer layer and establish a maintenance routine. Choose a UV-stabilized deck stain or exterior varnish, and apply according to the product directions. Lightly sand between coats and wipe away dust before recoating.Reapply sealant along joints every season or after heavy weather,and inspect screws,hinges,and corner brackets annually. To promote drainage and airflow, keep the box slightly elevated on feet or a small base, and consider a lid support or soft-close mechanism to prevent wind-driven slams.
Get Instant Access to 16,000+ Woodworking Plans →
Finishing Touches and Weatherproofing for a Beautiful Wooden Storage Box
Begin with thorough surface readiness to ensure lasting protection. Lightly sand the exterior panels with 120-180 grit, then finish with 220 grit for a smooth touch. Wipe away dust with a tack cloth and seal any small cracks with weatherproof wood filler. For a durable result, select exterior-grade finishes that resist moisture and UV exposure, and test a patch on a hidden edge to preview color and blotching. A UV-stabilized seal preserves the wood's natural character while adding a subtle sheen that suits a patio or deck aesthetic.
Follow these steps for a durable finish: clean and dry the surface; apply a compatible sealant or primer if required by your finish; brush or wipe on the first coat with the grain, covering all sides, including the underside; allow it to dry fully and then lightly sand with 320-400 grit before applying the next coat; apply a second coat (and a third if needed) and let it cure according to product instructions.
To maximize weather resistance, upgrade hardware to corrosion-resistant options and incorporate design details that shed water. Install stainless steel or brass hinges and screws, seal joints with a flexible sealant, and add small raised feet to keep the base off damp surfaces.A weather-sealed lid or gasket along the edge helps minimize moisture intrusion while allowing easy opening in any weather.
Maintainability is the key to long-lasting beauty. Clean the box with a mild soap solution and rinse; avoid harsh cleaners that can degrade the finish. Reapply your chosen coating according to exposure-more frequent touch-ups on sun-exposed decks and less in shaded areas-typically every 1-2 years for exterior finishes. Inspect annually for cracks, peeling, or loose hardware, and address repairs promptly to preserve both function and style.
| Finish Type | Pros | Maintenance |
|---|---|---|
| Exterior penetrating oil (e.g.,tung oil) | Brings out grain; easy touch-ups | Reapply every 6-12 months; wipe-on |
| Exterior polyurethane (oil- or water-based) | Excellent water resistance; durable | Recoat every 1-3 years depending on exposure |
| Water-based acrylic stain with sealant | Low odor; quick-drying | Reapply every 1-2 years; clean before recoat |
| Exterior enamel/paint | Strong barrier; wide color range | Repaint every 3-5 years; inspect for peeling |
Get Instant Access to 16,000+ Woodworking Plans →
Smart Storage Solutions Inside a wooden Storage Box for Patio Essentials
Smart storage inside a wooden box starts with a thoughtful interior that respects how you use your patio. Start with a shallow, removable tray and adjustable dividers so cushions, napkins, grill tools, and pool toys have designated homes. Choose a weather-ready finish and rust-proof hardware to withstand sun, rain, and humidity, and line the bottom with a soft pad to cradle delicate items. A tight-sealing lid with a quiet hinge keeps moisture out and makes daily access smooth and quiet.
Think in practical zones to maximize accessibility. The top pocket is ideal for quick grabs like sunscreen, matches, and bottle opener; the middle holds tongs, spatulas, and utensils; the bottom stores bulk items such as blankets and towels. Use fabric liner baskets or small removable bins to corral smaller pieces and trap sand or dirt before it spreads.Label each area with a durable tag so every guest can reach what they need without rummaging.
To help you visualize the layout, consider these inserts and their benefits:
| Insert | Benefit | Ideal Use |
|---|---|---|
| Removable divider kit | Creates adjustable compartments | Grill tools, utensils, napkins |
| Felt-lined tray | protects delicate items | Glassware, sunglasses, small accessories |
| Fabric liner baskets | Contains sand/dirt; keeps items tidy | Pool toys, towels, sunscreen bottles |
| Waterproof pouch | Keeps moisture-sensitive items dry | Matches, lighters, phone accessories |
Finish with smart upkeep. Reapply the outdoor seal or teak oil as seasons change, wipe the interior regularly, and check hardware for looseness.When not in use for extended periods, a lightweight cover helps protect from dust and drizzle. If you want an even tidier touch, add a soft-close hinge kit to reduce noise and protect fingers during busy patio evenings.
Get Instant Access to 16,000+ Woodworking Plans →
Maintenance and Longevity Tips for Your Wooden Storage Box on Outdoor Spaces
Regular maintenance starts with placement and simple cleaning. Position the box so water drains away and never sits against damp ground; keep it off soil or mulch to prevent moisture wicking. Clean with a soft brush and mild soap, rinse, and let it dry completely to prevent mildew. Periodically inspect joints, screws, and hinges for looseness or corrosion and tighten or replace as needed to stop issues from spreading.
Protective finishes extend color and strength. Choose an exterior finish that allows the wood to breathe while resisting moisture and UV damage.For a natural look,teak oil or wood oil revives grain and is easy to refresh; for a stronger protective film,consider water-based exterior polyurethane or marine varnish. Always sand lightly before recoating, remove dust, and apply under dry, mild conditions. Avoid paints that seal moisture inside; opt for breathable films that flex with wood movement to prevent cracking.
| Finish | Pros | cons | Best Use |
|---|---|---|---|
| Exterior Teak Oil | Penetrates wood; enhances grain; quick refresh | Requires frequent reapplication (3-6 months in sun) | Natural look in shaded/partial-sun areas |
| Water-based Exterior Polyurethane | Durable film; dries clear; low odor | Can trap moisture if wood is swollen; needs proper prep | Moisture-prone or high-traffic spaces |
| Exterior Spar/Varnish | Excellent UV resistance; flexible film | Longer cure time; may amber slightly | direct sun and exposed outdoor spots |
Hardware and moisture management are the finishing touches. Use corrosion-resistant fittings (stainless steel or brass) and lubricate hinges with a silicone-based product to keep operation smooth. Elevate the box slightly with small feet or a vented base to improve airflow and help wood dry after rain. If you store cushions or fabrics inside, ensure they are fully dry and consider a breathable lining to minimize mildew growth.
Adopt a simple seasonal care plan to keep longevity high. In spring, inspect for cracks and touch up any sealant; in summer, watch for UV fading and refresh the finish as needed; in fall, tighten hardware and clean out any debris that could trap moisture; in winter, protect from heavy moisture and consider a breathable cover that still allows air to circulate.
Get Instant Access to 16,000+ Woodworking Plans →
Q&A
What wood types hold up best for outdoor storage boxes?
Cedar or redwood are popular for their natural rot resistance and weathering longevity. Pressure-treated pine is budget-friendly if you seal it well and use exterior-grade hardware. Finish with a UV-rated sealant and seal all cut ends to extend life.
How should I size and design the lid to stay open safely?
measure interior space to fit cushions plus a little clearance for handling. Choose a hinge style that supports the lid and add a gas spring or prop stick to keep it open at a safe angle. Consider a soft-close or stopper to prevent finger pinching and sudden slams.
What finish is best for sun and rain protection, and how frequently enough should I reapply?
Apply a UV-rated exterior stain or paint with a penetrating sealer on all surfaces, including ends. Reapply every 1-3 years depending on climate and exposure, plus clean and lightly sand between coats for better adhesion. Always follow the product's directions for recoating.
How can I add ventilation and security without compromising weatherproofing?
Drill a couple of small breather holes near the top or install a vented panel to prevent moisture buildup. Use a lockable latch or hasp with a weatherproof seal to deter theft and keep rain out. Elevate the box on feet or a base frame to promote airflow and prevent pooling water.
In Summary
These plans remind us that a wooden storage box isn't just a container; it's a small stage for craft: precise measurements meeting weather-ready finishes, simple joinery, and a design that complements outdoor spaces. The key takeaway is that thoughtful planning and quality materials turn a basic box into lasting character on a patio or deck. For woodworkers, that intersection of practicality and aesthetic-durable construction, easy maintenance, and a touch of personal style-keeps the craft alive. So pick up a project, skim another guide for a new technique, or adapt these ideas to your space. With steady hands and clear intent, your outdoor workshop shines brighter.Let your next project begin.


This project sounds amazing! A stylish wooden storage box would not only keep my outdoor space organized but also add a beautiful touch to my patio. Can’t wait to try it out!
This is a fantastic idea, Adam! I love how a wooden storage box can blend functionality with aesthetics, making outdoor areas both practical and inviting. Looking forward to seeing everyone’s creations!
What a great project, Adam! I’m excited to see how everyone personalizes their storage boxes-it’s such a unique way to showcase creativity while enhancing our outdoor living spaces!
What an inspiring project, Adam! I love how a wooden storage box can elevate the look of any outdoor area while providing much-needed organization. Excited to see the unique designs everyone comes up with!
Absolutely love this idea, Adam! A wooden storage box would be the perfect blend of style and utility for my deck, and I can’t wait to see all the creative designs everyone puts together. Such a fun way to enhance our outdoor spaces!
This project is such a clever way to combine style and function, Adam! I’m thrilled to see how everyone’s unique creations will transform their patios and decks into even more inviting spaces. Can’t wait to get started on my own!
I absolutely love this idea, Adam! A stylish wooden storage box is such a functional yet chic addition to any patio or deck, and I can’t wait to see how everyone puts their personal spin on it-it’s a great opportunity to showcase creativity in our outdoor spaces!
What a fantastic idea, Adam! A stylish wooden storage box not only adds a touch of elegance to our patios and decks but also helps keep everything organized. I’m eager to see all the creative designs emerge from this project-it’s a wonderful way to blend functionality with personal style!
This is such a brilliant concept, Adam! A stylish wooden storage box not only serves as a practical solution for keeping our patios and decks tidy but also adds a beautiful focal point to the outdoor decor. I’m looking forward to seeing all the imaginative designs that everyone creates!
What an amazing project, Adam! A stylish wooden storage box is the ideal way to elevate the aesthetics of our patios and decks while keeping everything organized. I’m excited to see everyone’s unique interpretations and designs come to life-it’s such a great way to express creativity outdoors!
What a fantastic concept, Adam! A stylish wooden storage box is a perfect blend of practicality and aesthetics, and I can’t wait to see how everyone personalizes their designs to enhance the charm of their patios and decks-this project really inspires creativity in outdoor living!
What an incredible project, Adam! A stylish wooden storage box perfectly combines form and function, transforming our patios and decks into organized yet inviting spaces. I can’t wait to see the innovative designs everyone comes up with-it’s such a wonderful way to bring our unique styles outdoors!
This is such a delightful project, Adam! A stylish wooden storage box is the perfect way to enhance the beauty of our patios and decks while providing much-needed organization. I’m excited to see how everyone puts their personal spin on this idea-it’s a wonderful opportunity to showcase our creativity in outdoor spaces!
This is an awesome idea, Adam! A stylish wooden storage box is not only functional for keeping outdoor spaces organized but also adds a touch of elegance to patios and decks. I’m eager to see the unique designs that everyone will come up with-what a fantastic way to showcase our individual styles while enhancing our outdoor areas!