
Imagine a shelf that looks tailor-made for your space, built with simple, beginner-kind tools. That moment-when the wood grain, perfectly square edges, and a satisfying finish meet your own hands-is what draws many woodworkers back to the bench. This topic matters because stylish, sturdy shelves are one of the clearest signs of growing skills: they teach measuring, planing, sanding, and finish work without overwhelming you with complex joinery.In this article, you'll learn how to choose the right wood, plan a layout, and execute basic cuts, joinery, sanding, and finishing-gaining confidence to create functional, attractive storage.
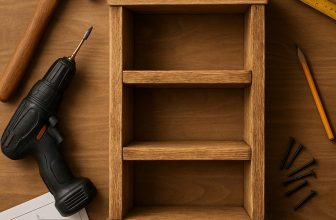
Beginner Friendly Tools for Creating Stylish Wooden Shelves
Beginner-friendly tools for creating stylish wooden shelves don't need to be expensive or fancy. With a small, reliable set, you can build sturdy frames and clean, polished edges. Start with the essentials: tape measure to mark precise lengths,carpenter's square for right angles,handsaw or a beginner-friendly jigsaw for straight cuts,a cordless drill for pilot holes and screws,clamps to hold parts steady,and a sanding block to smooth edges. Keep your cuts deliberate, and start with simple designs-single floating shelves or a small wall-mounted rack-to build confidence and consistency.
Here's a quick,practical guide to the core tools,distilled for beginners. Use the table to compare purpose and style at a glance.
| Tool | Why its beginner-friendly | Tips |
|---|---|---|
| Tape measure | Accurate lengths and layouts | Lock blade; measure twice |
| Carpenter's square | Ensures perfect right angles | Double-check corners before cutting |
| Handsaw / Jigsaw | Low-cost, forgiving cutting | Cut slowly along line |
| Cordless drill | Drills pilot holes and drives screws | Pre-drill holes to prevent splitting |
| Clamps | Holds pieces steady for accuracy | Use two hands-free setups |
| Sanding block / sandpaper | Creates smooth, chat-free edges | Start coarse, finish fine |
With tools in hand, follow a simple sequence to turn planning into a finished shelf: measure the wall and board widths; cut to size; sand edges smooth; pre-drill holes; glue joints lightly; screw pieces together; and finally finish with a clear sealant. Safety matters: wear eye protection, keep fingers away from blades, and work on a stable surface. If a step feels uncertain, slow down and re-check your measurements-the calm, patient approach pays off in a cleaner, stronger result.
Get Instant Access to 16,000+ Woodworking Plans →
Choosing Wood and Finishes That Elevate Your Shelves
Choosing the right wood sets the tone for your shelves long before you pick a finish. For beginner-friendly projects, start with woods that are forgiving and inexpensive, like or poplar, which plane smoothly and take finish well. If you want a bit more character without complicated work, consider birch or maple for a clean, light canvas, or oak for a classic grain that wears beautifully over time.Look for straight grain, few knots, and consistent color to reduce sanding and planing surprises later.
Finishes aren't just protection; they sculpt the look. A water-based polyurethane offers durable protection with minimal odor and fast drying,ideal for a room shelf project. Oil finishes, such as tung or Danish oil, heighten the grain and warm the tone, but require a bit more care with curing times. If you're unsure, practice on scrap wood and build up thin coats rather than a single heavy layer. Remember to sand lightly between coats to keep the surface smooth and snag-free.
Here's a quick reference to pair wood choices with finishes:
| Wood | Look | Durability | Suggested Finish |
|---|---|---|---|
| Pine | Warm, pale | Soft, dent-prone | Oil or water-based poly |
| Poplar | Light, even | Moderate | Oil + wax or poly |
| Oak | Visible grain | High | Oil-based poly or varnish |
Test stain or tinted finish on a hidden edge before committing to the entire shelf, so you can adjust the shade to match your room. If you're building floating shelves with visible edges, consider edge banding or a lighter finish to preserve the wood's natural lines. Always seal end grain to slow moisture uptake, and use thin coats to avoid runs on delicate edges. For lasting and budget-friendly sourcing, choose locally milled or reclaimed wood when possible, and practice steady hand-sanding to maximize shine with the tools you already own.
Get Instant Access to 16,000+ Woodworking Plans →
Plan and Measure for Perfectly Proportioned Shelves
Before you pick up a saw,lock in a plan and measure the space. Start with a simple sketch of where the shelf will sit, what it will hold, and how much weight it must bear. Pull out a tape measure and check width, depth, and the vertical clearance above and below the planned location. Aim to leave at least a half inch of room for mounting hardware and wall irregularities, and remember the old adage: plan first, measure twice, cut once.
With measurements in hand, translate them into a practical design. Choose a shelf width that fits between wall studs without crowding hardware, and pick a depth that suits the items you plan to display. For most lightweight to moderate loads, a depth of 6-9 inches works well; for books or heavier keepsakes, lean toward 10 inches or more. Consider materials that balance workability and strength-softwoods like pine are forgiving for beginners, while plywood or MDF offer flat, stable panels. To prevent sag, plan for a sturdy mounting method (cleats or a back panel) and select thicker boards if your span tips toward the upper end.
Here's a quick reference to help you size your shelves. Use it as a starting point, then adjust to your space and taste:
| shelf Type | Width | Depth | Board Thickness | Vertical Spacing |
|---|---|---|---|---|
| Mini wall Shelf | 18″ | 6″ | 3/4″ | 8-10″ |
| Medium Book Shelf | 30″ | 9″ | 3/4″-1″ | 12″ |
| Display Shelf | 48″ | 10″ | 3/4″-1″ | 12-14″ |
Turn your plan into action with a simple workflow. Follow these steps to bring perfectly proportioned shelves into your space:
- Measure and mark the wall with a level to ensure each shelf sits true.
- Cut boards to size,then smooth edges with a sanding block.
- Install sturdy mounting hardware: cleats or a back panel, sized to your shelf span and load.
- Dry-fit the pieces on the wall before final fastening, then apply your finish and seal.
- Mount with a level one last time and load intentionally to avoid overloading the ends.
Get Instant Access to 16,000+ Woodworking Plans →
Step by Step Assembly and Mounting for secure Shelves
Plan your layout carefully and start by locating the wall studs where the shelf will anchor. Find the studs to maximize holding power; if you can't reach studs at every mounting point, add blocking behind the drywall or choose a robust cleat system. Gather beginner-friendly tools: tape measure,carpenter's square,level,drill with appropriate bits,countersink,and the screws or brackets recommended for your mounting method. Measure twice, drill once to prevent gaps and misalignments, then dry-fit the boards on a clean workspace before driving anything home.
Assemble the shelf box on a flat, stable surface. Apply a thin line of wood glue along the joints, clamp, and drive screws from the inside to keep the exterior clean. For a floating look, attach a wall cleat to the stud line first, then bolt the shelf to the cleat from underneath. Throughout, use a level to keep the front edge perfectly horizontal so the weight sits evenly and the shelf appears plumb from all angles.
| Shelf Length | Mounting Type | Screw Size (approx) | Notes |
|---|---|---|---|
| 12-16 in | Wall cleat | 3 x 50 mm | Stud-attached, simple & strong |
| 18-24 in | Wall cleat + bracket | 4 x 60 mm | Extra support, use anchors if no stud |
| 30 in+ | Heavy-duty bracket + cleat | 5 x 60 mm | Maximum stability |
With the wall secured, fasten the shelf to the cleat or brackets as planned.If you used screws from the back, countersink them lightly so the head sits flush with the surface; fill any gaps with matching wood filler and wipe clean. If you installed a back panel, trim it flush with the shelf edge for a neat finish, then lightly sand the edges and apply your chosen stain or sealant.
test the setup before loading full weight: gently press the center, then apply incremental weights while watching for movement. Safety first-wear eye protection, keep cords clear, and ensure kids or pets aren't nearby while you secure the last screws. A quick re-check with a level after a day of use helps catch any settling and keeps your shelves looking perfectly aligned.
Get Instant Access to 16,000+ woodworking Plans →
Finishing Techniques and Care to Extend Wood Life
Finishing coats protect shelves from daily use and spills, and the right choice depends on where your shelves live and the look you want. For most beginner projects, start with a clear, satin finish to preserve wood color while reducing glare. Options include water-based polyurethane for easy cleanup and low odor, oil-based polyurethane for a warmer tone and extra durability, or a penetrating oil (like tung) if you prefer a natural, matte look with minimal buildup. Always test your chosen finish on a scrap piece or the rough backside of the shelf to verify color, sheen, and feel before committing to the whole project.
| Finish Type | Pros | Best For |
|---|---|---|
| Water-based polyurethane | Low odor; quick cure; clear | Indoor shelves with moderate use |
| Oil-based polyurethane | Durable; warmer tone; strong protection | High-traffic or moisture-prone areas |
| Penetrating oil + wax | Natural look; easy maintenance | Open-grain woods; decorative shelves |
Application and drying steps: sand through 120, 180, and 220 (finish with 320 for a silky surface). Wipe away dust with a tack cloth, then apply thin coats with a brush, foam, or lint-free cloth. Avoid heavy buildup and wipe off any excess after a couple of minutes. Allow each coat to cure fully-water-based finishes typically 4-6 hours, oil-based finishes longer depending on temperature and humidity-and lightly sand with 320 between coats to improve adhesion. Two to three coats are usually enough for shelves that will bear books, décor, or dishes.Keep a scrap board handy to compare sheen and color as you work.
Care and ongoing protection: dust regularly with a soft microfiber cloth and avoid harsh cleaners that can wear down the finish. For spills, wipe promptly and consider a light touch-up if you notice wear on high-use areas. Place felt pads under decorative items and coasters under any items that could cause moisture marks. Maintain a stable humidity level (roughly 40-60%) to minimize warping or cracking, and plan to recoat worn areas every few years based on use. If scratches occur, a small amount of matching finish along with a light re-shine can blend them away.
Storage and recoat planning: keep leftover finish sealed and labeled, so you can match tone and sheen later. Preserve a few sample boards to test future touches. When reapplying, lightly sand the surface to break the glaze, clean off dust, and apply in the same grain direction for a seamless look. With regular care, your stylish shelves stay protected and vibrant for years.
Get Instant Access to 16,000+ Woodworking Plans →
Common pitfalls and Practical Troubleshooting for Beginners
Beginners often stumble on the simplest steps before a single shelf goes up: misread measurements, cut pieces to the wrong width, or pick a wood species that doesn't suit the design. start with a clear plan: label each piece, note its length, width, and grain direction, and double-check against your wall layout. Practice the layout on scrap before you cut, then dry-fit the frame to catch mismatches early. Remember that the shelf's load and how you anchor it will determine your fasteners and back support-plan for bracing and wall anchors from the start.
Tool setup and safe handling save time later. Use beginner-friendly tools, verify your square, and clamp every piece before you cut or drill. Set saw depth carefully, make test cuts on scrap, and watch for tear-out at the grain edge. Keep your workspace tidy, wear eye protection, and use a push stick for narrow cuts. If a cut wanders or your edge isn't square, stop, reposition, and re-cut rather than forcing the piece.
During assembly and finishing, alignment and surface prep can derail a project fast. Dry-fit again before glue or screws, predrill holes to avoid splitting, and clamp firmly while you assemble. Sand progressively from rough to fine grits, wipe away dust, and apply the finish in light, even coats. If you see tiny gaps or rough spots, address them early with light sanding or filler, then reclear before final coats. The goal is a clean, flush look that highlights the wood's character rather than obvious hardware.
| Issue | Why it happens | Fix |
|---|---|---|
| Warped or cupped boards | Moisture changes or uneven grain | Flatten with clamps and a straightedge,plane if needed,or replace when warped beyond repair |
| Gaps at joints | Inadequate clamping or misalignment | Re-clamp,re-check square,consider add-on joints (biscuits/dowels) or wood filler for tiny gaps |
| Finish not sticking or peels | dusty surface or dull blade | Sand clean,wipe with tack cloth,and recoat in thin,even layers |
| Screws splitting near edges | Poor predrilling or driving too deep | pretap with a smaller bit,countersink,or use shorter screws and add backing |
Get Instant Access to 16,000+ Woodworking Plans →
Q&A
What basic tools do I need to start building wooden shelves?
Start with the essentials: a tape measure, square, and level for accuracy; a saw (hand or power) for cutting; a drill/driver, screws, and wood glue for assembly; clamps and sandpaper for a smooth finish. Safety goggles and a dust mask are worth having as you work. If you're on a budget, choose beginner-friendly tools and gradually upgrade as you gain confidence.
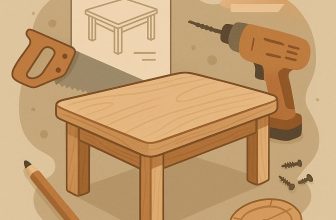
How should I choose the right wood type for beginner shelves?
For easy handling and lower cost, start with softwoods like pine or poplar, which cut and finish more forgivingly. If you want a sturdier feel, consider plywood or medium-density fiberboard (MDF) for panels paired with a solid edge. Always factor weight, humidity, and your finishing plan when selecting material.
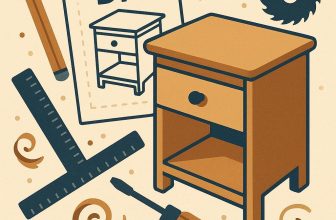
What simple shelf designs are sturdy and beginner-friendly?
A classic single-shelf or two-shelf wall unit with a simple rectangle frame can be very reliable. Floating options using a French cleat or sturdy brackets let you hang shelves without visible supports. Keep dimensions modest,use thicker stock or a solid plywood back,and finish edges for extra strength.
How can I ensure shelves are level and safely mounted?
Locate wall studs with a stud finder and mark level lines before drilling. Pre-drill holes to prevent wood from splitting, then secure brackets or cleats solidly into studs with appropriate screws. Check level during installation and distribute weight evenly to avoid sagging over time.
Concluding remarks
Great design often starts with simple tools and a clear plan. The takeaway here is that you don't need fancy gear to craft stylish shelves; accurate measuring,thoughtful layout,and patient finishes can elevate common boards into feature pieces. For woodworkers, that matters: it builds confidence, expands techniques, and opens doors to more ambitious projects without overwhelming costs. So pick up a scrap board, sketch a plan, and test a small project. Browse related guides, compare joinery methods, and apply what you've learned to your next shelf or display. With curiosity and care, your workshop can become a gallery of tasteful, sturdy solutions-and you'll surprise yourself.


This is such a great project idea! Can’t wait to try it out with just basic tools-thanks for sharing!
I love how accessible this project is for beginners! Stylish wooden shelves can really elevate a space, and it’s awesome to see that you don’t need fancy tools to create something beautiful. Looking forward to getting started!
I’m excited to see how simple tools can lead to such stunning results! This project seems perfect for adding a personal touch to my home decor while honing my crafting skills. Thanks for the inspiration!
This is exactly what I needed! I’m always on the lookout for DIY projects that don’t require a ton of experience or equipment, and these wooden shelves seem like the perfect way to add some character to my home. Excited to give it a go!
I can’t believe how easy this looks! I’m definitely going to give these wooden shelves a shot, and I appreciate that it’s geared towards beginners like me. It’s inspiring to see such great ideas that don’t require a lot of experience!
I’m so thrilled to see a project that combines simplicity and style! It’s amazing how wooden shelves can transform a room, and knowing that I can achieve this with minimal tools makes it even better. Can’t wait to start building!
This is fantastic! I’m all about DIY projects that are achievable without a lot of experience, and these stylish wooden shelves are calling my name. It’s so motivating to see that with just a few basic tools, I can make something unique for my home. Time to gather some materials and get crafting!
I love how accessible this project is for beginners! It’s refreshing to see stylish designs that don’t require extensive tools or expertise. Can’t wait to try my hand at making these wooden shelves and add a personalized touch to my space!
This looks amazing! I love the idea of creating something beautiful without needing advanced skills. It’s inspiring to see such practical projects for beginners, and I can’t wait to make my own stylish wooden shelves to enhance my living space!
This is such a great project for those of us just starting out with woodworking! I love the idea that with just a few basic tools, we can create something stylish and functional. I’m excited to give it a try and put my own spin on these wooden shelves!
This project is exactly what I needed to feel inspired to dive into woodworking! The combination of style and simplicity makes it perfect for beginners like me. I’m really looking forward to customizing these wooden shelves to fit my home decor-thank you for sharing such an accessible idea!
I’m so excited about this project! As a beginner, it’s encouraging to see that creating stylish wooden shelves is possible with just a few tools. I can’t wait to personalize mine and transform a simple idea into something beautiful for my home! Thanks for the inspiration!