
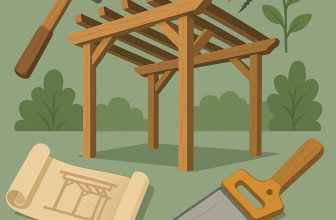
Take a weekend, a handful of boards, and a spark of sweat-watch a budget deck chair rise from rough lumber to a confident centerpiece. For woodworking enthusiasts, this project matters: it hones precise measuring, joinery, and whether-ready finishes, all while delivering outdoor comfort at a fraction of store-bought prices. In this article you'll learn how to select durable materials, draft a simple cut list, assemble with sturdy joints, fasten securely, and seal against sun and rain. You'll finish with a practical chair you can customize, plus tips to adapt the build for future outdoor projects.
Choosing Budget Friendly Wood for DIY Wooden Deck Chairs
Budget-friendly wood for DIY wooden deck chairs is about finding the sweet spot between price, stability, and comfort. Outdoor chairs face sun, rain, and humidity, so choosing lumber that ages well without breaking the bank saves time and frustration. common starting points include pressure-treated pine, SPF, and cedar, each offering a different balance of cost, availability, and natural character. With proper sealing and routine upkeep, even the most affordable stock can become a durable, good-looking seat.
Pressure-treated pine is often the cheapest option and widely available. It resists rot and insects, but the treated surface can be harder to finish and the wood may warp if it dries unevenly. For best results, pick kiln-dried stock, seal all faces, and use exterior-grade hardware to minimize corrosion. SPF is another budget-friendly choice-light, easy to cut, and forgiving on simple joinery-but it lacks the natural rot resistance of cedar, so annual maintenance and careful storage are key.
Cedar, especially Western Red Cedar, offers a natural resistance to decay and a pleasant grain that shows well outdoors. It sits at a mid-to-high price point compared with pine but often lasts longer with less intensive maintenance. If reclaimed wood is appealing, scan local sources for clean, straight boards and avoid pallets with heavy chemical coatings. Inspect for soft spots, nails, and warp, and plan to surface or seal any pieces you intend to expose to weather.
Tips to shop smart and build smarter: choose straight,knot-free boards for the legs and arms; favor thicker stock in high-stress areas to reduce flex; pre-drill and countersink to prevent splitting; and use stainless or galvanized hardware to resist corrosion.A simple, well-braced frame can handle years of sun and rain when finished with an exterior sealant or penetrating oil. See the swift comparison table below to weigh your options at a glance.
| Wood Type | Typical Cost | Durability | Workability | Maintenance Tips |
|---|---|---|---|---|
| Pressure-Treated Pine | $0.25-$0.60/bf | Moderate | Easy | Seal yearly; store dry |
| SPF (Spruce-Pine-fir) | $0.40-$0.90/bf | Low-Moderate | Very Easy | Seal; check for checks |
| Cedar (Western red) | $0.80-$1.60/bf | high | Moderate | Oil or seal; occasional refinishing |
| Reclaimed Wood | Varies | Variable | Variable | Inspect for rot/nails; treat before use |
Get Instant Access to 16,000+ Woodworking Plans →
Designing a Clear Build Plan and Materials List for Your Deck Chairs
Before you start cutting, lock in a clear build plan that matches your space, comfort, and budget. Begin with precise dimensions for your chosen footprint, sketch the chair on scrap paper, and translate that sketch into a simple cut list. Consider the weight you expect to support, the deck surface where it will rest, and the weather exposure. A thoughtful plan helps you estimate material needs, minimize waste, and stay on schedule. For a budget-friendly approach, choose sturdy, affordable stock (pine or cedar) and decide on a straightforward joinery method-face-frames or simple butt joints-so you can source components without fuss.
Use this concise cut list to guide procurement.The table that follows provides essential components, rough dimensions, and quantities you can adjust to fit your chair size. Tweak the figures based on waste and layout to keep your project on budget.
| Part | Material/Stock | Size/Thickness | Quantity | Notes |
|---|---|---|---|---|
| Seat slats | Cedar or pine | 3/4 in x 2 in | 8 | Sand smooth |
| Back slats | Cedar or pine | 3/4 in x 2 in | 6 | Even spacing |
| Front legs | Cedar or pine | 2×2 | 2 | Shorter for height |
| Rear legs | Cedar or pine | 2×2 | 2 | Longer for incline |
| Armrests | Cedar or pine | 1×4 | 2 | Rounded edges |
| Side rails | Cedar or pine | 1×2 | 2 | Attach under seat |
| Cross braces | Cedar or pine | 1×2 | 4 | Under-seat support |
| Hardware | Stainless screws | #8 x 2 in | 1 box | Outdoor grade |
| Wood glue | All-purpose | – | 1 bottle | For joints |
| Finish | Outdoor sealer | – | 1 can | Two coats |
With your cut list in hand, map your assembly order to minimize clamping and rework. A simple build sequence keeps mistakes low: prepare raw stock, cut to size, sand edges, assemble subframes, attach the seat slats, then install the back slats and armrests, followed by final sanding and sealing. Create a quick visual checklist on a sticky note or a one-page sheet and reference it as you work. For accuracy, set up a small measuring grid in your workspace and dry-fit joints before driving screws.
to keep costs predictable, estimate per-component costs, add 10-15% for waste, and reserve a small buffer for fasteners and finishes. Consider using recycled or offcut stock for parts where appearance matters less, like cross braces or supports. When choosing finishes, pick an outdoor-grade sealer and apply two thin coats for durability. generate a concise bill of materials you can reuse on future projects, and keep notes on any tweaks you made for next time.
Get Instant Access to 16,000+ Woodworking Plans →
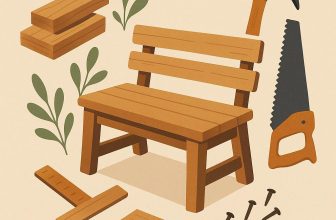
Step by Step Assembly for a Sturdy Outdoor Deck Chair
Start with a clean workspace and a precise cut list. Gather two long side rails, a solid seat frame, four uprights (legs), two armrests, and a handful of cross braces that will lock everything together. Mark each piece and cut with square ends, then sand to remove rough edges. A dry-fit without glue lets you catch miscuts early and confirms the chair will sit level on your deck.
Begin assembly by securing the seat frame to the front legs, then connect the back legs with a sturdy cross brace to prevent racking. Use exterior-grade screws, predrilling pilot holes to avoid splitting the grain.clamp pieces for flush joints as you drive fasteners, and check squareness with a diagonal measurement from corner to corner. once the seat frame is stable, attach the armrests to the side rails and install the seat slats with even spacing to promote comfort and drainage.
| Hardware | Quantity | Notes |
|---|---|---|
| Screws (exterior, 3″ length) | 12 | Star drive recommended |
| Galvanized washers | 12 | Slat-securement |
| Dowels or wood glue | 1 set | Joints for armrests |
| Sealant or deck stain | 1 can | Exterior finish |
Finish the frame with a weatherproof seal or deck stain that fits your budget. A light coat of wood conditioner first helps even absorption, then two light coats of sealant provide durable protection. Allow drying times between coats and keep the finish out of direct sun during curing. If you plan to store the chair outdoors year-round, consider a slightly thicker coat or a varnish proven for exterior use.
To keep it sturdy over time, periodically tighten screws, inspect slats for looseness, and replace any worn connectors. For added comfort, experiment with the seat slat spacing or add a thin outdoor cushion. A simple rubber foot or felt pad under each leg can keep deck boards from damage and reduce wobble on uneven surfaces.
Get Instant Access to 16,000+ Woodworking Plans →
Finishing and Weatherproofing Techniques for Longevity
Outdoor seating endures sun, rain, and humidity, so a durable finish is essential for longevity. Start with clean, dry timber and a light sanding to open the grain. If possible,acclimate fresh boards for 24-48 hours,then wipe away dust and tackiness before applying any coating. Inspect joints and hardware, masking metal fasteners to prevent staining and ensure even coverage around edges and cutouts.
Choosing the right finish is about balance: protection without sacrificing the natural look or adaptability as wood expands and contracts.the following options are budget-friendly and reliable for deck chairs built from common budget woods.
- Spar varnish – highly flexible outdoors-friendly film that resists cracking when timber moves; 2-3 thin coats recommended.
- Exterior water-based polyurethane – clear, fast-drying, low odor; best for lighter shades; apply 2-3 thin coats and recoat annually or after heavy use.
- Penetrating exterior oil – tung or linseed oil sinks into grain for depth; easy to apply but requires more frequent renewal (every 6-12 months) and occasional topcoat for UV protection.
- Stain plus clear topcoat - adds color with UV protection; choose a UV-rated stain and seal with a compatible outdoor topcoat for best durability.
| Finish type | Pros | Cons | best use |
|---|---|---|---|
| Spar varnish | Very durable outdoors; flexible | Requires maintenance; longer cure | Natural wood tones; high exposure |
| Exterior water-based polyurethane | Clear, quick-drying; low odor | Less flexible; may require proper prep | Light colors; frequent recoat |
| Penetrating exterior oil | Rich grain; easy to apply | Needs regular renewal; limited film protection | Rustic charm; shaded areas |
| Stain + topcoat | color + UV protection | May need multiple coats for even color | Color customization; outdoor durability |
Application workflow for best long-term results includes clean patch testing, thin coats, and careful maintenance. Start with a small test on a hidden area to confirm adhesion and color, then brush or wipe along the grain in consistent, even strokes. Work in dry weather with ambient temperatures between 50-85°F (10-29°C) and avoid applying finishes to warm surfaces in direct sun. Apply several thin coats, allowing full cure between passes, and lightly sand between coats with fine grit (320-400) for a smooth, abrasion-ready surface. Seal ends and any hollow sections to reduce end grain moisture uptake and staining.
Maintenance and weatherproofing cadence are as vital as the initial finish. Recoat frequency depends on exposure: plan for about every 12 months in full sun and heavier rain, or every 2-3 years in shaded, sheltered spots. After winter, clean the chair with a gentle brush and mild soap, dry thoroughly, and inspect for peeling, cracking, or lightened spots. When reapplying, clean the surface, lightly sand, remove dust, and apply a fresh thin coat for best adhesion and longevity.
Get Instant Access to 16,000+ Woodworking Plans →
Smart Money Saving Tips Without Compromising Comfort
Smart money-saving starts with a simple, modular design that keeps comfort intact. Choose a straightforward silhouette: a flat seat,a gently angled back,and solid legs that can be cut from the same stock to minimize waste. Look for budget-friendly, outdoor-grade wood such as reclaimed pallets or inexpensive southern pine, and always check boards for cracks or spikes before you buy or commit. By planning your cuts around the grain and reusing offcuts, you can build a sturdy chair with less waste and less cash spent.
focus on reuse and smart fasteners. If you have access to reclaimed pine or cedar offcuts, mill them to consistent thickness and edge them squarely so the joints stay tight without expensive hardware.Use sturdy butt joints reinforced with exterior wood glue and corrosion-resistant screws,rather than pricey joinery.Measure twice, cut once, and batch-cut parts for all chairs to save time and reduce scrap. A simple, durable back-and-seat connection can be achieved with two screws per side and a small crosspiece underneath.
Finish and comfort are where you preserve value without sacrificing coziness. Seal surfaces with a weatherproof oil or sealant to extend life, choose breathable outdoor cushions or DIY cushions from affordable fabric remnants, and pick a color that hides dirt between cleanings. For maintenance, wipe down after rainy days, re-oil annually, and store cushions indoors when not in use.With careful planning, a deck chair can feel luxurious despite a tight budget, especially when you swap in fresh fabric or stain to refresh the look without buying new wood.
Get Instant Access to 16,000+ Woodworking Plans →
Design Variations to Personalize Your Deck Chairs
Peopel frequently enough think personalization costs more, but budget-friendly customization is all about thoughtful choices. Start by selecting a wood that complements your deck and stands up to weather. For a warm, natural look on a budget, cedar or pine with a durable exterior finish works well; for a touch of luxury without overspending, opt for treated pine sealed with a marine-grade varnish or penetrating oil. You can also vary the frame and slats for a mixed texture – try a sturdy,light-colored frame with contrasting slats for visual interest. Small changes like leg height or backrest angle can dramatically improve comfort, so sketch a few options and test them before final assembly.
Comfort-first variations matter as much as appearance. Upgrade cushions with outdoor fabrics such as Sunbrella or marine-grade textiles; use high-density foam and breathable inner covers. For easy maintenance, choose removable, washable covers and secure cushions with simple ties or Velcro straps. You can also experiment with armrest shapes (rounded versus square) to improve ergonomics, or add a small hook or pocket at the side for towels or magazines. Weatherproof hardware like stainless screws keeps a budget project durable through seasons.
| Variation | Practical Tip | Example |
|---|---|---|
| Wood type | Choose outdoor-grade wood and seal well | Cedar frame with pine slats |
| Finish | Use exterior varnish or oil for weather resistance | Teak oil on cedar |
| Cushions & Upholstery | Weather-ready fabric; removable covers for cleaning | Sunbrella cushions |
| Details & Accessories | Color accents and practical add-ons | Contrasting leg paint; small tray |
For finishing touches, coordinate color and personality with your deck.Accent paints in muted charcoal, seafoam, or sun-washed blue can tie your chairs to your deck scheme. If you love upcycling, scavenge pallets or discarded furniture for components that can be repurposed into armrests or slat spacing. Keep measurements on a card, test-fit loose parts, and use painterS tape to mark alignment before you drill. A few budget-friendly swaps will make these wooden deck chairs feel uniquely yours and ready for summer lounging.
Get Instant Access to 16,000+ Woodworking Plans →
Q&A
What materials deliver good durability on a budget for wooden deck chairs?
Choose outdoor-grade wood like pressure-treated pine or cedar for affordability and resilience. Use galvanized or stainless hardware and exterior screws to resist corrosion, and seal the wood with a UV-resistant finish. Sand and pre-drill to prevent splitting and ensure snug joints.
How much wood and hardware do I need for a pair of chairs?
Sketch a simple cut list based on your target dimensions (seat around 15-17 inches high, 18-20 inches wide). Add a little extra for errors and future tweaks. If your unsure, buy one extra long board and 10-15% extra screws and brackets.
What essential tools should I have on hand?
A saw (circular or mitre), a drill with driver bits, clamps, a tape measure, and sandpaper or a sander are the basics. Don't forget safety gear like goggles and gloves. They cover cutting, joining, shaping, and finishing tasks.
How can I protect the chairs from weather and extend their life?
Use exterior-grade wood and apply a sealant or varnish designed for outdoor use; recoat every season or two, depending on sun exposure. Storing in a sheltered area or using breathable covers in winter helps. Regular checks for loose joints prevent bigger problems later.
Any tips to ensure comfort and stability without breaking the budget?
Set a comfortable seat height and back angle, and use properly spaced slats to avoid pinching. Reinforce joints with screws and optional corner braces to keep things sturdy. Test the chairs on a flat surface before finishing.
Key Takeaways
At its heart, the takeaway is simple enough to build yourself, and smart enough to respect the budget: a sturdy, comfortable deck chair doesn't have to break the bank or demand perfection. The project demonstrates that careful planning, clean joints, and thoughtful material choice can yield durable seating with a handmade feel. For woodworking enthusiasts, it matters because it pairs practical skill with creativity-you practice measuring, cutting, sanding, and finishing while shaping your outdoor space and your confidence. So pick up a saw, pull out the plans, or browse more guides, and apply what you've learned. With patience and grit, you'll turn wood into everyday joy.


These look amazing, Mary! I love the idea of creating my own deck chairs; it’s a great way to save money and add a personal touch to my outdoor space.
Absolutely, Mary! I completely agree-there’s something so rewarding about building your own furniture, and these deck chairs seem like a fun project that anyone can tackle!
I couldn’t agree more, Joseph and Mary! There’s nothing quite like relaxing in furniture you’ve crafted yourself, and these budget-friendly wooden deck chairs are the perfect summer project!
I totally love the idea of this project! Building my own deck chairs sounds not only fun but also a fantastic way to customize my patio. Can’t wait to give it a try!
I’m excited to see everyone so inspired! These DIY budget wooden deck chairs seem like a perfect way to not only beautify our outdoor areas but also add a personal touch that store-bought furniture just can’t match. Can’t wait to get started!
I love the enthusiasm around this project! Building budget wooden deck chairs is a great way to express creativity while enjoying the outdoors – I can’t wait to share my progress and see everyone else’s designs too!
I’m thrilled to see so much excitement for this DIY project! These budget wooden deck chairs not only offer a fun building experience but also allow us to create unique pieces that reflect our personal style. Let’s keep sharing tips and ideas!
This DIY project is such a fantastic way to create something functional and beautiful for our outdoor spaces! I love how these budget wooden deck chairs can be tailored to fit our individual tastes while making memories along the way. Let’s keep the inspiration flowing!
This is such an exciting project! DIY budget wooden deck chairs are a wonderful way to enhance our outdoor spaces while embracing our creativity and individuality. I’m looking forward to seeing everyone’s unique designs and sharing my own journey as I build mine!
I’m loving all the positive vibes for this DIY project! Building our own budget wooden deck chairs not only saves money but also provides a chance to unleash our creativity and make something truly special for our outdoor spaces. Can’t wait to see all the amazing designs that come out of this!