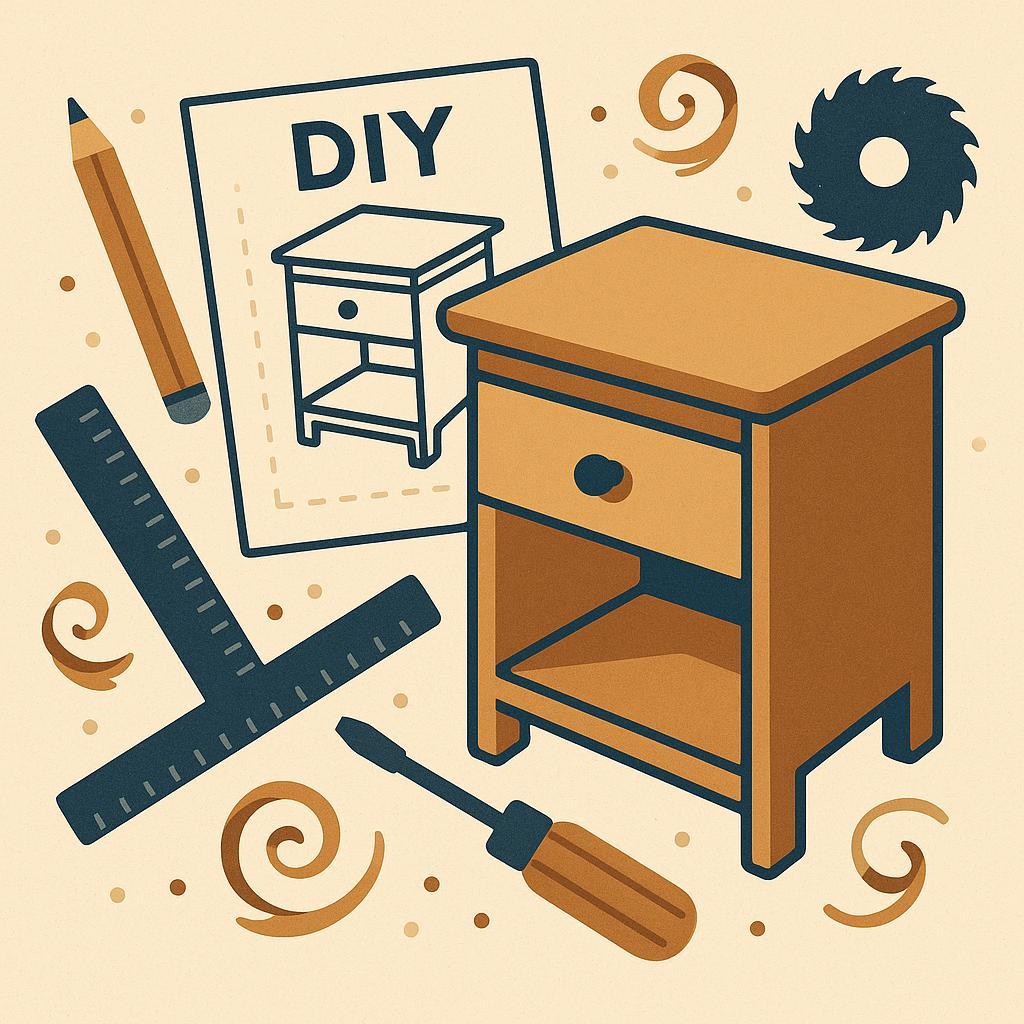
The moment you tighten the first screw, a room begins to tell its own story. DIY Nightstand Plans invites you to turn a simple block of wood into a practical piece that feels like it belongs-and it's the perfect beginner project to prove you can shape your own space. For woodworking enthusiasts, it's more than a shelf on legs; it's a compact workshop lesson in planning, joinery, and finishing, with real-world budgeting and problem-solving baked in. You'll gain clear cut lists, measured steps, safety tips, and adaptable techniques you can reuse on future projects. By the end, you'll have a completed nightstand and the confidence to tackle more ambitious builds.
Choosing the Right Nightstand Design for Beginners
beginner-friendly nightstand design starts with practical planning and accurate measurements. Before you cut a single board, map out how high, wide, and deep your nightstand should be to fit your bed and lamps. A common starting point is a top surface around 18-22 inches high and roughly 16-20 inches deep, paired with one easy-to-build drawer or an open shelf. By choosing a simple box or cube as your base, you keep the build approachable while still delivering real utility. Remember to measure twice, cut onc to avoid waste and frustration.
Material and joinery choices impact how quickly you finish, not just how it looks. Opt for forgiving woods like pine, poplar, or plywood where you can use edge banding to soften edges. For a tidy, beginner-friendly build, favor pocket-hole joinery or butt joints with wood glue and screws, rather than complex dovetails. Plan the hardware first-small knobs or pulls are affordable and can dramatically upgrade the look without adding complexity. Safety first-wear eye protection and clamp pieces securely while drilling.
| Design Type | Pros | Cons | skill Level |
|---|---|---|---|
| Minimalist Box | Fast, inexpensive, clean look | Limited storage | Beginner |
| Drawer Nightstand | Hidden storage, surface versatility | Requires accurate drawer fit | Intermediate |
| Open-Shelf | Airy, simple to build | Items visible, less privacy | Beginner |
| Floating/Wall-Mounted | Modern look, frees floor space | Wall mounting adds complexity | Intermediate |
After the plan, it's time to execute with a simple workflow. Create a cut list, gather your fasteners, and mark your pieces to avoid mix-ups. dry-fit the parts before you glue or screw them. Then sand progressively from 120 to 220 grit, wipe off dust, apply a finish, and allow it to cure. assemble the nightstand, install the hardware, and place it by the bed to ensure it feels right in height and scale. A well-made beginner nightstand teaches essential skills and builds confidence for the next project.
get Instant Access to 16,000+ Woodworking Plans →
Essential Tools and Materials for DIY Nightstand Plans
Begin with a focused core of tools that cover measuring,cutting,shaping,and assembly. A concise setup keeps the project enjoyable rather than overwhelming. Measuring and marking essentials include a quality tape measure,a combination square,and a marking knife or pencil for precise lines. For cutting, a saw (miter saw or handsaw) speeds up long, straight cuts, while a random-orbit sander helps you tame rough edges. Have a drill/driver with a selection of pilot and countersink bits, plus a handful of screws in common lengths. Clamp assortment-bar and spring clamps-keeps pieces steady for accurate joints. A shining work light and hearing and dust protection round out the safety and comfort.
Next,gather the materials that balance durability with budget. For the frame and drawer faces,choose wood that matches your skill level-pine for rapid results,poplar for a smooth finish,or oak for lasting strength. if you build drawers, a plywood or birch veneer core gives stability, while edge banding keeps exposed edges clean. Stock up on wood glue, filler, sandpaper in grits 80-220, and a small set of fasteners: wood screws, pocket-hole screws, and brads. For finishes, pick polyurethane, polycrylic, or stain combined with a compatible topcoat. The table below summarizes common wood choices at a glance.
| Wood Type | Pros | Cons | Best For |
|---|---|---|---|
| Pine | Affordable, easy to cut | Dents easily | Starter builds |
| Poplar | Smooth, good for staining | Average hardness | Painted or light finishes |
| Oak | Strong, durable | Heavier, harder to work | Quality, lasting pieces |
Hardware and finishing considerations help the project survive daily use.Choose drawer slides (bottom-mounted or side-mounted) that suit your drawer depth, and pick handles or knobs that match the scale of the nightstand. For fasteners, stay with 3/4″-1″ screws for frame connections and 1″ screws for drawer construction. Use wood glue for joints and a dab of wood filler for any gaps before sealing. When finishing, wipe on a thin coat of polyurethane or polycrylic, sand lightly between coats, and apply a durable topcoat to resist wear and moisture. Safety gear, like goggles and a dust mask, keeps the process safer and more comfortable.
Put the plan into action with a simple workflow that reduces mistakes. Start with a precise cut list based on your final dimensions, then dry-fit all parts before gluing. Clamp pieces squarely,apply glue to joints,and drive screws once the assembly is stable. After assembly, rough sand, then progressively sand through the grits to a smooth finish before applying the chosen finish. assemble hardware and fittings,and test the drawers for smooth operation. Keeping a small scrap bin handy helps you practice joints and trim edges without wasting materials.
Get Instant Access to 16,000+ Woodworking Plans →
A Practical Step by Step Guide to Building a Sturdy Nightstand
Plan with precision and prepare a clean, stable workspace. Choose stock that's straight and dry-3/4-inch plywood or solid hardwood works best for a nightstand that lasts. Draft a cut list and lay out your parts on scrap or a cutting map before you touch saws. Label each piece to avoid mix-ups, and edge-treat surfaces to ensure a consistent edge line. Safety is non-negotiable: wear eye protection, clamp stock firmly, and pre-drill pilot holes to reduce surface tear-out during assembly. A sturdy nightstand starts with a square, well-supported base, so check that the feet or legs sit flat and the carcass is square at every stage.
With your stock cut, begin the build by dry-fitting the carcass. Use your preferred joinery-pocket holes on the inside faces, dowels for alignment, or simple butt joints reinforced with glue and screws-to form a rigid box. Apply glue to joints, clamp securely, and fret over square corners; use corner blocks or spacer strips to keep edges true while the glue sets. Once the carcass is true, attach the back panel to lock the frame, then fix the top and bottom shelves so they are flush with the front edge and parallel to the floor. Sand lightly along edges to remove tool marks and prepare for finishing. See a practical cut list below:
| Part | Dimensions (in) | Qty |
|---|---|---|
| Top | 18 x 14 | 1 |
| Bottom/Shelf | 18 x 14 | 1 |
| Left Side | 24 x 14 | 1 |
| Right Side | 24 x 14 | 1 |
| Back Panel | 18 x 24 | 1 |
Finish with a durable protective coat and thoughtful hardware choices. For a classic look,wipe-on poly or water-based polyurethane offers good water resistance without ambering the wood. Sand between coats with 220 grit and watch for nibs that can mar a clean surface. Install hardware such as a soft-close drawer slide (if you add a drawer), a slim drawer pull, and levelers for stability on uneven floors.Finaly test the nightstand for wobble, tighten screws as needed, and place a light load on the top to confirm stability. A well-built piece not only looks the part but also handles daily use with minimal maintenance.
Get Instant Access to 16,000+ Woodworking Plans →
Finishing Techniques and Finishes to Elevate Your Nightstand
Finishing a nightstand is where your woodworking choices pay off in real life. Start with a clean slate: sand progressively from 120 to 220 grit, remove all dust, and wipe with a tack cloth. Test your chosen stain or paint on a scrap piece of the same wood to confirm color and how it interacts with the grain. If you're chasing a warm, natural look, opt for a light stain and a clear topcoat to preserve texture; for a modern, opaque finish, plan on a primer and several thin coats of paint. Let the piece acclimate to your shop or room temperature before applying any finish.
Choosing a finish is about durability, maintenance, and how much you value appearance over time. Oil-based polyurethane yields rich color and a tough surface but cures slowly and has a stronger odor.Water-based poly dries quickly, remains clear, and cleans up with soap and water-ideal for light woods and interiors. For a vintage or warm feel, shellac adds character but isn't highly water resistant. If you want a matte or satin look with minimal yellowing, consider a water-based satin or matte poly, then optionally buff with wax for a soft hand. Lacquer offers a glassy, durable finish but requires good ventilation and careful touch-ups later.
To keep results consistent, follow a repeatable workflow. Start with a dust-free surface, apply a sealer or conditioner if the wood bleeds, then apply thin, even coats, letting each one dry fully and light-sand between coats. Work with the grain and avoid heavy builds that can crack. Build up 2-3 coats for durability; for a nightstand that will see daily use, plan on at least three coats of clear protective finish. let the finish cure in a controlled habitat before reassembling hardware.
| Finish | Pros | cons | best For |
|---|---|---|---|
| oil-based polyurethane | Durable, rich color | long cure, stronger odor | high-use surfaces |
| Water-based polyurethane | Fast cure, clear finish | Can feel plastic-ish on some woods | Light woods, interiors |
| Shellac | Warmth, fast dry | Not water resistant | Vintage look, quick topcoat |
| Lacquer | glass-like, durable | Repair can be tricky | Modern, sleek surfaces |
Care and maintenance extend the life of your finish. Wipe with a soft, damp cloth and avoid harsh cleaners; if wear appears, lightly sand and recoat a thin layer for a refreshed look. Protect the surface from heat and moisture and keep it out of direct sun to prevent color shift. For best results, schedule occasional touch-ups or a refreshed topcoat every few years, especially on edges and high-contact areas.
Get Instant Access to 16,000+ Woodworking Plans →
Budget Friendly Options and Time Saving Tips for Your First Furniture Project
Starting on a budget doesn't mean you have to compromise on style or function. Opt for a simple, timeless nightstand design with a minimal parts count-top, sides, a drawer, and a base. For materials, consider budget-friendly woods like pine or poplar, or half-inch plywood for a sturdy case. Salvaged lumber or reclaimed pallet boards can stretch your dollars further if they're clean and straight. Plan around standard board widths to minimize waste and extra cuts, and target a one-drawer layout to keep assembly straightforward. Measure twice, cut once, and keep a precise cut list to prevent costly mistakes and unneeded trips to the store.
Time-saving tips start with a smart cut plan. Batch cut all pieces before you assemble, so you're only handling parts once. Use a pocket-hole jig or simple butt joints with glue and finish nails for fast, sturdy construction that doesn't require complex joinery. Pre-drill holes for the drawer hardware and test-fit everything before final assembly. For finishing, choose a single, even application like a wipe-on polyurethane or a light spray finish to reduce brushing and drying time. If you already own basic tools, stick to them; investing in one versatile jig can save hours over multiple builds.
Budget-conscious substitutions can dramatically cut costs without sacrificing durability. Reuse drawer pulls from an old project, swap in inexpensive hinges, or skip metal drawer slides in favor of a simple wood runner if the drawer width is modest. Keep a running ledger of materials and prices so you can adjust the scope before you start. For a compact project like a nightstand, a single sheet of plywood plus a few boards can cover the whole carcass, saving both material and finish time. The following table summarizes a practical materials plan with quick cost estimates to help you decide fast.
| Item | Options | Estimated cost |
|---|---|---|
| Lumber | Pine boards or 1/2″ plywood | $8-$40 |
| Hardware & Fasteners | Screws,glue,drawer slides | $8-$20 |
| Finish & Sanding | Sandpaper,stain/sealer | $5-$15 |
| Hardware (Pulls) | Budget pulls or repurposed | $2-$10 |
Get Instant Access to 16,000+ Woodworking Plans →
creative Storage Solutions and Personalization Ideas for Your Nightstand
Creative storage solutions for a nightstand can transform your bedside routine. Think in layers: a pull-out tray for small items, a slim fabric bin on the lower shelf, and a cord-management groove to tame charging cables. If you add a hidden top compartment, you can tuck away receipts, sunglasses, or vitamins without cluttering the surface.
- Pull-out tray under the top surface to hold small essentials.
- fabric or woven bins on the lower shelf for quick access and visual texture.
- Hidden compartments behind removable panels for electronics and cords.
- Built-in charger with a dock or USB hub and tidy cord routing.
- Modular dividers in a drawer to separate jewelry, meds, or stationery.
personalization adds character and helps you actually use the space.Consider a finish that echoes your room-soft contrast in the trim, or a top veneer with a subtle grain. Embellish with a hand-painted motif, a decoupage panel, or a small inlay that reflects your style. Swap standard knobs for geometric pulls or vintage glass handles to elevate the piece while keeping the project approachable for a first project.
To plan and implement these ideas,start with a quick sizing map and a simple materials list. Sketch the layout, then test-fit inserts before final assembly. Use low-profile hardware to keep surfaces smooth, and route cords with a shallow grommet or cable channel so you can reach devices without unplugging. Below is a quick reference for storage options that balance accessibility and concealment:
| Option | Pros | Best For |
|---|---|---|
| Pull-out tray | Keeps small items organized and reachable | Top surface items |
| Hidden compartment | Conceals electronics and cords | Nightstand interior |
| Built-in charger dock | Cable management; devices charge neatly | Phone, watch, earbuds |
Get Instant Access to 16,000+ Woodworking Plans →
Q&A
What tools do I need to build a simple nightstand?
At minimum, you'll want a saw, drill, screwdriver, tape measure, square, clamps, and sandpaper. A power sander and cordless drill can speed things up, but they're optional for a first project. Stick to well-maintained basics and follow safety guidelines.
What materials are best for a beginner-friendly nightstand?
Plywood or pine boards with a simple box frame are forgiving and easy to work with. opt for straight grain and a material you're comfortable finishing; pre-finished plywood can save time.Pair with sturdy joinery and a simple shelf if you like.
How should I size a nightstand to fit with my bed?
Aim for a top surface height around the mattress top (roughly 24-28 inches). Match the nightstand width to the bed's footprint and leave legroom for comfort.
How can I finish and protect a nightstand without a lot of fuss?
Choose a simple finish like a water-based polyurethane or a clear stain to highlight the wood with minimal steps. If you prefer paint, prime first and apply two thin coats plus a clear sealer. Either approach provides durable protection with straightforward steps.
The Conclusion
Choosing a simple nightstand isn't just about a small end table; it's proof that clear plans, patient hands, and a few basic tools can transform an idea into a sturdy piece you'll use every day. the takeaway is that starting with approachable plans builds confidence, sharpens measuring and joinery skills, and invites customization as you grow. For woodworking enthusiasts, these projects matter: they're low risk teachers, steady progress, and tangible rewards. so pick up the saw, study a plan, or skim another guide, then adapt the design to your space. With steady effort,your next project will stand tall-and you will,too.


This DIY nightstand project looks like a fantastic way to kick off my furniture-making journey! I love the design-simple yet stylish. Can’t wait to give it a try!
This project seems so achievable for beginners like me! I appreciate the clear instructions and relatable materials; it really inspires me to finally tackle my own nightstand!
I love how this project combines functionality with a bit of personal flair! I’m excited to customize my own nightstand and make it uniquely mine. Thanks for sharing these great plans!
I’m thrilled to see such positive feedback on this project! I think making my own nightstand will not only enhance my bedroom but also boost my confidence in DIY furniture-making. The plans seem so approachable-I’m definitely ready to dive in!
I’m really excited about these DIY nightstand plans! It feels like the perfect way to start building my own furniture, and I can’t wait to add my personal touch to the design. Thanks for the inspiration!
I’m really looking forward to taking on this DIY nightstand project! It seems like an excellent introduction to furniture-making, and I can’t wait to bring my own style to life while creating something functional for my space. Thanks for sharing these amazing plans!
I can’t wait to get started on this DIY nightstand; it looks like the perfect blend of style and practicality, and I’m eager to put my own spin on it! Thanks for the detailed plans and motivation!
I’m super excited to tackle this DIY nightstand project! It looks like a fantastic way to get into furniture-making, and I can’t wait to personalize it to match my bedroom decor. Huge thanks for the clear plans and encouragement!
I’m really excited to give this DIY nightstand a go! It seems like a perfect project to flex my woodworking skills while adding a personal touch to my room. Thanks for providing such clear and inspiring plans!
I’m thrilled to dive into this DIY nightstand project! It seems like a perfect blend of creativity and functionality, and I’m excited to customize it to match my style. Thank you for the wonderful plans and inspiration!
I’m so excited to start this DIY nightstand project! It seems like a fun way to learn new skills while crafting something that perfectly suits my room. Thank you for the clear instructions and inspiration!
I’m really looking forward to tackling this DIY nightstand project! It seems like an excellent way to hone my woodworking skills while creating a piece that truly reflects my style. Huge thanks for the detailed plans and inspiration!
I’m so eager to start this DIY nightstand project! It seems like a great way to express my creativity while learning some new woodworking techniques. Thank you for the easy-to-follow plans and the motivation to bring my vision to life!
I can’t wait to start this DIY nightstand project! It looks like the perfect way to combine creativity with practical skills, and I’m eager to make something that adds a personal touch to my space. Thanks for the inspiring plans and guidance – I’m ready to get building!