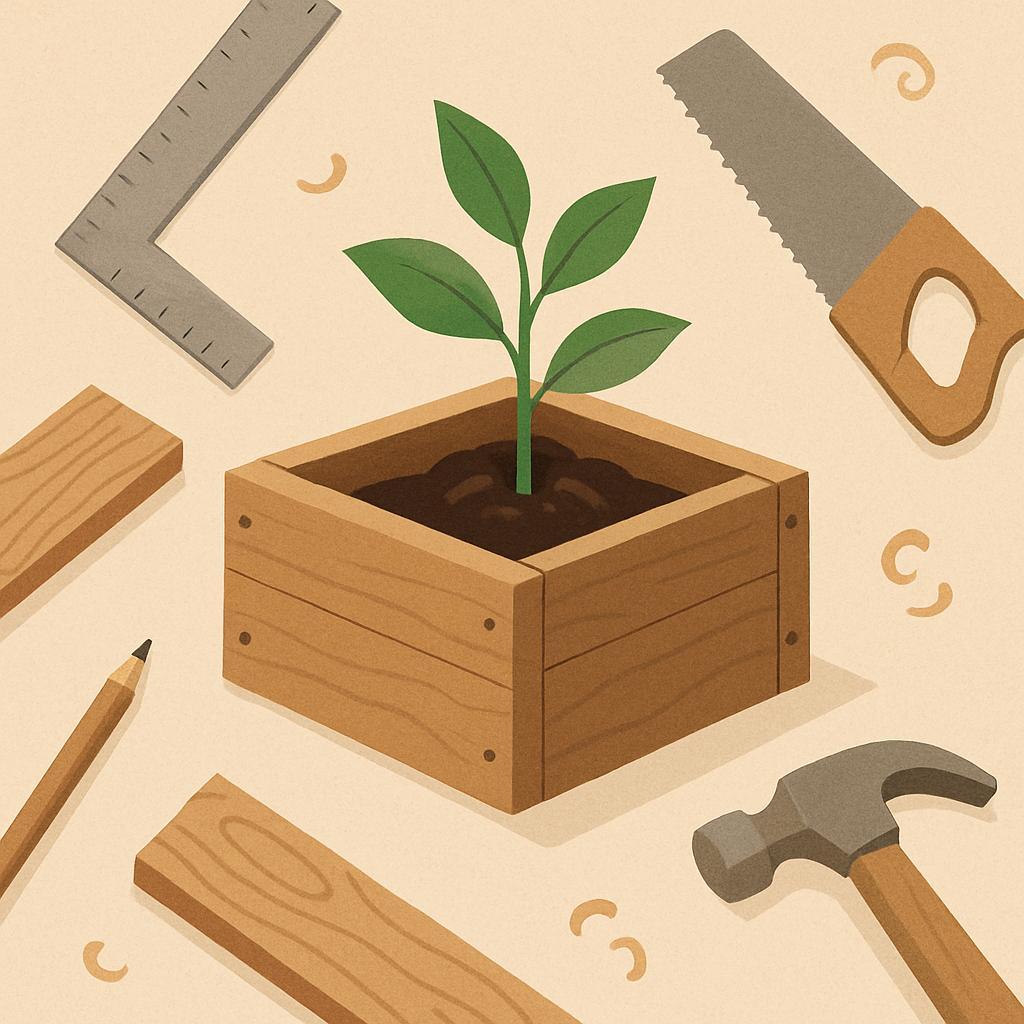
Turn a few ordinary boards into a pocket of green. A wooden planter box is more than a container-it's a practical canvas for craftsmanship, a test of precise cuts, and a slow, satisfying project you can finish in a weekend. For woodworking enthusiasts, assembling a sturdy planter connects joinery, finish, and an eye for proportion with living color.In this step-by-step guide, you'll learn to choose materials, measure accurately, cut safely, assemble a durable box, and seal it for the elements. By the end, you'll gain a repeatable process and a handmade planter that blends function with design.
:
Choosing the right wood and protective finishes for longevity
Choosing the right wood for a planter box isn't just about looks; it's about longevity. Favor rot-resistant species such as cedar,redwood,or cypress,or use exterior-grade pine that's kiln-dried and intended for outdoor use. Aim for boards around 3/4 inch to 1 inch thick for the sides to withstand moisture,and plan to line the interior with a durable plastic liner to protect the wood from direct soil contact. This simple setup reduces warping and extends the life of your planter without constant repairs.
Before you finish, decide on a protective coating strategy that lets the wood breathe. Penetrating oils like tung oil or polymerized linseed oil guard from within and resist peeling as moisture cycles. For a more durable exterior surface, apply a breathable water-repellent stain or spar varnish in thin coats, keeping coatings away from the interior were soil sits. Remember to seal end grains well, and avoid paints that trap moisture inside wooden planters.
Practical steps for longevity: sand the boards smooth, apply a penetrating finish to all exterior surfaces, and install a durable interior liner before adding soil. use stainless steel or galvanized hardware to resist corrosion, and recoat every 1-2 years depending on exposure. The table below summarizes common finishes and their trade-offs to help you choose the best balance of protection and maintenance for your climate.
| Wood type | Pros | Cons | Best for |
|---|---|---|---|
| Cedar | Rot-resistant; pleasant grain | Higher price | Long-lasting planters in sun |
| Pressure-treated pine | Affordable; strong | May leach chemicals; line interior | Budget-friendly boxes |
| Redwood | natural rot resistance; sturdy | Can be costly; variable supply | Medium to large raised beds |
Get Instant Access to 16,000+ Woodworking Plans →
Designing a planter box size and layout to fit your space
Take stock of your space and your planting goals before you touch a saw. Start by measuring the available length, width, and height, then add clearances for doors, paths, and the box's lid if you plan to cover it. Think about sun exposure, drainage direction, and how you'll reach the soil for watering and maintenance. A well-sized planter respects the room's flow and your back: a footprint that fits comfortably alongside furniture and does not feel like an obstacle will invite you to tend your herbs or greens daily.
Size is driven by what you want to grow and how deep the roots will reach. Use the soil depth to guide the planter's height: shallow herbs and leaves are happier in shallower boxes, while root crops and tomatoes demand more depth. For reference, see the rapid guide below, which helps you pair plant type with an appropriate soil depth.
| Plant Type | Soil Depth (inches) |
|---|---|
| Herbs (basil, parsley) | 6-8 |
| Leafy greens (spinach, lettuce) | 8-12 |
| Tomatoes/Peppers | 12-18 |
| Root crops (carrots, radishes) | 12-18 |
Turn your measurements into a practical layout.A straight rectangular box is the simplest, but on a small balcony or corner you can create a corner-friendly setup or split a long run into two shorter boxes to improve accessibility. Plan for a safe, level base, handy drainage, and sturdy fastenings. For most greens, aim for a height of 10-12 inches to reduce bending, while deeper boxes (12-18 inches) support tomatoes, peppers, and root crops. If you're space-limited, consider two compact planters rather than one oversized box to keep maintenance easy and water management predictable.
draft a quick mock-up of your footprint: tape the outline on the floor, or cut cardboard shapes to scale and try them out. Mark where you'll drill drainage holes and where a watering can can reach, then adjust the layout before you assemble. Remember to account for weight when full-soil and water can quickly become heavy, so choose durable material, add a simple wheel base if you need to move the box, and consider a lightweight liner to reduce stiffness while keeping soil contained.
Get Instant Access to 16,000+ Woodworking Plans →
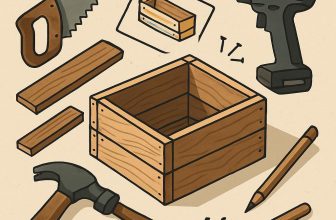
Cutting and assembling a sturdy frame with precise joints
Begin by selecting straight, dry boards of equal thickness for the frame. Plan your outer dimensions carefully and lay out all pieces with a sharp pencil. Mark each cut line, then set your saw to the exact angle you need and use a stop block to guarantee uniform lengths. When you cut, keep the boards flat and supported to avoid chipping, and lightly deburr the edges with sandpaper so there are no splinters that might snag joints.This upfront discipline will pay off with precise measurements and square cuts that align neatly at assembly.
With all pieces cut, perform a dry-fit on a flat workspace. Check that opposite corners form perfect right angles and that the outer frame sits flat without gaps. If any edge is slightly out of square, trim a touch and re-check before gluing. Apply a thin bead of wood glue to the mating faces, then reinforce each joint with screws driven from the inside to keep the exterior clean. Pre-drill pilot holes to prevent splitting, and countersink the screws for a flush, professional look. You can use through-dab glue on the edges or opt for pocket-hole screws for an even cleaner interior.
Begin assembling the frame by joining in a logical sequence-two long sides with two short sides to form a rectangle. Clamp the corners firmly during the process, then drive screws through the inside faces, ensuring the outer edges stay flush.for extra rigidity, insert small internal corner blocks or use metal L-brackets on the inside corners. Keep checking the diagonals as you go; when both diagonals measure the same,you know the frame is square and ready to take a bottom panel and the rest of the planter box.
| Part | Length (in) | quantity | Notes |
|---|---|---|---|
| Long sides | 21 | 2 | outer frame |
| Short sides | 15 | 2 | Outer frame |
Finish the assembly by turning the frame over and smoothing any rough spots. Fill tiny gaps with matching wood filler, let it dry, and sand to a smooth, even surface. test for wobble on a flat surface and add additional bracing if needed. If the planter will be outdoors, seal the frame with an exterior-grade finish to protect against moisture, and ensure all joints are fully sealed before mounting or attaching the bottom. A solid, square frame makes the entire project feel sturdy and professional.
Get Instant access to 16,000+ Woodworking Plans →
Lining and drainage strategies for healthy plants
Healthy plants thrive when the planter interior is protected from wood rot but still allows excess water to escape. In a DIY wooden planter,lining and drainage are the dynamic duo that keep roots oxygenated and wood intact. Consider three goals as you plan: shield the timber from soil moisture, provide a reliable drainage path, and prevent soil from soaking into the joints. A thoughtful setup can extend the life of your planter and reduce watering guesswork.
Choose a lining strategy that suits your wood, climate, and how you plan to use the box.Options include:
- No liner with intentional drainage – drill evenly spaced holes and add a shallow drainage layer to move water away from the wood while still letting excess liquid escape.
- Landscape fabric barrier – a breathable sheet that keeps soil from direct contact with the wood while allowing moisture to pass; secure edges to prevent clogging.
- Plastic or rubber liner with holes – insert a flexible liner and punch drainage holes; this reduces soil wicking into the wood but requires periodic checks for leaks and humidity against the wood.
- solid liner with a capillary break – a rigid interior liner plus a coarse drain layer; great for moisture control and easier cleaning, though it adds weight.
Plan drainage with a practical stack: start with a handful of evenly spaced bottom holes,add a coarse drainage layer (gravel,expanded clay,or broken terracotta) to keep soil from clogging holes,and lay a breathable barrier such as landscape fabric to separate soil from the wood while letting water pass.Elevate the planter on short feet or a lightweight platform to improve air circulation underneath, and use a removable inner liner for seasonal cleaning and refreshing the soil mix.
Maintenance is the quiet ally of good lining and drainage. Periodically inspect the drainage holes and clean out roots or sediment, refresh the drainage layer if it compacts, and re-evaluate the liner choice if you notice damp wood or damp soil pockets. A quick finger test for soil moisture and a yearly exterior seal (if the box is exposed to rain) can prevent surprises. Keeping the interior liner removable makes routine cleaning simple and helps you extend the life of your wooden planter.
| Option | Pros | Cons |
|---|---|---|
| No liner | Excellent drainage; simplest setup | Wood may be exposed to moisture; higher rot risk |
| Landscape fabric | Breathable barrier; keeps soil from wood | Fabric can degrade and clog over time |
| Plastic/rubber liner with holes | Controlled moisture; easy to remove and clean | Requires holes and venting; can trap moisture if not ventilated |
| Solid liner with capillary break | Strong moisture control; stable interior | Heavier; needs regular removal for deep cleaning |
Get Instant Access to 16,000+ Woodworking plans →
Finishing touches and maintenance for lasting beauty
To keep your wooden planter box looking fresh for seasons to come, finishing touches are everything. Choose a finish that suits your climate-outdoor-grade sealants such as a water-based polyurethane, penetrating oil, or marine varnish work well. Apply a thin,even coat after a light sanding with 120-180 grit,then wipe away dust with a tack cloth. Allow to dry completely, sand lightly again, and add one or two more coats for lasting protection. Prioritize a weatherproof interior sealant and all exposed edges to minimize moisture ingress and warping.
Maintenance is where the beauty lasts. Establish a simple routine: inspect seasonally for peeling edges, soft spots, or cracks, and recoat as needed. Clean the exterior with a mild soap solution and a soft brush; avoid harsh cleaners that can strip the finish. If fading or chalking appears, lightly sand with fine-grit paper or a tack cloth and reapply. This proactive care preserves color, reduces moisture buildup, and extends the life of your planter without more work later.
Here's a concise reference to finishes that suit outdoor use, helping you decide at a glance.
| Finish | Pros | Best Use |
|---|---|---|
| Water-based polyurethane | Clear, durable, fast-drying | General outdoor boxes |
| Penetrating oil | Enhances grain, easy renewals | Poorly sealed woods |
| Marine varnish | Superior water resistance | Harsh climates |
To further protect the finish and structure, add practical design touches. Use a removable liner to shield wood from soil moisture, and opt for ventilation or gaps to prevent trapped humidity. Choose corrosion-resistant hardware,and consider rubber feet or small runners to keep the base elevated and dry. Place the planter in a partially shaded spot to minimize UV wear, and commit to a yearly reseal if your climate is fickle; small maintenance steps now pay off with lasting beauty.
Get Instant Access to 16,000+ Woodworking Plans →
Installing the planter box in a garden or balcony
Choose a spot with adequate sun and protection from strong winds. A level, stable surface is essential, so check the ground or balcony floor and use a little shim if needed to even out any slope. If you'll be placing the planter on a balcony rail or deck, confirm the structure can safely bear the load and won't block access or drainage. If needed, place a thin rubber mat or leveling shims under the box to even it out. Ensure you have a plan for drainage and a tray or saucer to catch runoff.
On a garden bed or paved patio, anchor the planter with non-slip feet or small stake brackets to minimize movement on windy days. For balcony installations, you can attach the box with exterior-rated straps or brackets designed for railing mounting, following the railing's manufacturer's weight limits. Whichever method you choose, distribute weight evenly and avoid overloading any single point; this helps protect the surface below and reduces wobble when you water the plants.
Prepare the planter for soil by lining the bottom with landscape fabric to keep soil from washing out while still allowing water to drain. Add a thin layer of drainage material (a few centimeters of gravel or broken pottery) to prevent waterlogging. Place a suitable liner or inner pot to keep soil contained, then fill with a light, well-draining potting mix. Leave a couple of centimeters at the top for watering, and give the box a gentle test by tipping it slightly to confirm it sits level and drains freely. Use the quick sizing table below to estimate load and depth.
| Planter size | Soil depth (cm) | Estimated filled weight (kg) | Notes |
|---|---|---|---|
| Small | 20 | 40-70 | Lightweight; suitable for benches or railings |
| Medium | 30 | 80-150 | Balanced for balconies and patios |
| Large | 40 | 150-250 | Most stable but heavy; may require anchors |
after filling, inspect the installation: ensure the box is level, securely anchored if needed, and does not encroach on doors or path clearances. Water thoroughly to settle the soil, then re-check for drainage or pooling. In windy seasons,periodically check fasteners and edging,and if you use a railing mount,re-tighten brackets as necessary. With proper setup, your planter will stay sturdy and accessible for routine maintenance and seasonal replanting.
Get Instant Access to 16,000+ Woodworking Plans →
Q&A
What materials do I need to build a simple wooden planter box?
You'll need weather-resistant boards (cedar or exterior pine), exterior screws, wood glue, a saw, drill, and sandpaper, plus an exterior sealant or stain. Add a liner or landscape fabric to keep soil from washing out, along with potting soil and your plants. A drip tray or saucer helps manage excess moisture.
How do I choose the right size and ensure proper drainage?
Choose dimensions based on the plants' root depth and spread; herbs are pleasant around 6-12 inches deep, while leafy greens may need more. Drill drainage holes in the bottom and use landscape fabric to stop soil from leaking through. Elevate the box slightly on feet or a stand to improve airflow and drainage.
What's the best way to weatherproof and finish the box?
Opt for exterior-grade wood and apply a penetrating sealant or stain to all sides before assembly. Line the interior with a plastic liner or heavy-duty fabric to protect the wood from soil moisture. Re-seal or re-stain the exterior as needed to keep the look and protection over time.
How long does it take to complete, and can I customize the size later?
A basic planter can be built in a few hours, with drying time for sealant adding a bit more. Yes-custom sizes are straightforward: plan your dimensions, cut to fit, and adjust the number of supports accordingly. You can also swap board types or finishes to suit your space.
Concluding Remarks
Ultimately, the heart of this guide is that a simple project, done with deliberate steps, yields lasting results.Choose the right lumber, cut to plan, assemble with sturdy joints, and finish with weather-safe sealant. The takeaway: measurable prep and patient assembly turn a few boards into a dependable home for plants and a satisfying woodworking win. For enthusiasts, the exercise matters because it builds practical skills-measuring, dry-fitting, sanding, and testing fit-while offering room to improvise with hardware, finishes, or sizes. So try the project, skim other guides for ideas, and translate these steps to your next build.May your bench stay steady and your curiosity bloom.


This looks like a fun project! Can’t wait to try making my own wooden planter box after following your detailed guide. Thanks for sharing!
I love the idea of creating a wooden planter box-it’s such a charming addition to any garden! Your step-by-step guide makes it super accessible for beginners.
This is such a great project for both experienced crafters and newbies! I appreciate the clear instructions and tips-definitely inspired to get started on my own planter box soon!
This guide is fantastic! I love how straightforward it is, and I can’t wait to personalize my own planter box with some unique designs. Great job!
I’m really excited to try this out! Your detailed steps make it easy to follow, and I love the personal touch you encourage with designs. Perfect for adding some flair to my garden!
This guide is amazing! I appreciate how you break everything down into manageable steps, making it so approachable for anyone. I can’t wait to get started on my own wooden planter box and add some greenery to my space!
I’m so inspired by this guide! The step-by-step format really makes it easy to envision the process, and I can’t wait to let my creativity flow while building my own unique planter box. Perfect weekend project!
I love this DIY project! The instructions are so clear, and I feel like I could really make it my own with some creative touches. Excited to get my hands dirty and add a beautiful wooden planter box to my garden!
This DIY guide is just what I needed to make my first planter box! The clarity of your instructions is impressive, and I’m looking forward to customizing it with some fun paint and decorations. Can’t wait to see my garden flourish!
This guide is fantastic! I love how detailed and user-friendly it is, making it perfect for both beginners and seasoned DIYers alike. I can’t wait to bring my own personal style into the planter box and watch my plants thrive!
This guide is fantastic! I love how detailed and user-friendly it is, making it perfect for both beginners and seasoned DIYers alike. I can’t wait to bring my own personal style into the planter box and watch my plants thrive!