The right set of tools can turn a rough piece of lumber into a doorway to creativity. For beginners, choosing tools is as much about safety and learning pace as it is about blades and boards. This article explains why a thoughtful starter kit matters to every woodworking enthusiast, and how it can build confidence and accuracy from the first square cut. You'll learn wich tools to start with, how to evaluate quality, and how to set up a safe, efficient workspace. It also outlines budget-kind options, basic maintenance, and simple projects to practice with your new kit.
Choosing the Core Tools for a Successful Woodworking Starter Kit
is about balancing safety, versatility, and growth. Start with a compact set that covers most beginner projects-think basic cutting, measuring, and assembly. Prioritize comfort and control: an ergonomic handle, a blade that stays sharp with light maintenance, and a tool that feels balanced in your hand.A thoughtful starter kit reduces frustration and encourages you to try new projects rather than chasing perfect gear.
Before you buy,map out the kinds of projects you want to tackle in the first months. A well-chosen mix grows with you: a reliable saw, a precise measuring/marking setup, a plane or smoothing tool, and a couple of clamps for hold-fast stability. Invest in quality where it matters-edges stay square, cuts stay clean, and repeatable layouts save time-then reserve budget for the rest. Consider how space, noise, and dust will affect your setup, and choose tools that fit your workspace.
- Measuring and marking: tape measure, combination square, marking gauge
- Cutting tools: backsaw or handsaw, utility knife
- Smoothing and shaping: block plane, file/rasp, sandpaper
- Holding and assembly: clamps (two to four), wood glue, mallet
| Tool category | Why it matters | Starter option |
|---|---|---|
| Measuring & marking | Ensures accurate, repeatable cuts | Tape measure + combination square |
| Cutting | Creates straight, square edges | Crosscut handsaw or backsaw |
| Smoothing | Leaves ready-to-finish surfaces | Block plane or smoothing plane |
To stretch your budget, plan upgrades methodically. Start with tools you'll use for multiple projects, then add specialty pieces as your interests sharpen. Keep your workshop organized: a dedicated tool cabinet, labeled slots, and a safe place for blades and clamps. And always embrace basic safety habits: wear eye protection, keep blades sharp, and clean your workspace after each session. A thoughtful approach today makes future upgrades cheaper and more enjoyable.
Build Your Dream Workshop on a budget →
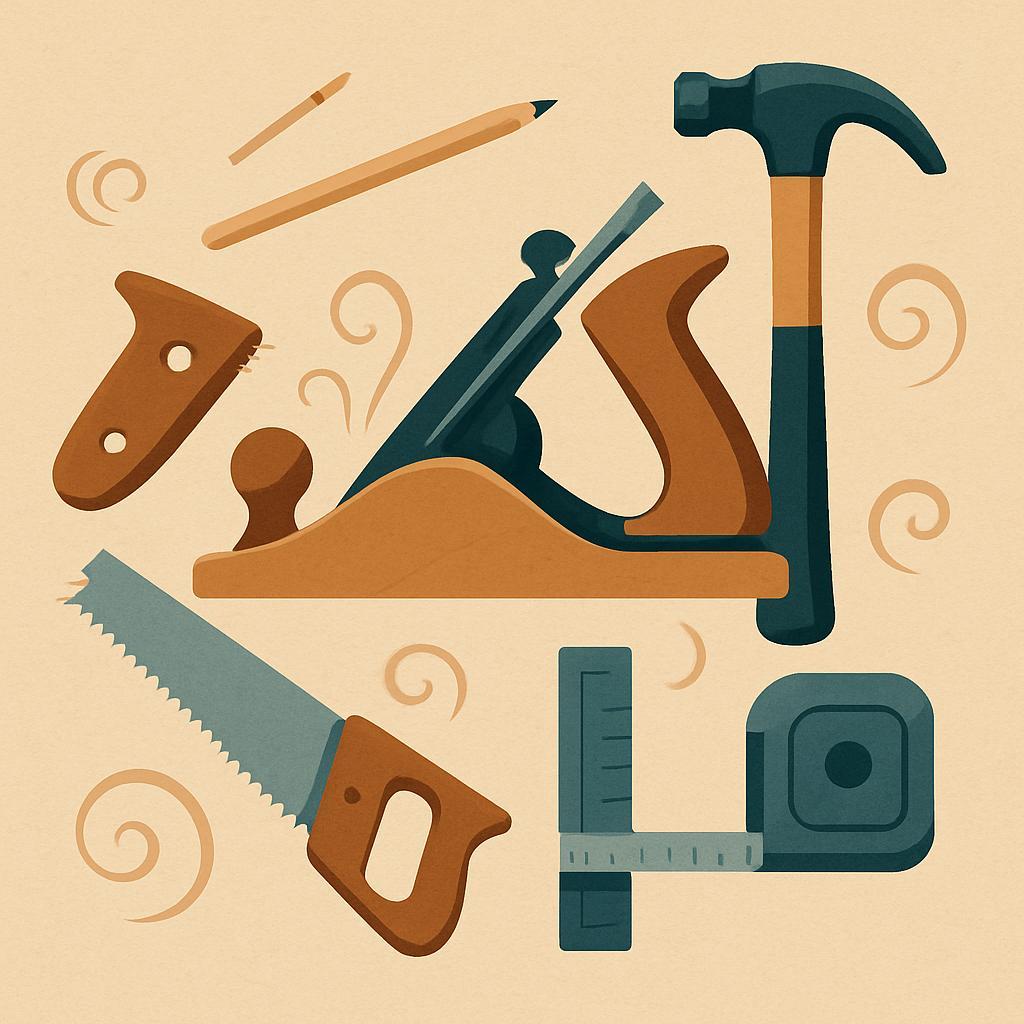
Must Have Hand Tools for Beginners and Progressive Projects
Starting with the right hand tools sets the pace for every project, from small boxes to weekend builds. Prioritize reliability, comfort, and a sense of control over your work. A tight starter kit keeps you practicing precise cuts, clean joints, and smooth edges without chasing every new gadget. With a few well-chosen tools, you can build confidence, learn sharpening routines, and progressively tackle more aspiring projects.
These core hand tools cover most beginner-to-progressive projects and scale with your skills. Build them in a practical sequence and you'll stay motivated while you learn proper technique.
- Claw hammer (16 oz) - for nails and light demolition; balanced grip aids driving without fatigue.
- Handsaw – accurate cuts in stock; keep the blade sharp and aligned.
- Combination square (6″ or 12″) – for squaring, layout lines, and 90°/45° checks.
- Marking knife or marking gauge – crisp, transfer-ready lines that pencils can smear.
- Bevel-edge chisel set (1/4″, 1/2″, 3/4″) - waste removal and fine fitting; keep blades sharp.
- Block plane – easing edges and flattening stock; balance and a sharp iron matter.
- Optional smoothing plane – for a smoother final surface as your projects grow.
- Tape measure (25 ft) and a small ruler – speedy layout and checks on the fly.
- Screwdriver set (flat and Phillips) – assembly and adjustments; choose comfortable handles.
- Sharpening system (stone or honing guide) – keeps edges true and safe to use.
Here is a quick reference to help you plan purchases.The table outlines each tool's purpose and a practical tip to get the most from your early work.
| Tool | why it matters | Starter tip |
|---|---|---|
| Claw Hammer | Driving nails and light demolition | Go for a balanced head and comfortable grip |
| Combination Square | Squaring, marking, and layout | Check 90°/45° accuracy on arrival |
| Bevel-edge Chisel Set | Waste removal and fine fitting | Keep blades sharp; pare with care |
| Handsaw (Panel/Crosscut) | Accurate cuts in stock | Support workpiece; align with cut line |
| Block Plane | Flattening and edge bevels | Sharpen blade; adjust for light cuts |
Progression and care go hand in hand. As you complete more projects, expand thoughtfully and establish routines that protect your tools as well as your work. Sharpen regularly, wipe and dry metal parts after use, store blades safely, and keep a dedicated space for your kits. Plan purchases around your actual project needs, not novelty, and you'll build a durable, enjoyable workshop without breaking the budget.
Build Your Dream Workshop on a Budget →
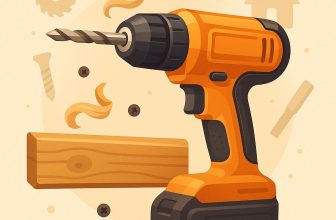
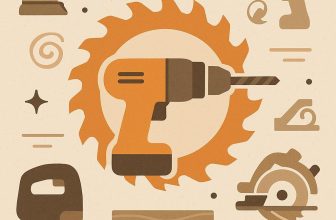
Power Tools Essentials for a Safe and Efficient Workshop
Power tools can transform a beginner's woodworking into precise, efficient work, but safety must come first. Build a workspace where everything has a place, where guards are in place, and where you unplug before adjusting blades or changing bits. Establish a routine: inspect blades and bits for wear, secure stock with clamps, and use a push stick or featherboard when guiding boards through a saw. A clear safety plan reduces surprises and keeps your learning curve steady.
For a solid starter kit, focus on a handful of versatile machines that cover the common tasks you'll face:
- Cordless drill/driver for fast driving and drilling; pair with sharp bits and a magnetic tray to keep bits handy. look for a comfortable grip, a reliable chuck, and variable speed.
- circular saw with a sturdy blade and a guide track for straight cuts; consider a compatible zero-clearance base or guide rail to improve accuracy.
- Jigsaw for curved or interior cuts; use fine-toothed blades and slow feeds to minimize tear-out.
- Random orbital sander to prep surfaces evenly; start with coarse grit and move to finer grits, keeping the pad flat to avoid gouges.
- Miter saw or a compact chop saw for clean crosscuts; a good miter gauge and stops improve layout speed.
To compare these tools at a glance, consider thier common safety features and usage notes:
| Tool | Key Safety Feature | Usage Tip |
|---|---|---|
| Cordless drill/driver | Forward/reverse, adjustable clutch | Clamp work, start with low speed |
| Circular saw | Blade guard, riving knife | Use a track or guide for straight cuts |
| Jigsaw | Orbital action toggle, blade changes | Support material; cut away from your body |
| Random orbital sander | Dust collection compatibility | Keep the pad flat; avoid pressing hard |
| Miter saw | Blade guard, stable fence | Measure twice; use clamps |
Beyond buying, invest in habits that keep tools performing and your workshop safe. Maintain sharp blades and bits,clean dust regularly,and store cords and batteries where they won't tangle. Create a practical layout: power outlets near the bench, a dedicated dust-collection zone, and a rack for storing guards, blades, and bits.With a thoughtful setup and a respectful approach to safety, your starter kit will stay reliable, and your project outcomes will improve as your skills grow.
Build Your Dream Workshop on a Budget →
Safety Gear and workshop Setup for Confident Woodworkers
Confidence in woodworking starts with protecting your body. A well-fitting set of safety gear isn't a barrier to learning-it's the first step to keeping you in the shop longer and injury-free. Invest in PPE that fits comfortably: safety glasses or goggles with anti-fog lenses,reliable hearing protection,and a respirator or dust mask for sawdust. Choose gear with adjustable straps,cleanable materials,and easy access so you're more likely to wear it consistently. Regularly inspect gear for wear and replace any damaged items before you start a project.
To keep safety front and center, here's a concise PPE guide you can reference often.Eye protection, hearing protection, and respiratory protection cover the basics, while gloves and an apron add extra defense when handling sharp stock or finishing supplies. This quick table helps you scan essentials and remember care tips at a glance.
| Item | Why It Matters | Care & Tips |
|---|---|---|
| Safety glasses / goggles | Shield eyes from flying chips, dust, and splinters | Keep lenses clean; replace scratched lenses |
| Hearing protection | Protect ears during loud cuts and planing | Use earmuffs or plugs; store clean |
| Respiratory protection | Filters fine dust and fumes | Choose respirator or dust mask; wash or replace filters |
| gloves | Minimize cuts when handling sharp edges; grip | Use snug-fitting gloves; avoid loose fabric near blades |
| Apron / protective footwear | Protect body and feet from spills and dropped tools | Sturdy closed-toe shoes; leather apron; secure hair |
Beyond PPE, set up your workshop with workflow and safety in mind. Create distinct zones for roughing stock, precise joinery, and finishing, so tools and materials move through your process with minimal risk. Good lighting, dust control, and cord management are essential: dust collection or a shop vac reduces airborne particles; shining task lighting prevents mistakes; and keep cords out of walkways to prevent trips. Keep blades and bits guarded, clamps within easy reach, and a sturdy workbench at a comfortable height to maintain control and posture during cutting and planing.
Build Your dream Workshop on a Budget →
Budget Wise Tool Picks and Quality Tradeoffs
budget-wise tool picks hinge on maximizing versatility, reliability, and steady progress. For beginners, a small set of well-chosen tools can cover a wide range of tasks without pushing you toward an oversized, expensive kit. Look for tools that feel comfortable in your hand, produce consistent results, and invite you to keep learning with every project.
Below is a concise snapshot of core picks and the tradeoffs you're likely to encounter at different price points.
| Tool Category | Budget pick | Quality Tradeoff |
|---|---|---|
| Chisel set | $15-$25 | Edges may be less durable; requires regular sharpening |
| Block plane | $25-$60 | Blade quality and smoothing improve with mid-range options |
| Cordless drill/driver | $49-$99 | Battery life and torque vary; two batteries help |
| Combination square | $5-$20 | Stability and accuracy improve with sturdier frames |
For power tools, start with a single dependable cordless drill/driver as the backbone of your kit. It handles many basic tasks and can drive a range of bits and accessories.If the budget allows, consider a compact drill/driver plus an impact driver to handle tougher joints, but always pair them with extra batteries and a solid charger. Prioritize ergonomics and balance-comfort matters when you're spending long sessions in a shop-and don't overlook safety gear like safety glasses and hearing protection as essential parts of your setup.
Smart shopping and maintenance pay off over time. Look for used or refurbished tools in good working condition, test them if possible, and verify compatibility with common blades and batteries. Keep blades sharp, store tools in a dry, organized space, and set a gradual upgrade plan so you can expand as you discover which projects you most enjoy and commit to mastering.
Build Your Dream workshop on a Budget →
Maintenance and Care to Protect Your Starter kit Investment
Protecting your starter kit starts with a simple,repeatable routine. After every project, wipe blades and edges with a dry microfiber cloth to remove sap, dust, and wood fibers. Store tools in a dry, organized case or on a pegboard where air can circulate. Humidity control matters: keep your tools in a dry area and use silica gel packs in the chest to slow rust.
Give metal parts a light protective coat: a thin wipe of non-detergent mineral oil on exposed iron or steel surfaces every few weeks of inactivity helps prevent rust. Periodically inspect blades and chisels for dull edges or nicks; a quick honing touch-up with a fine stone can extend life without a heavy re-sharpen. When not in use, keep blades sheathed or guarded and avoid resting sharp edges on wood benches to prevent dulling.
- Clean and dry after each use
- Lightly oil metal surfaces
- Inspect edges and tighten hardware
- Store in a dry, organized case
Develop safe handling habits that protect both you and your tools. always use push sticks or guards on cutting tasks to minimize kickback and errant slips, and tighten hardware as you notice looseness. Keep chisels and plane blades out of reach of children, and check handles for cracks or swelling. Use protective cases or sleeves for blades, and label each tool so you can quickly grab the right one without exposing the sharp edge to you or others.
To help you keep track, here's a compact maintenance quick-reference:
| Task | Frequency | Tips |
|---|---|---|
| Dust and wipe | After each session | use microfiber; dry cloth |
| Oil metal parts | Every 2-4 weeks | Light coat; wipe excess |
| Sharpen/hone blades | As needed | Use proper stone; maintain bevel |
| Store properly | after use | Keep in dry case; avoid moisture |
Build Your Dream Workshop on a Budget →
Q&A
What are the essential tools I should start with for beginner woodworking?
Begin with a core hand-tool kit: a handsaw (or small backsaw), a block plane, a basic chisel set, a hammer, a combination square, a marking gauge, and a tape measure. Add marking tools like a pencil and marking knife, plus clamps and a cordless drill for versatility. Prioritize sharp blades and comfortable grips,and build your kit around the projects you plan to tackle.
How do I choose beginner-friendly tools that won't overwhelm me or break the bank?
Start with only what you truly need to complete simple projects, then expand as you gain confidence. Look for ergonomics, reliable blade sharpness, and comfortable handles rather than the flashiest brand.Consider beginner bundles or budget-friendly options and add tools gradually when a project demands them.
Are there any safety tips I should follow when starting with basic hand tools?
Always wear eye protection and keep blades sharp; dull tools are more risky than sharp ones. Clamp your work securely and cut away from your body.Maintain a tidy workspace and store tools properly to prevent accidents and misplacement. When using power tools like a drill,unplug or switch off before changing bits and keep cords clear of the work area.
How should I organize or store my starter kit to stay organized and efficient?
Designate a small, organized workspace or a tool cabinet where each item has a home. Use shallow trays or labeled drawers to keep frequently used tools within arm's reach and reserve a sharpening station for blades.Regularly review your kit and retire or replace worn items to keep things efficient.
to sum up
Ultimately, the core message is simple: a well-chosen starter kit unlocks hands-on learning faster than wandering in a sea of options. With a few reliable basics, beginners gain confidence, develop good habits, and begin to understand how each tool shapes the work you imagine.The topic matters as woodworking blends creativity with craft-safety, precision, and joy grow together when you start with the right gear. Now is the moment to act: pick a small project, explore the additional guides, and commit to applying what you've learned.May your bench be steady, your hands curious, and your projects end with a satisfying finish.


Great list! I wish I had this when I first started; having the right tools really makes a difference in learning and creating.
Absolutely! Investing in these essential tools can really set you up for success and make the learning process so much smoother.
This is a fantastic resource for newcomers! Having the correct tools can truly ignite your passion for woodworking and help you grow your skills more effectively.
I’m so glad to see a post like this! Starting with the right tools can really make a world of difference, and it’s exciting to think about all the projects beginners can take on with this starter kit.
Totally agree! It’s amazing how the right tools can boost your confidence and creativity as you dive into woodworking; I think this kit will inspire many new woodworkers to bring their ideas to life.
This is such a helpful guide! Every beginner deserves to start their woodworking journey with tools that empower them to explore their creativity and develop their skills; I can’t wait to see what amazing projects come from this starter kit!
This post is a game-changer for beginners! With the right tools, it’s incredible how much easier and enjoyable woodworking can become; I can’t wait to see the creativity that unfolds from this awesome starter kit!
This is exactly what I needed! A well-curated starter kit can really set the foundation for a successful woodworking journey; I’m excited to see how it encourages beginners to experiment and bring their visions to life!
This post is exactly what every aspiring woodworker needs to kickstart their journey! Having the right tools not only makes the process smoother but also opens up endless possibilities for creativity and skill development; I’m thrilled to see how this starter kit will inspire beginners to tackle their first projects with confidence!
I’m really loving this post! The right tools make such a difference for beginners, and this starter kit is a fantastic resource to help them get started; I can already envision all the creative projects that will come to life from this essential foundation!
Absolutely agree with all the previous comments! A solid set of tools is crucial for beginners to feel confident and capable in their woodworking adventures; I’m excited to see how this starter kit will not only simplify their projects but also ignite a passion for creating!
This is such an inspiring post! A proper starter kit can truly empower beginners to explore their creativity in woodworking, and it’s great to see resources that help them build their skills confidently; I believe this will spark many wonderful projects ahead!
I couldn’t agree more with everyone here! A thoughtfully assembled starter kit is essential for beginners, providing them with the tools they need to unleash their creativity and tackle projects with confidence; I can’t wait to see what amazing creations come from those who embrace this journey!
I wholeheartedly agree with everyone here! This starter kit is a game-changer for beginners, equipping them with essential tools that pave the way for exciting projects and endless creativity; I can already see the amazing things that will come from those who dive into woodworking with this fantastic foundation!
I completely resonate with all the great insights shared so far! This starter kit is an amazing toolset that will undoubtedly help beginners embark on their woodworking journey with confidence and enthusiasm; I’m thrilled to see how these tools will inspire new ideas and innovative creations in the hands of aspiring woodworkers!