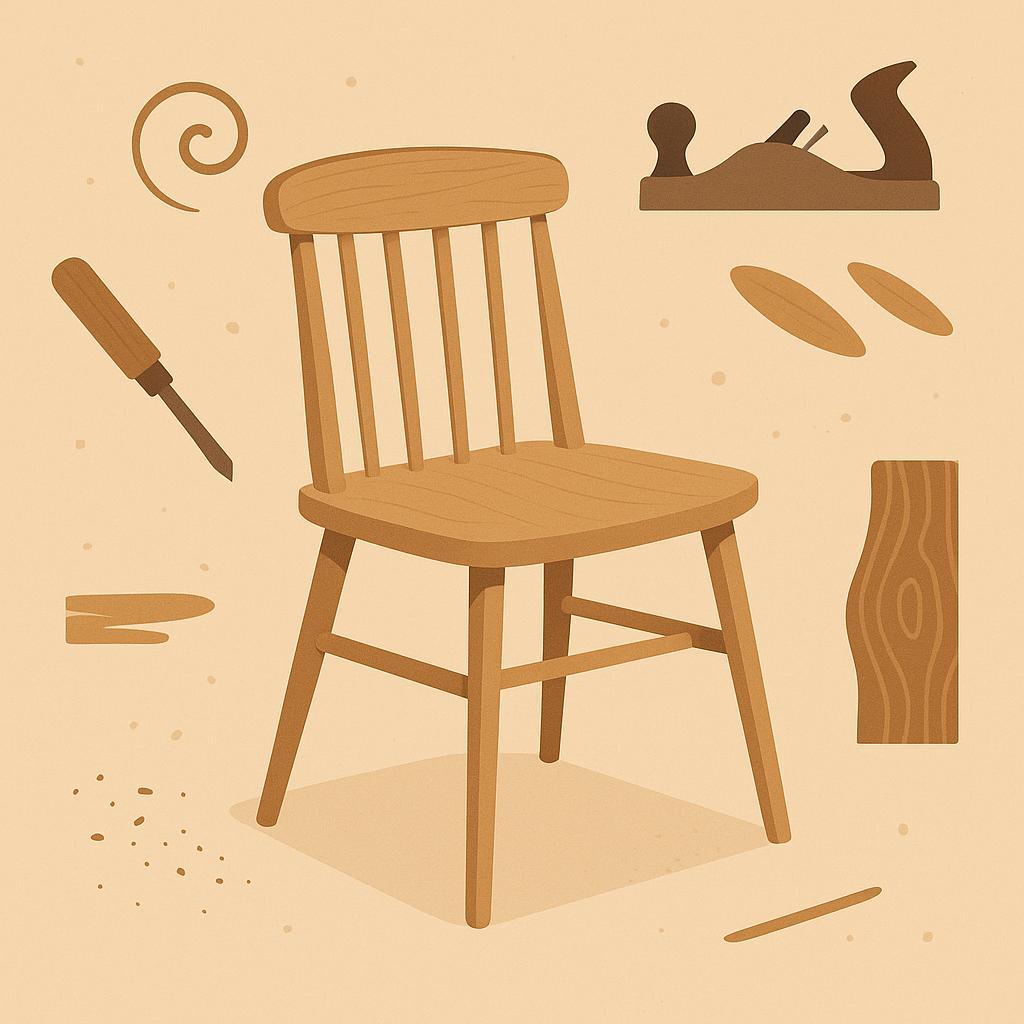
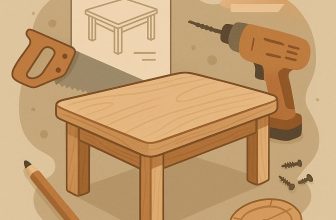
Your next woodworking breakthrough begins with a seat you built yourself. In this beginner-pleasant guide,we'll explore why handmade chairs matter-how a simple seat teaches you too read grain,measure twice,and respect wood's character,turning raw stock into heirloom-friendly furniture. For woodworkers, chairs are a compact lab: they demand accurate cutting, reliable joints, agreeable ergonomics, and thoughtful finishing. By the end, you'll know how to select materials, plan a safe workflow, perform basic joinery (mortise-and-tenon, dowels), shape components by hand, and finish for durability. Ready to sit with your first successful chair?
Why Handmade Wooden Chairs Are a Beginner friendly Choice
Handmade wooden chairs are approachable for beginners as they rely on basic, repeatable steps and forgiving materials.you can start with simple stock like pine or poplar and use straightforward joinery such as butt joints or pocket-hole techniques. The project size is manageable: a sturdy chair or a small stool teaches essential furniture-making skills without overwhelming tools or curves. With careful planning and patience, progress shows quickly, which helps you stay motivated and proud of each finished piece.
To get started, follow a simple playbook that keeps things enjoyable and safe:
- Pick a straightforward design featuring flat surfaces and right angles.
- choose forgiving woods (pine or poplar) and cut all parts to exact lengths.
- Drill pilot holes, assemble with wood glue and clamps, and allow joints to dry.
- Sand smoothly and apply a protective finish that suits your space.
A rapid reference helps beginners compare options:
| Wood | Workability | Finish | Durability |
| Pine | Easy | Accepts oil/varnish | Moderate |
| Beech | Moderate | Excellent with polish | High |
| Maple | Moderate | Clear finish | High |
Finish and upkeep tips help your chair last: use a protective topcoat, clean spills promptly, check joints every few months, and re-tighten with a simple screwdriver as needed. Build confidence by documenting measurements and noting which techniques felt smoothest.As you grow more comfortable, you can explore subtle curves or more refined joinery, but always anchor learning in solid, beginner-friendly steps.
Get instant Access to 16,000+ Woodworking Plans →
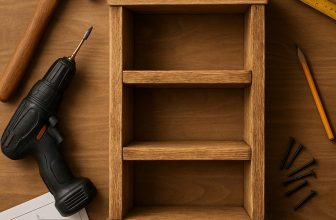
Essential Tools and Materials for Handmade Wooden Chairs
Equipping yourself for handmade wooden chairs starts with a thoughtful toolbox. For beginners, a balanced mix of hand tools for feel and small power aids for consistency helps you stay in control without overwhelming you. Build a starter kit with core reliability:
- Handsaw or backsaw for precise cross-cuts and gentle rips
- Block plane to smooth surfaces and fit joints
- Chisels in a few widths (e.g., 1/4″, 3/8″, 1/2″) for mortises and clean edges
- Mallet to avoid marring edges during assembly
- Measuring tools such as a tape measure, steel ruler, and a try square for straight, true lines
- Clamps (2-3 small F-clamps and 2 larger bar clamps) to hold parts during glue-up
- Sandpaper set plus a palm sander or sanding block to build smooth, comfortable surfaces
- Sharpening gear (stones or a honing system) to keep edges sharp and safe
- Safety gear including goggles, a dust mask, and ear protection
Beyond tools, the right selections of wood and fasteners shape how your chair feels and lasts. For beginners,choose wood with stability and workability,such as beech,maple,oak,or pine,and be mindful of grain orientation for strength. Stock up on a few essentials:
| Material | Best Use | Notes |
|---|---|---|
| Pine | Frame parts, legs | light, affordable; easy to work but softer |
| Beech | Seat slats, rails | Stable, good wear; takes finishes well |
| Maple | Durable components | harder; nice finish but harder to plane |
| Oak | Frame and back | strong; pronounced grain; heavier |
Adhesives, finishes, and fasteners complete the toolkit. A reliable wood glue with a long open time helps glue-ups stay aligned, while a light finish guards against moisture and wear. For chairs, you may also want dowels or screws for joinery, and a simple wipe-on polyurethane or oil finish for a natural look. Stabilize your work with the right clamps and supports:
- Clamps (bar clamps, F-clamps, quick-grips) in a range of sizes
- cauls or sacrificial boards to protect delicate surfaces
- Finish tools such as brushes or lint-free cloths for even coatings
| Workholding | Why it helps |
|---|---|
| bar clamps | Glue-ups, spacing |
| cauls | Protects flat surfaces |
| Bench dogs | Stabilizes workpieces |
to translate this into a smooth start, sketch a simple plan before touching wood. Create a short bill of materials,cut parts a shade longer,and trim to fit as you assemble. Practice with a scrap piece to dial your saw and plane, then move to a small chair project such as a stool or an armless chair. A tidy workspace, a clear cut list, and intentional steps turn a daunting project into a confident craft, one notch at a time.
Get Instant access to 16,000+ Woodworking Plans →
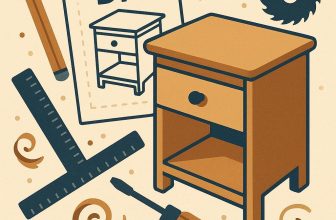
Planning your First Handmade Wooden chair From Concept to Sketch
Plan with purpose by narrowing your options to a chair that fits both space and user. Decide on the chair style (for example, a dining chair, a lounge chair, or a desk chair) and outline the ergonomic targets it must meet. Think about seat height around 17-18 inches for most adults, a seat depth that supports the thighs without crowding the knees, and a backrest that follows the natural curve of the spine. Collect a few quick inspirations, then sketch several variations on grid paper to compare silhouettes and proportions. A short constraint list-available wood, tooling access, and budget-will keep the concept realistic as you move toward a precise sketch.
With a clear concept, translate it into simple sketches that reveal joints, leg geometry, and the backrest relationship. Start with a side view and a top plan view on a light grid,labeling critical dimensions as you go. Decide on joinery that you can execute with your tools-mortise-and-tenon or dowel-and-screw are solid beginner options-without overcomplicating the build. choose a wood species that matches your climate and budget, and note its grain direction as you mark where the stock will be cut. This step is about confirming proportions and ensuring the concept remains doable once you start cutting.
Use a simple reference table to lock in core numbers before finalizing the sketch.
| dimension | Typical Target | Notes |
|---|---|---|
| Seat height | 17″-18″ | Adjust for user height |
| Seat depth | 15″-17″ | Balance leg support and backrest |
| Backrest height | 12″-18″ | Lower back; taller if lumbar support desired |
| Leg style | Straight or tapered | Stability and aesthetics |
map the plan to a practical workflow: turn the sketch into a basic cut list, lay out parts on the stock, and decide grain orientation for strength and beauty.Sketch the front and side views neatly, annotate each piece with its approximate thickness, and note where joints and fasteners will go. Before cutting, do a quick dry-fit with scrap lumber or cardboard to check angles and seating comfort, and adjust proportions if needed. Keep a running checklist: stock availability, tool setup, and a realistic time frame to avoid overreach. This upfront planning will shorten the build and boost confidence as you bring the chair from concept to a tangible result.
Get Instant Access to 16,000+ Woodworking Plans →
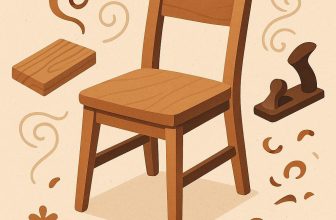
Core Techniques for Building a Sturdy Comfortable Chair
building a sturdy, comfortable chair starts with selecting the right materials and planning for durability from day one. Choose hardwoods with straight grain and good density,such as maple,beech,ash,or oak,rather than soft woods for the main frame. Plan for grain orientation that supports the load path: vertical members carry most weight; seat rails and back slats should be well-supported. Prioritize precise cuts,square corners,and careful pre-drilling to prevent splits. A well-fitted assembly relies on accurate cuts and a clean fit, so dry-fit before gluing or screwing anything together.
Strong joints are the backbone of a sturdy chair. Mortise-and-Tenon joints provide excellent load transfer, especially where the legs meet the rails and backrest. Dowel joints can be simpler for beginners but require precise alignment. Reinforce joinery with careful glue application and clamps to prevent gaps. Always seal end grain where possible to reduce moisture absorption. Use long screws or corner blocks in areas prone to lateral stress for added resilience.
| Joinery | Pros | Cons |
|---|---|---|
| Mortise-and-Tenon | Great strength; durable when well-cut | more complex; requires precise milling |
| Dowel | relatively simple; good alignment with jigs | Less resistant to twisting; alignment critical |
| Corner Block / Lap | Fast to assemble; good for beginners | Limited load path compared to mortise-tenon |
| Pocket Hole | Quick; hides fasteners | may show on visible surfaces; less rigid long-term |
Ergonomics matters as much as raw strength.Start with a comfortable seat height-aim for about 17 to 18 inches from the floor for average adults, and offer a shallow seat depth around 16 inches to keep knees from pressing into the edge. Back support should follow the natural curve of the spine, with a gentle recline of roughly 5 to 15 degrees to reduce fatigue. If your upholstering, choose a breathable cushion and consider a slight bow on the back slat to cradle the lower back. Test often by sitting for extended periods during the build to catch comfort issues early.
finishing and final checks seal the chair's endurance. Sand through grits gradually for a smooth surface, then apply a protective finish that suits your wood and climate-oil finishes for warmth or polyurethane for durable protection. After assembly,test for wobble by placing the chair on an unlevel surface and adjusting with shims or leveling feet if needed; check joints by applying forward and side pressure to ensure no shifting.Maintain the chair with periodic tightening and gentle cleaning to preserve both comfort and structural integrity.
Get Instant Access to 16,000+ Woodworking Plans →
Finishing Touches and Maintenance for Handmade Wooden Chairs
Finishing touches do more than just prettify a chair; they seal and protect the wood, influence comfort, and determine how long your project will endure daily use. For handmade chairs, start by picking a finish that suits both the wood species and the room. Natural oils (like tung or linseed) create a warm, tactile feel and are easier to refresh, while protective films such as polyurethane or hard wax blends offer stronger abrasion resistance. Before committing,test your chosen finish on scraps or a hidden panel,note drying times,and plan for at least two to three light coats with light sanding between coats for a smooth,even finish.
To apply the finish well,follow a simple ritual: sand progressively from 180 to 320 grit for a silky surface,wipe away dust with a tack cloth,and apply thin coats with a quality brush or lint-free cloth. Let each coat cure fully before the next, and avoid thick layers that can peel. For a soft sheen, consider applying a final light coat of oil or wax. If you prefer a utensil-friendly surface for seating, a satin or matte finish frequently enough hides fingerprints better than a high-gloss look.
Maintenance after finishing is about consistency more than complexity. Regular cleaning with a damp, well-wrung cloth, avoiding excess moisture, and using felt pads under legs will minimize scratches and wear. Periodically inspect joints and fasteners; tighten loose screws with a small driver, and reapply finish on any exposed edges that show wear. A simple upkeep routine-dust, wipe, and re-oil or wax once or twice a year-will extend the life of your chair's finish while preserving its character.
| Finish Type | Look | Durability | Maintenance |
|---|---|---|---|
| Natural Oils (Tung/Linseed) | Warm, tactile feel; enhances grain | Moderate | Reapply every 6-12 months; wipe with oil as needed |
| Water-Based Polyurethane | Clear, non-yellowing; smooth | High | Wipe spills; recoat every 2-3 years with light sanding |
| Oil-Based Polyurethane | Amber hue; richer color | High | Recoat every 1-3 years; light sanding between coats |
| Shellac | Warm glow; easy to repair | Low-Moderate | Not water-resistant; needs refresh coats for wear |
Get instant Access to 16,000+ woodworking Plans →
Common Challenges and Practical Fixes for Handmade Wooden Chairs
New woodworkers often encounter wobble,loose joints,and rough surfaces as they build handmade chairs. These issues aren't failures; they're signals to adjust design and technique. A chair's performance hinges on joinery that accommodates wood movement, precise alignment, and clean surfaces.Start by planning for movement: allow for seasonal changes, cut joints a touch tight, and test fit with dry assembly before gluing.
Wobbly legs on an uneven floor are one of the most common annoyances. Before scrambling for a shim, check the base: square each leg end, true the feet with a quick sanding, and consider a simple cross-brace or a stretcher under the seat for stability. When joints loosen over time, disassemble if possible, re-glue with fresh glue, clamp firmly, and let cure fully. For on-the-fly fixes,use adjustable levelers or small shims under the shortest leg after reassembly,then recheck with a level across the seat.
Finishing quality and surface feel are often the culprits. The fix is a deliberate sanding and finishing plan: sand progressively through grits, remove all dust, condition softwoods, apply thin coats, and let each coat cure before the next. if a seat ends up feeling rough, a quick 180-240 grit pass followed by a damp cloth wipe helps, then a final light buff with a soft cloth after the last coat. The following quick-reference table summarizes common issues and practical fixes.
| Issue | Fix |
|---|---|
| Wobbly legs | Square feet, true ends, add cross-brace or seat stretcher; use levelers if needed |
| Loose joints | Disassemble if possible; re-glue with proper clamps; wipe away squeeze-out |
| Splinters/rough surface | Progressive sanding (120→180→240); apply finish after dust removal |
Maintenance after assembly helps chairs stay sturdy and comfortable. Create a simple routine: check hardware monthly, tighten screws, inspect joints for gaps, and swap out worn seats or runners as needed. Protect wood from moisture, use felt pads, and store chairs in a stable environment to minimize movement. By treating a handmade chair as a living piece of wood, you'll develop fixes that feel intuitive rather than reactive, making future builds smoother and more enjoyable.
Get Instant Access to 16,000+ Woodworking Plans →
Q&A
What wood is best for a beginner wooden chair?
For beginners, choose forgiving woods that cut cleanly and hold joints well, like pine, beech, or maple. They're widely available, affordable, and respond well to basic hand tools. Check boards for straight grain, minimal knots, and proper moisture content to avoid warping later.
How should I pick a simple chair design for my first project?
Start with a straightforward design such as a straight-back chair or a small dining stool. Use a proven plan or template and keep joints simple (dowel or mortise-and-tenon). Make sure your dimensions fit the space and user comfort, and avoid overly curved or intricate parts.
Which tools do I really need to build a chair?
Begin with essential hand tools: a handsaw, chisels, claw hammer, measuring tape, square, clamps, and sandpaper. A drill/driver and a few drill bits are very handy for pilot holes and fasteners.If you have access to a table saw or drill press, they speed things up, but many chairs can be built with basic tools.
How long does it take to complete a beginner chair?
A simple chair can take a weekend or two, depending on planning and drying times. break the work into cutting,shaping,dry-fitting,and assembly,then finish with a protective coating. Build in extra time for sanding and fixes to ensure a solid result.
How should I finish and protect my chair?
Sand progressively from rough to smooth, then clean away dust before finishing. Choose a protective finish such as oil, varnish, or clear polyurethane, and apply thin coats with light sanding between coats. Let each layer cure fully and test the final look on a scrap piece before applying to the chair.
Future Outlook
Ultimately, the takeaway is that a simple chair can be a gateway to bigger craft. Start small, map the joints, test fit, and let the wood speak through measured cuts and patient sanding. The path from a flat plank to a sturdy seat is a gentle education in geometry, finishes, and attention to detail-skills that transfer to every future project. For woodworkers, that relevance is the heartbeat: building something tangible with your own hands, learning from each trial, and sharing something useful with others. Try a project, dive into more guides, and apply the patience you've practiced. May your workshop stay curious, and your chair stand proudly.


These chairs look incredible! I love that they’re handmade-there’s something special about crafting furniture with your own hands. Can’t wait to try this out!
This guide is perfect for anyone looking to dive into woodworking! I appreciate the step-by-step instructions and tips for beginners. Excited to start my own project!
I’ve always wanted to try my hand at woodworking, and this guide makes it feel accessible! The detailed instructions and beautiful chair designs are super inspiring. Looking forward to getting started!
This guide is such a fantastic resource for newcomers! I love that it encourages creativity while providing clear guidance-can’t wait to create my own unique chairs!
This guide is exactly what I needed to feel confident about starting my woodworking journey! The designs are beautiful and the tips for beginners are so helpful-I’m excited to get my tools ready and make my first chair!
I’m so glad to see so many beginners excited about woodworking! This guide has ignited my passion for creating something beautiful, and I can’t wait to share my progress as I learn to make my own wooden chairs. Let’s all support each other on this journey!
I’m thrilled to see so much enthusiasm for woodworking! This guide is a game changer for beginners-it’s packed with practical advice and stunning designs that really inspire creativity. Can’t wait to see everyone’s projects take shape!
This guide really captures the essence of woodworking for beginners! I’m excited to dive in and create my own handmade wooden chairs, and it’s great to see such a supportive community. Let’s make some beautiful pieces together!
I’m so inspired by this guide and the wonderful community of beginners! It’s amazing to see everyone share their excitement and creativity; I feel ready to tackle my first handmade wooden chair and can’t wait to show you all my progress!
I’m really enjoying all the positive energy in this community! This guide is incredibly helpful for newcomers like me, and I’m eager to start building my own wooden chair. Let’s encourage and inspire each other as we create our unique pieces!