Turn a single plank into December's heartbeat-twenty-four doors, each a small lesson in wood, finish, and patience. For woodworking enthusiasts, this project blends design challenge with seasonal joy, showcasing practical skills in a tangible, reusable piece. In this guide you'll learn to plan your layout, select materials, cut to accurate sizes, craft reliable joints, apply finishes, and personalize the calendar with stains, inlays, or paint. By the end, you'll have a rustic display piece you can reuse year after year and a toolkit of techniques you can apply to future builds.
:
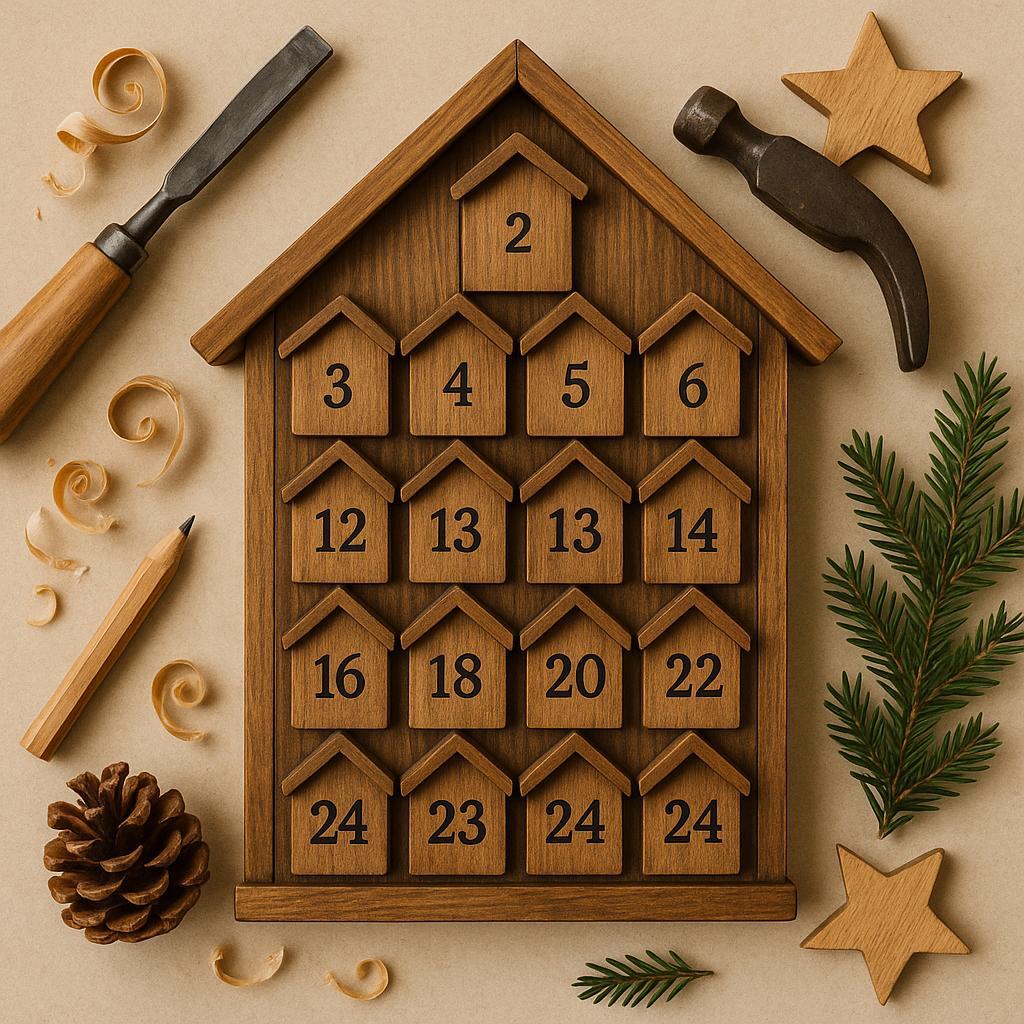
Rustic Wooden Advent Calendar design inspiration and project goals
drawing on rustic cabin charm, this advent calendar leans into the warmth of natural wood grains, rough-sawn textures, and a hand-crafted feel. Inspiration comes from repurposed planks, traditional joinery, and simple construction that celebrates character over perfection. The design aims to look intentional from day one and age gracefully, with compartments arranged in a grid or staggered pattern that echoes alpine lodges and forest trails. A soft, earthy palette-pine, oak, or stained cedar-lets the calendar feel like a year-round keepsake, not a disposable seasonal prop.
The project goals emphasize practicality and longevity. Build once,use for many seasons,and adapt the calendar to different Advent traditions. Priorities include safe craftsmanship for hands of all ages, rounded edges, and sturdy interlocking elements that resist daily handling. The layout should accommodate a standard 24-day countdown or a 25-day format, with clear labeling and a simple system for hanging or freestanding display.By planning for reuse, the calendar becomes a repository of memory as much as a countdown to presents.
To translate ideas into a workable plan, lock in a few core design elements that align with the rustic look and practical use. The following table captures key choices and practical tips to keep decisions aligned with a durable, homey aesthetic.
| Element | Why it matters | Implementation tip |
|---|---|---|
| Wood species | Durability, grain, and scent | Prefer hard maple, oak, or heart pine; seal with a satin finish |
| Joinery | Strength and character | Use simple butt joints with corner supports or small cope joints |
| Compartment size | Day-gift fit, visibility | 2″-2.5″ cubes work well for most treats |
outline a lightweight project plan with milestones: rough-cut materials, dry-fit assembly, sanding and edge smoothing, finish, and final hardware installation. Test the calendar with a mock countdown to verify spacing and access, then adjust for thickness variations in reclaimed stock. Document the process with simple sketches or a mini build log so future projects can reuse the same framework with different finishes or sizes.
Get Instant Access to 16,000+ Woodworking Plans →
Choosing materials and sustainable finishes for a rustic advent calendar
Choosing the right materials sets the tone for a rustic advent calendar that ages gracefully. Prioritize sustainable sources: reclaimed boards from old furniture, pallet wood (carefully de-nailed and kiln-dried), or solid stock from FSC-certified suppliers. The rustic aesthetic loves natural grain, knots, and a few imperfect edges, so select boards that show character but are still stable enough to withstand daily handling. If you opt for new timber, select local species such as pine or poplar that finish evenly and warp less with seasonal humidity.
Evaluate material options for the frame and compartments with a practical eye. Reclaimed timber offers authentic texture but may require extra prep; FSC-certified pine and poplar are reliable, easier to sand, and take finishes smoothly; hardwood veneers on plywood provide strength with less weight. The table below summarizes the essentials at a glance, helping you balance appearance, cost, and work time.
| Material | Best For | Notes |
|---|---|---|
| Reclaimed timber | Texture & character | Prep-heavy; check for cracks and nails |
| FSC-certified pine | Framing & boxes | Stable; light color |
| Plywood with hardwood veneer | Flat panels & drawers | Strong; edge finishing needed |
| Solid poplar | Lightweight boxes | Finishes well; watch for moisture |
finishes to preserve the rustic feel should be low impact and user-amiable. Natural oils and waxes let the wood breathe while bringing warmth to the surface. Consider these dependable options:
- Linseed oil (raw or boiled) for deep grain richness; apply thin coats and wipe off excess.
- Tung oil for durable, water-resistant protection with a matte finish.
- Beeswax and mineral oil blend for a soft, subtle luster and easy buffing.
- Water-based polyurethane (low VOC) for a tougher seal with minimal odor.
Application tips and maintenance: always test finishes on a scrap piece first, sand between coats with 220 grit, and work in a well-ventilated area. Keep a clean workspace,label pieces for assembly,and store excess finish in a sealed container away from heat. For the rustic charm you're after, a couple of thin coats and a light buff will highlight the wood's personality without obscuring its texture.
Get Instant Access to 16,000+ Woodworking Plans →
DIY assembly steps for a sturdy advent calendar frame and compartments
Begin with a clear plan for the frame and the 24 cubby compartments. Choose sturdy wood-pine for ease, oak for longevity-and cut the outer frame from 3/4″ stock: two long rails and two shorter stiles. For the grid, cut five vertical dividers and three horizontal dividers to create a 6-by-4 layout, leaving about 1/4″ between compartments for a neat front. Dry-fit the pieces on a flat work surface, square the joints with clamps, and adjust as needed before assembly.
To assemble, apply a thin bead of wood glue to each joint, then secure with finish nails or pocket-screw fasteners. Start by attaching the vertical dividers to the top and bottom rails, then insert the horizontal dividers to form the grid. Once the grid is complete, center and attach it to the back panel so the grid remains fixed and the screws are hidden on the back. Predrill holes to prevent splitting and sink fasteners slightly below the surface to keep the front clean and smooth. check for squareness and clamp until the glue sets.
| Item | Details | Quantity |
|---|---|---|
| Frame stock | 3/4″ pine or hardwood, cut for outer frame | 1 set |
| Divider stock | 5 vertical + 3 horizontal slats, 3/4″ thick | 8 pieces |
| Back panel | 1/2″ (or 3/4″ if preferred) plywood | 1 |
| fasteners & glue | Wood glue, finish nails or screws | As needed |
| Finish | Sandpaper, stain or clear polyurethane | As needed |
Finish and mounting: sand all surfaces smooth, then apply a light stain or clear matte finish to let the wood grain shine.Seal edges to reduce swelling in humidity, and allow to cure fully. Attach suitable wall hardware (a French cleat or keyhole slots) to the back and hang in a prominent location; add tiny numbered tags or hand-painted digits to identify each day. If you prefer extra rigidity, reinforce the back with a second back panel or a 1/4″ plywood sheet.
Get Instant Access to 16,000+ Woodworking Plans →
Creative layouts and daily reveal ideas for a festive advent calendar
Creative layouts for a festive rustic advent calendar blend practicality with natural charm. Visualize the calendar as a piece of living decor: a wall-mounted panel, a small branch ladder, or a stack of hollowed log slices that can be rearranged year after year. Plan reveals to unfold with intention-some days hide a tiny treat, others carry a handwritten note, and a few spark a family activity. consistency in texture and finish ties the display together, so the wood grain, hardware, and fabric accents feel like one cohesive story.
Here are layout ideas that maximize space while keeping the rustic vibe.
- Sliding mini-drawers carved into a shallow cedar plank; label days with hand-painted numbers; use small brass pulls for easy opening.
- Hanging pockets on twine or a miniature ladder; fabric pockets in burlap or linen; seal with natural wax for a weathered look.
- Log-slice grid – cut small log slices, carve numbers, and tuck a tiny gift behind a removable cork or wooden plug.
- Pegboard panel with hooks and cubbies; whitewash the board to preserve the rustic vibe; use chalkboard tags for daily clues.
to keep anticipation high, mix reveal types across the month and vary pacing; pair each reveal with a small display cue (date tag, color, or motif) to reinforce the calendar's story.
- Mini gifts like seeds,spices,tea bags,or tiny ornaments.
- Notes and puzzles that lead to a family activity or prize.
- DIY coupons for a cozy night in, baking session, or movie night.
- Scented sachets with cinnamon, orange peel, or dried pine for a festive aroma.
- Personalized cards with compliments or memory prompts to spark conversations.
| Layout option | Ideal reveal type | Best placement |
|---|---|---|
| sliding mini-drawers | Small gifts or notes | Central wall area |
| Hanging pockets | Pouches with treats or seeds | Shelf edge or mantle |
| Log-slice grid | Natural keepsakes or spices | Tabletop centerpiece |
| Pegboard panel | Chalkboard messages and small trinkets | Wall display |
Get Instant Access to 16,000+ Woodworking Plans →
Finishing touches and personalization to elevate your rustic advent calendar
Choose a finish that enhances grain while preserving the rustic charm of the calendar. A wipe-on tung oil or Danish oil adds warmth and a subtle satin sheen without a plastic look. For a tactile, cottage-core feel, rub in a thin coat of beeswax and buff to a soft glow. If you need stronger protection for seasonal storage, apply a matte polyurethane sparingly to maintain the texture and heritage feel. Always sand between coats with 220 grit and test on a scrap piece to see how it ages before committing to the whole piece.
Personalization elevates the gift-giving moment. Engrave dates or initials with a wood-burning tool, stamp a single letter on each door, or apply removable vinyl numbers for quick changes year to year.Use muted tones or earthy pigments to keep the look cohesive, and consider tiny charms, dried herbs, or twine bows for added charm. Secure elements with small magnets or discreet pins so you can reconfigure compartments without marring the surface.
| Finish | Look | Pros | Cons |
|---|---|---|---|
| Beeswax rub | Matte, tactile | Easy to refresh; warm patina | Requires periodic reapplication |
| Tung oil | Warm glow, satin | Durable, food-safe when dry | Longer cure time |
| Matte polyurethane | Even protection | Strong protection; scrub-resistant | Can mute grain slightly |
| Danish oil | Balanced finish | Good protection, quick drying | Less durable than polyurethane |
display and maintenance: plan how it will be shown and kept in good shape.Mount the calendar on a sturdy wall or place it on a reclaimed-wood shelf, with a soft backing to prevent glare.Use small magnets, brass hooks, or twine loops to hold each door closed, so you can rearrange days without stressing joints. For ongoing charm, wipe with a dry cloth, avoid excessive moisture, and reapply the finish every season as needed to maintain the rustic patina.
Get Instant Access to 16,000+ Woodworking Plans →
Care and maintenance for your advent calendar
Keep the charm of your rustic advent calendar with a gentle care routine that respects the grain. Regular dusting using a microfiber cloth or a soft brush prevents grit from scuffing edges and carved details. For tight corners, a small drafting brush or a nozzle attachment on a vacuum helps lift dust without moisture. If a spill happens,blot it dry immediately and avoid soaking the wood; when in doubt,test cleaners on a hidden spot first.
When it comes to protective finishes, choose options that warm the wood without masking its character. A thin coat of mineral oil or a wax-based polish nourishes the surface; skip silicone-based products that can build up. Apply with a lint-free cloth, rub along the grain, let it sit briefly, then buff to a soft sheen. Reapply every season or whenever the surface looks dry, especially in sunny rooms or dry environments.
Keep storage and seasonal use in mind. After the holidays, wipe down the calendar, tighten any loose screws, and repair minor wobble with wood glue or a single replacement part. Store in a breathable container or wrapped in cotton to prevent dust while allowing air to circulate, and protect it from direct sun, heat, and humidity swings. A simple hygrometer in the storage area helps you maintain a stable habitat (roughly 40-50% humidity is comfortable for most woods).
| Task | Frequency | Tip |
|---|---|---|
| Dusting | Weekly | microfiber cloth or soft brush; avoid moisture. |
| inspect hardware | Quarterly | Tighten screws; check hinges and runners; repair as needed. |
| Condition/finish | Annually | Apply oil or wax; wipe excess; buff when dry. |
| Deep clean & repairs | Every 2-3 years | Lightly sand; reapply finish; replace damaged parts. |
Get Instant Access to 16,000+ Woodworking Plans →
Q&A
What materials do I need to get started with a rustic wooden advent calendar?
Choose sturdy wood such as pine or reclaimed boards,plus basic tools: a saw,sandpaper,wood glue,nails or brad nails,clamps,and a drill. Have a finish that fits the rustic vibe-mineral oil, beeswax, or a matte polyurethane work well. For the day markers, keep a stencil or paint ready, and consider small drawers or pockets for a tactile charm.
How should I plan the layout and numbering of the compartments?
Sketch a simple grid or a staggered arrangement on paper and decide whether you want 24 or 25 compartments.Size each space before cutting, leaving room for numbers and any hardware. Number the compartments clearly, using chalk markers or a subtle paint for easy adjustments.
What finishing options work best for a rustic look and durability?
Natural-looking finishes suit rustic wood: mineral oil, beeswax, or a matte polyurethane. Sand between coats and wipe away excess to keep the texture. If the calendar will be handled a lot,seal key edges to resist wear without dulling the wood grain.
How can I personalize the calendar without losing its rustic charm?
Add understated touches like carved initials, a simple date strip, or muted-numbered lettering. Incorporate natural accents-twine, burlap, pine cones, or small metal tags-that echo a rustic vibe. You can tailor the contents or opening style for each day while preserving the wood's character.
What are common mistakes to avoid and tips for durability?
Avoid misaligned joints and gaps by checking squareness before finishing. Don't overload with heavy coatings that conceal texture; apply thin,even layers. Use quality fasteners and allow proper drying between coats, then occasionally oil or wax the surface to keep it looking good year after year.
Concluding Remarks
Finished well,a rustic wooden advent calendar reminds us that good design can be both practical and poetic. The core takeaway is that thoughtful planning,measured simplicity,and sturdy joints transform a seasonal idea into a lasting piece. For woodworkers, it showcases how common materials, modest tools, and careful detailing yield characterful results you'll be proud to hand down. If the calendar inspires you, try the build this season, adapt the size or wood type, or flip through more guides to sharpen your technique. Start with a sketch, pick a finish you love, and let your workshop whisper, you've got this.


This looks like such a fun project! I love the idea of adding a personal touch to the holidays with a rustic advent calendar. Can’t wait to try it out!
This DIY guide is fantastic, Margaret! I also appreciate how it combines Craftsmanship with the spirit of the season-definitely adding this to my holiday to-do list!
I love the charm of rustic decor, and this advent calendar is the perfect way to count down to Christmas! Great instructions, Margaret-I’ll be gathering my supplies this weekend!
This is such a creative idea, and I can already envision how beautiful it will look in my home! Thanks for sharing the details, Margaret-I’m excited to start my own rustic advent calendar!
This is exactly the kind of project I’ve been looking for to kick off my holiday season! I love how DIY elements can make our celebrations so much more special. Thanks for the inspiration, Margaret!
This project is exactly what I needed to bring a little more warmth to my holiday decor! I can’t wait to personalize my own advent calendar and make it a family tradition-thank you for the step-by-step guide, Margaret!
What a wonderful way to celebrate the season, Margaret! I love the idea of a rustic wooden advent calendar, and I’m excited to make one that not only enhances my decor but also creates memories with my family. Thanks for the inspiration and clear instructions!
This DIY rustic advent calendar is such a fantastic way to bring the family together during the holidays! I’m thrilled to get started and add my own personal touches. Thank you for the detailed instructions, Margaret!
What a delightful project, Margaret! I love the idea of incorporating rustic elements into my holiday decor, and this advent calendar will definitely add a cozy touch to our celebrations. Can’t wait to get started!
This is such a charming idea, Margaret! I absolutely adore the rustic vibe and how it’s a perfect blend of creativity and tradition. Can’t wait to create my own calendar and share it with loved ones this holiday season! Thank you for the fantastic guide!
What a beautiful project, Margaret! I love how this rustic wooden advent calendar combines artistry with sentiment, and it’s sure to become a cherished part of our holidays. I’m inspired to tackle this DIY and create something special for my family-thank you for sharing such a lovely guide!
This is such a lovely project, Margaret! I adore the rustic charm of this advent calendar and how it adds warmth to the holiday season. It’s a perfect way to create lasting memories with family, and I’m eager to get started on my own version. Thank you for the wonderful inspiration and step-by-step guide!
What a wonderful project, Margaret! I love the combination of rustic aesthetics and family bonding that this advent calendar brings. It sounds like a fun way to countdown to Christmas while creating cherished memories. Excited to try this out!
This is such a fantastic DIY, Margaret! I love how the rustic wooden advent calendar not only enhances holiday decor but also encourages family interaction and anticipation for Christmas. Your clear instructions make it accessible for everyone, and I’m excited to create one for my home! Thank you for sharing this lovely project!
This DIY project is absolutely delightful, Margaret! I love the rustic feel and the sense of anticipation it brings to the Christmas season. Your detailed guide makes it seem so achievable, and I can’t wait to craft my own advent calendar to enjoy with my family. Thank you for the inspiration!
This is such a charming idea, Margaret! I absolutely love the rustic vibe of the advent calendar and how it brings a personal touch to the holiday season. Your guide makes it feel doable, and I’m really looking forward to creating my own version to enjoy with my kids and make our countdown to Christmas even more special. Thank you for this wonderful inspiration!
This is such a beautiful DIY project, Margaret! The rustic wooden advent calendar captures the essence of the holiday spirit perfectly. I appreciate your clear instructions and creative ideas; I can’t wait to start crafting my own with my family. Thank you for sharing this delightful inspiration!
What a fantastic idea, Margaret! This rustic wooden advent calendar will definitely add a special touch to our holiday traditions, and I appreciate how approachable your instructions are. Can’t wait to get started and create lasting memories with my loved ones while making it! Thank you for the inspiration!
This rustic wooden advent calendar is such a creative idea, Margaret! I love how it combines charm and functionality, perfect for building excitement as we count down to Christmas. Your detailed instructions make it easy to follow, and I can’t wait to start crafting one with my friends and family. Thanks for sharing this delightful project!
What a beautiful project, Margaret! I love how the rustic wooden advent calendar adds warmth and charm to the holiday season. Your step-by-step instructions are so easy to follow, and I’m excited to create one with my children this year to enhance our Christmas traditions. Thanks for the wonderful idea!