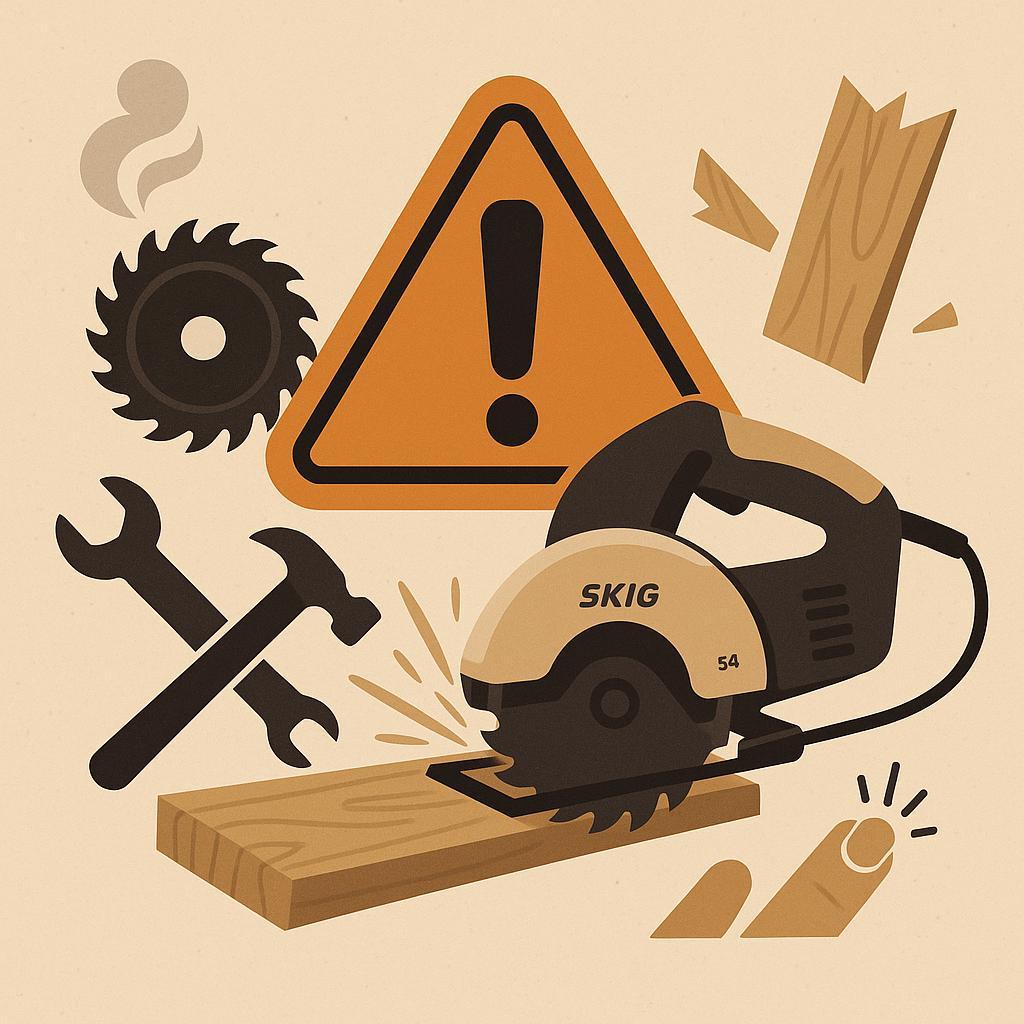
Before you reach for a saw, pause to name teh hazards hiding in plain sight. Woodworking is about patience, precision, and pride-but a slip can derail a project and threaten your safety. This article helps enthusiasts spot common hazards-from kickback and dust to hidden fumes and tool setup errors-and shows practical steps to avoid them. You'll gain a clear checklist for safe workspaces, guidance on selecting protective gear, and habits that prevent injuries without slowing your flow. by reading, you'll sharpen your awareness, reduce interruptions, and finish projects with both skill and security.
:
Spotting Hidden Hazards in the Woodworking Workshop
Hidden hazards in a woodworking shop frequently enough hide in plain sight: a thin film of sawdust clogging a switch, a loose cord curling under a workbench, or a guard that doesn't move smoothly. Take a careful pass around each machine to verify that blade guards, riving knives, and fence alignment are in proper working order. If somthing looks worn or stiff,mark it for maintainance before the next project begins.
Shift your mindset from ”it's fine” to “it's not.” Start with the obvious trip and slip risks: keep cords taped or routed along walls,wipe spills instantly,and maintain a clean walking path. Next, assess dust and respiratory hazards by ensuring your dust collector is connected, your filters are clean, and that ventilation keeps air moving without creating a wind tunnel that propels chips into your eyes. confirm that push sticks and featherboards are within reach and used on every pass where hands are near blades.
| Hazard | Risk | Mitigation |
|---|---|---|
| Loose cords and clutter | Tripping, accidental unplugging | route cables, keep floor clear, use cord covers |
| Dust and chips in eyes/airways | Irritation, respiratory issues | Dust collection, PPE, proper ventilation |
| Unguarded blades and kickback | Severe injury to hands or arms | Use guards, push sticks, keep guards in place |
| Hot surfaces and solvent fumes | burns, inhalation | Ventilation, PPE, cool-down area |
| Poor lighting | Reduced depth perception | Install luminous, even lighting |
Make it a habit to run a 5-minute safety check at the start of every session: inspect guards, unplug machines before adjustments, and confirm emergency stops are accessible. Consider a quick rotating buddy system for spot checks, and keep a simple sign-off sheet to track maintenance and training needs. By treating hidden hazards as an ongoing project rather than a one-off task, you'll protect yourself and anyone who shares the space, while keeping projects on track and within budget.
Build Your Dream Workshop on a Budget →
Reducing Dust and Particulate Exposure in Woodworking
Effective reduction of dust and particulate exposure starts at the source. Connect a capable dust collection system to your primary woodworking machines and keep ductwork sealed and well-maintained. Use blast gates to isolate tools when not in use, and position a portable vacuum at the workpiece to capture chips and fibers as they are produced. At the source control reduces how much dust becomes airborne, making the rest of your approach more effective.
Beyond the machines, create an air-quality plan that combines filtration and ventilation. A HEPA-filtered air scrubber or portable vacuum helps pull fine particles from the room air, especially during sanding and finishing steps. If space allows, consider a downdraft table or a ceiling exhaust to pull dust away from your breathing zone. Pairing a cyclone or separator upstream of your main bag can improve overall efficiency by keeping the collected dust drier and reducing clogging.
| System | Pros | Best Use |
|---|---|---|
| Central dust collector | High airflow; supports multiple machines | large shops with several tools |
| Portable shop vacs | Flexible, targeted pickup | Near-workstation dust, quick cleanups |
| HEPA air scrubbers | Filters room air; reduces fine dust | During sanding, finishing, or cleanup |
| Downdraft tables | Captures dust at the source | cuts, sanding, assembly work |
Personal protection and shop-cleanliness go hand in hand.When cutting, sanding, or routing, wear a NIOSH-approved respirator with P100 filters for wood dust, and ensure a proper fit. Keep up with routine housekeeping: damp-wipe surfaces, seal containers of dusty woods, and store materials to reduce re-suspension. Schedule heavier dust-producing tasks before end-of-day cleanup to minimize airborne particles lingering in the shop.
Build Your Dream Workshop on a Budget →
Safe Tool Handling and Routine Maintenance for Woodworkers
safe tool handling begins with respect for power and precision. Before plugging in any machine, conduct a quick inspection of guards, fences, blades, and bits. If something is loose, dull, or vibrating oddly, address it before starting. Always unplug the tool to make adjustments, change a blade, or clear a jam. wear eye protection, hearing protection, and a dust mask when needed, and keep hands well clear of moving parts. Use push sticks, featherboards, and other work-holding aids to maintain control, and never reach over a spinning blade or cutter. A tidy, well-lit workspace reduces surprises and keeps you in command of every cut.
Routine maintenance should be part of every session. Build a simple cadence: quick daily checks and a deeper weekly tune-up. Ensure guards move freely, fences align true, and blades or bits stay sharp. Clean dust from the tool housing, vents, and switch area, and verify that the dust-collection system connects properly. Lubricate moving parts according to the manufacturer's guidelines to minimize friction and heat buildup, and replace any worn components before they fail in service.
Keep a compact maintenance checklist visible at the workbench to stay consistent across projects:
| Tool | Daily checks | Weekly maintenance |
|---|---|---|
| Circular saw / table saw | Guard operation, blade clean, fence alignment | Blade tension (if applicable), calibrate fence, clean exhaust, lubricate arbor |
| Planer / thicknesser | Bed and bed-rails clear of shavings, infeed/outfeed clear | Sharpen/replace knives, inspect cutterhead, lubricate ways |
| Router / shaper | Bit secure, collet clean, base and fence free of play | Sharpen/replace bits, lubricate bearings, check spindle runout |
| Drill press / power drill | Chuck clean, chuck key returned, depth stop functional | inspect belts or gears, lubricate bearings if specified |
Beyond mechanics, safeguard your workflow by secure storage and mindful handling. Store blades and bits in labeled cases or on a dedicated rack, keep cords coiled and routed away from work zones, and connect dust collectors before starting to minimize airborne particles. Always unplug before changing bits or blades, and never leave a tool running unattended. With a routine you trust and tools that are properly maintained, you'll reduce hazards and stay productive through longer sessions.
Build Your Dream Workshop on a Budget →
Eye and Ear Protection and hazard Mitigation in Woodworking
Eye protection injuries are among the moast common, yet frequently enough preventable hazards in a wood shop. Flying chips, dust, and resin splinters can strike within seconds of a misalignment or a kickback. Always wear ANSI Z87.1 rated eye protection with side shields or a face shield when grinding, sanding, or cutting with high-dust tools.Choose lightweight polycarbonate lenses for impact resistance, and consider prescription-amiable options if you wear glasses.Look for anti-fog coatings or keep a spare pair on hand, since humid or dusty environments can cloud lenses quickly. Before every project, inspect eyewear for cracks, scratches, and loose straps, and store them in a protective case when not in use.
Hearing protection should accompany every loud operation. Ripping, planing, joinery, and sanding can exceed safe exposure levels in a short session. If you cannot comfortably converse with someone at arm's length, it's time for protection. Use earmuffs with a suitable noise reduction rating (NRR) or in-ear plugs that fit snugly. For long sessions, choose higher NRR gear and ensure a proper seal-practice inserting plugs until you achieve a quiet seal. Regularly replace ear cushions or foam tips onc they show wear. If a noise source is intermittent, take short breaks to reduce overall exposure, and consider installing a check on the dust collector to quietly lower background noise.
| Protection Type | Key Benefit | When to Use |
|---|---|---|
| Earmuffs | High attenuation, reusable | Rough-cutting, planing, sanding in a noisy area |
| Earplugs | Low-profile, good seal | Smaller ears or combination with earmuffs |
| NRR Rating | Indicates noise reduction | Choose based on tool noise level; higher for louder tools |
Hazard mitigation goes beyond PPE and starts with the shop layout and equipment guards. Keep walkways clear,lighting bright,and a dust-collection system connected to power tools. Guard devices should never be removed or bypassed; use blade guards, riving knives, and anti-kickback pawls where appropriate.Use push sticks and push blocks on the table saw, bandsaw, and router to keep hands away from blades. Regularly inspect guards for wear, and replace damaged parts immediately. Maintain sharp blades for clean cuts, less binding, and fewer kickbacks.
To make hazard mitigation a habit,build a quick,practical routine you can run before every cut: bright lighting so misalignment is obvious; dust collection running to reduce fine dust and noise; guards in place any time the tool is powered; push sticks/blocks for small pieces; clean floor to prevent slips; sharp blades for safer,smoother cuts; tool alignment checks before starting.
Build Your Dream Workshop on a Budget →
Ergonomic Setup and Injury Prevention in the Woodshop
In the woodshop, ergonomic setup isn't vanity-it's safety. Start with your workbench and cut stations at a height that keeps your spine aligned and your shoulders relaxed. For most standing tasks,aim for a bench height around 34-36 inches (86-91 cm). If your torso tilts or you feel strain in your lower back after a session, raise or lower the surface by a few inches until your elbows rest at about a 90-degree angle when your forearms are on the work surface. Wear supportive shoes, and consider an anti-fatigue mat for extended standing periods to reduce leg fatigue. Small posture tweaks now prevent big injuries later.
Organize tools and materials so you don't reach or twist excessively. Create a simple reach zone: items you use every few minutes within arm's length, occasional tools within a step or two, and rarely used gear in a cabinet. Keep wrists in a neutral position when guiding boards; use push sticks, featherboards, clamps, and guides to maintain control while reducing forces on wrists, shoulders, and back. For power tool operation, position the tool's major control within easy reach and ensure cords trail away from the work path to avoid trips. Use a stable stance with feet about shoulder-width apart and weight balanced on both legs to absorb kickback and vibration.
Quick ergonomic targets at-a-glance
| Adjustment | Why it matters | How to implement |
|---|---|---|
| workbench height | Maintains neutral spine and elbows | Set at 34-36 in (86-91 cm); add shims or use adjustable stands |
| Tool reach | Reduces overreaching and twisting | Store frequently used tools within arm's reach |
| Footing and stance | Improves balance and absorbs vibration | Shoulder-width stance; alternate weight and take micro-breaks |
pattern and task rotation matter. Alternate between tasks to spread load across different muscles, and schedule short rest breaks to reset posture. Vibration awareness matters: use anti-vibration mounts or slower, lower-amplitude passes when feasible, and always inspect tools for loose handles or worn grips that force a tighter grip. End each session with a quick stretch routine for neck, shoulders, and forearms to reduce stiffness and encourage healthy habits in the shop.
Build your Dream Workshop on a Budget →
Building a Practical Safety Plan with Actionable Woodworking Guidelines
Building a practical safety plan starts with clarity and repeatable habits. Begin with a simple hazard audit of your workshop: list each machine, workstation, and process where an injury could occur. Assign roles so someone is responsible for guards,another for dust collection,and another for first-aid readiness. Document a concise set of guidelines you can train new helpers on-keep it actionable and easy to follow. The goal is to make safety a routine part of every cut, plane, and sanding pass.
Turn a plan into daily practice with a clear, visible checklist and solid safeguards. Guarding and blades should be in place and tested before any work begins. Implement lockout/tagout procedures during blade changes or adjustments, and always de-energize at the source. Use push sticks and featherboards where your hands wouldn't be safely behind the fence, and keep the work area clean and well-lit. Ensure dust collection is functioning to keep particles from lingering in the air, and wear appropriate PPE-safety glasses, hearing protection, and a dust mask when dust creation is high.
| Hazard | Preventive Action | Quick Tip |
|---|---|---|
| Kickback on table saw | Use riving knife, proper fence alignment, and sharp blade | Stand to the side, never behind the blade |
| Blade contact during changes | Lockout/tagout, unplug power, guards in place | Never reach with blade exposed |
| Dust and airborne particles | Attach a dust collector; seal joints; good filtration | Wear a mask when cutting |
| Noise exposure | Hearing protection; keep machines maintained | Take breaks; position work to reduce vibration |
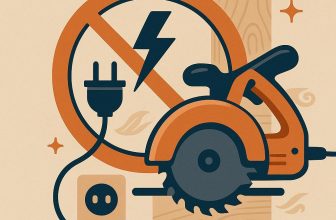
| Electrical shock | Inspect cords; use GFCI in damp areas; dry hands | Do not operate damaged outlets |
bake in review and betterment: a quick weekly safety huddle, a simple near-miss log, and updates to SOPs whenever a hazard is observed. Train every new helper with a short, practical module and refresh knowledge at least quarterly. Keep a visible safety Board near the workshop entrance with emergency contacts, shutdown locations, and your latest guidelines. By tying the plan to real hands-on routines, hazards become manageable steps rather than abstract warnings.
Build Your Dream Workshop on a Budget →
Q&A
What are the most common hazards I should look for in a woodworking space?
Start with a quick risk scan of your space: loose boards, nails, clutter, and tripping hazards. Check that guards, blades, and riving knives are intact and properly aligned, and ensure clamps securely hold stock. Keep the floor clean and tools powered off when not in use.
How can I prevent kickback when using saws?
use a properly aligned fence and a riving knife or splitter; keep blades sharp and guards in place. Stand to the side rather than directly behind the cut, and use push sticks or pads for narrow stock. Never reach over a running blade and keep your hands away from the blade path.
How do I manage dust and breathing hazards in a small workshop?
Connect a dust collection system or shop vac to your power tools and run it during each cut. Wear a respirator or properly rated dust mask when sanding or finishing, and ensure good ventilation. Regularly clean up dust and avoid dry sweeping.
What quick safety checks should I perform before starting a project?
Inspect tools for damaged cords, missing guards, or loose parts; unplug before changing blades or adjusting settings. Check clamps and workholding for secure grip and stability of the workpiece. Make sure the workspace is clear of clutter and that PPE is within reach.
Insights and Conclusions
Spotting common woodworking hazards isn't about fear-it's about freedom to create with confidence.The core takeaway is simple: stay curious and stay prepared. A moment to scan for loose blades, proper dust control, stable supports, and clean benches can prevent injuries and keep projects on track.For woodworking enthusiasts, safety is what turns ambition into steady progress, letting you try new techniques without second guessing every cut. If you're ready to apply it,start a small project with a checklist,dive into more guides,or revisit your workspace today. With care, your craft can flourish-steady, sharp, and inspired.


Great insights on woodworking safety! It’s crucial for both beginners and experienced woodworkers to stay vigilant and prioritize safety in the workshop. Thanks for highlighting these hazards!
Absolutely agree with Mason! It’s easy to overlook safety when you get into the groove of working, but being aware of these common hazards can make all the difference. Keep up the great work sharing these essential tips!
Well said, Mason and Harold! It’s so important to create a safe workspace by being aware of potential dangers and implementing proper safety measures. Sharing these insights helps cultivate a culture of safety in the woodworking community!
Thanks for shedding light on this important topic! It’s essential for everyone, regardless of experience level, to recognize hazards and take proactive measures to ensure a safe working environment. Let’s keep the conversation going and prioritize safety in our projects!
I completely agree, everyone in the woodworking community should prioritize safety first and foremost; it’s all about creating a supportive environment where we can share tips and look out for one another while pursuing our passion!
Safety should be at the forefront of every woodworking project; by staying informed about hazards and sharing our experiences, we can all help create a safer and more enjoyable workshop for everyone involved!
It’s great to see everyone emphasizing the importance of safety in woodworking; we must all stay vigilant and proactive about potential hazards to not only protect ourselves but also foster a culture where everyone feels comfortable sharing their experiences and knowledge for safer practices!
Absolutely, Karen! Safety is a shared responsibility in our woodworking journeys; by educating ourselves and each other about common hazards and best practices, we can ensure that our craft remains both enjoyable and safe for everyone involved.
Absolutely, Danielle! It’s vital that we all engage in ongoing discussions about safety to continuously improve our skills and knowledge; after all, a safe workshop allows for creativity to thrive and enhances the overall woodworking experience!
I couldn’t agree more with everyone; by fostering a culture of safety awareness in our workshops, we empower ourselves and those around us to work confidently and creatively, ensuring that we can enjoy our craft without unnecessary risks!
I completely agree with the importance of sharing knowledge about woodworking hazards; by being aware and discussing these issues openly, we create a supportive environment that encourages safe practices and helps everyone improve their skills while enjoying the craft!
I couldn’t agree more with the sentiments shared here! Prioritizing safety in woodworking not only protects us but also allows us to create a more collaborative and informed community where everyone can learn and grow together while enjoying this rewarding craft.
I couldn’t agree more with all the insightful comments here! Promoting safety in woodworking not only helps us avoid potential hazards but also fosters a sense of community and teamwork, where we can all share our experiences and grow as craftsmen together.