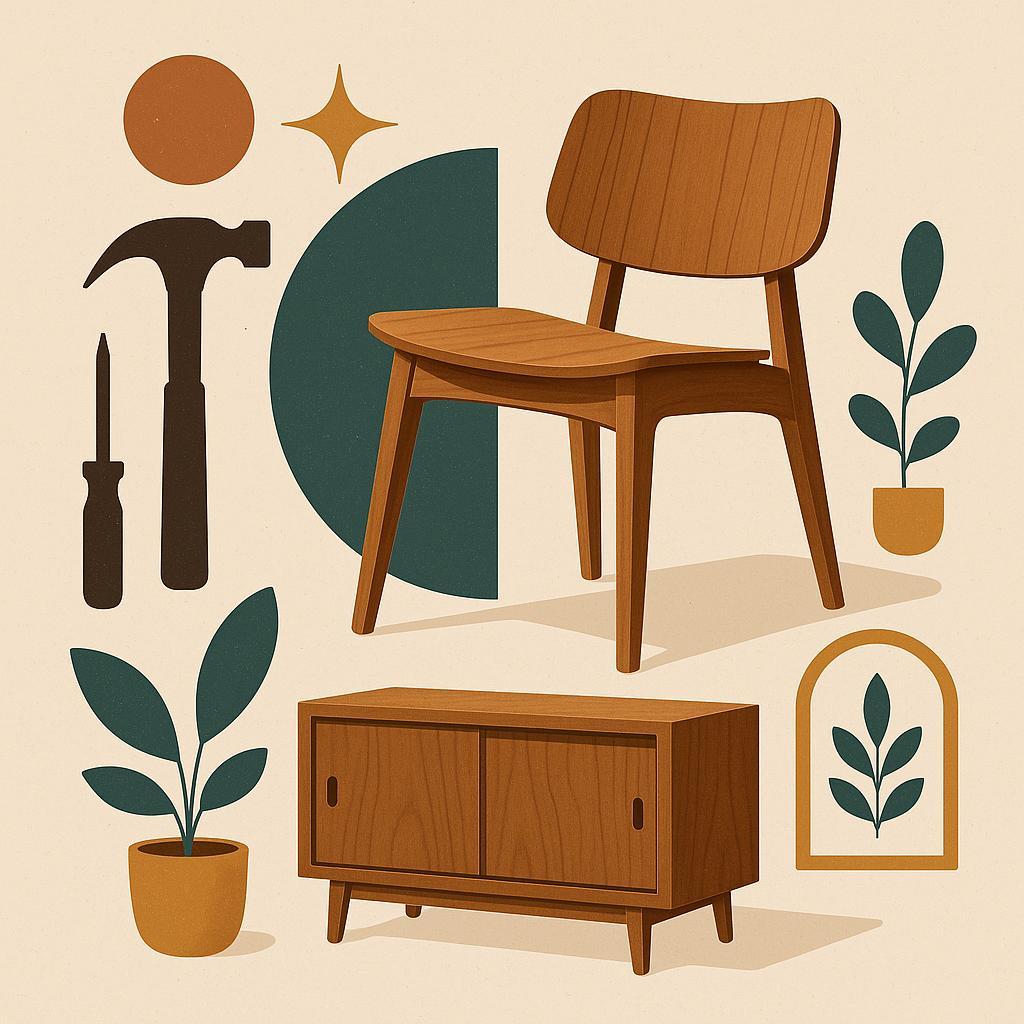
What if a single handmade piece could redefine your room? Stunning DIY Furniture: elevate Any Home Style invites woodworkers to push boundaries without losing practicality. For enthusiasts, this craft matters because it blends technique with personal expression, offers cost-effective customization, and strengthens the bond between space and maker. In this article,you'll learn how to read a room,choose materials,and translate style into build plans-from clean-lined modern to warm rustic,or anything in between. Expect actionable projects, step-by-step guidance, finishes that suit different woods and climates, safety reminders, and tips to scale designs to your space. You'll gain confidence to create furniture that lasts.
:
Choosing the Right Materials for Stunning DIY Furniture
Choosing the right material sets the tone for durability, character, and how your piece will feel in daily life. Start by envisioning the room: a country kitchen, a sleek mid-century study, or a coastal living space will steer you toward different grains and finishes. Practical constraints matter too: budget,climate,and how much weight the piece must bear. By prioritizing durability, workability, and sustainability, you can narrow options without sacrificing style.before you buy, grab small sample boards and imagine every touchpoint-edge, surface, and joinery-so you can see how materials respond under your chosen finish and use.
Material choices in DIY furniture range from tactile hardwoods to versatile engineered options. For a refined, heirloom feel, lean into solid hardwood like oak or maple; for lighter frames, consider softwood such as pine. For flat panels and frames that need stability, plywood or other engineered woods perform well, especially when sealed with compatible finishes. If you're on a tighter budget or crave bold paint, MDF can be a practical interior surface. And if you value character and sustainability,look at reclaimed wood from local sources or salvaged pallets-each piece has a story and a reduced environmental footprint.
| Material | Best For | Pros | Cons | Typical Cost |
|---|---|---|---|---|
| Solid hardwood | High-end furniture, accents | Durable, beautiful grain | Heavy; expensive; seasonal movement | High |
| Softwood (pine, fir) | Frames, legs, light structures | Affordable, easy to work | More dents; softer surface | Low-Moderate |
| Plywood/Engineered | Cabinets, shelves, panels | Stable, consistent, cost-amiable | Edge finishing and occasional voids | Moderate |
| Reclaimed wood | Character-rich pieces | Eco-friendly, unique | Variable quality; sourcing can be irregular | Moderate-High |
Finish and hardware choices tie everything together. Align your finish with the wood's natural tone and the room's style-oil and wax enhance warmth, while polyurethane or water-based varnishes offer durable protection. Test a small swatch to ensure color and sheen match your vision, and choose hardware that complements the material (brass for traditional, matte black for modern). plan a simple sourcing checklist: verify moisture content is below 12-15% for most woods, confirm lead-free finishes, and prefer local, certified sources when possible. A thoughtful combination of material, finish, and hardware makes a piece look intentional rather than assembled.
Build Your Dream Workshop on a Budget →
Upcycling Techniques to Transform common Pieces
Start with a clear plan: inspect for loose joints, stabilize wobbling legs, and remove hardware that could get in the way of a fresh finish. Give the piece a thorough cleaning to remove dirt,oil,and wax,then roughen the surface with a light sand to improve paint grip. For painted finishes, prime especially when switching from dark to light hues, or when the surface has bleed-through. A solid prep phase pays off with smoother coverage and longer-lasting results.
Choose a mood and method: chalk or milk paint for a matte,vintage look,or a solid acrylic for bold contemporary color. Apply thin, even coats, letting each layer dry fully before a light sanding.For depth, add a glaze or antiquing wax in the recesses and wipe off excess. Finish with protection: wax for a soft patina, or a clear polyurethane for durability. Pro tip: protect hardware temporarily with tape so you don't accidentally seal them in.
| Technique | Best For | Notes |
|---|---|---|
| Chalk/milk Paint | Matte, vintage look | Thin coats, light sanding between layers |
| Glaze or Antiquing Wax | Depth and contrast | Work into details, wipe excess |
| Stain & Top coat | Rich wood tones | Wipe excess; seal with poly or wax |
Texture and pattern can come from reupholstering or adding texture. Remove old fabric, cut new material with extra margin, and staple cautiously for a snug fit. For swift refreshes, try a removable fabric cover, a slipcover, or decoupage with simple, bold patterns. If you prefer a low-fuss update, consider a vinyl or fabric wrap for small areas that doesn't require sewing or heavy tools.
Hardware and structural tweaks can shift a piece's voice instantly. Swap knobs, pulls, or brackets to introduce metal tones or antique brass.Elevate style by changing the legs-shorter legs for a modern lift, tapered feet for mid-century flair, or chunky feet for traditional heft. After changes, clean up dust, re-tighten joints, and seal edges to protect the new look.
Build Your Dream Workshop on a Budget →
Finishing Touches that Elevate Your Home Style
Finishing touches are what elevate a DIY piece from practical to personality. Establish a unifying finish language that carries across projects-think a warm wax for vintage warmth, a satin topcoat for everyday durability, or a soft glaze to add subtle depth. Test on scrap, apply with smooth, even strokes, and let grain show where you want it; restraint is your ally, because a cohesive look reads as intentional rather than accidental.
Details finish the story. Update hardware to reflect your chosen vibe-brushed brass for a cozy glow,matte black for modern edge,or nickel for understated elegance. Balance sheen by pairing glossier surfaces with matte legs, and layer texture with textiles, lighting, and a touch of greenery. Small decor accents, like a woven rug or a ceramic vase, can anchor the finish in the room's light, color, and mood.
| Finish | Look & Feel | Care |
|---|---|---|
| Matte wax | Velvety, warm patina | dust; reapply annually |
| satin polyurethane | Durable with subtle sheen | Wipe with damp cloth |
| Oil-based stain + topcoat | Rich depth, vintage vibe | Avoid water; reapply every few years |
To bring it home, run a tiny, focused finishing experiment before committing to a full makeover. Pick one piece, test two finishes on scrap, choose the best result, and apply it across related items to build cohesion. Document your process with photos in the room's light, so you can judge scale and color in real life.
- audit your furniture for repeat finishes to create cohesion.
- Pick one finish language and one metal tone to carry through pieces.
- Source budget-friendly hardware from thrift stores or repurpose found pulls.
- Seal and cure properly before heavy use.
Build Your Dream Workshop on a Budget →
Smart Planning and Budgeting for DIY Furniture Projects
Smart planning starts with clarity: define what you want to build, map your room dimensions, and sketch a workable layout that fits your style. Create a simple project ledger that lists each piece, it's dimensions, material choices, and a rough cost estimate. By setting a realistic scope and a budget cap, you'll curb scope creep and stay aligned with your home's personality.
Budgeting should be actionable, not abstract. break costs into key categories such as materials, hardware, finishes, and tools or rentals, then add a contingency of 10-20% for surprises. Track every purchase in a living budget sheet, update it as soon as you lock in a price, and compare at least two suppliers before pulling the trigger.
| Category | Typical Range | Notes |
|---|---|---|
| Materials | $60-$250 | Lumber, plywood, veneer |
| Hardware | $15-$80 | Hinges, screws, brackets |
| Finish | $20-$60 | Stain, varnish, brushes |
| Tools/Rentals | $0-$40 | Sanding pads, fasteners |
Plan the timeline alongside your procurement. Set order windows that align with your project phases, batch similar tasks to reduce waste, and look for rebates or salvage options to stretch the budget. Consider reclaimed or pre-loved components for character, and keep a running materials list so you can spot duplicates before you buy.
Quality control is a budget strategy too. Schedule quick fit checks after each major cut, test finishes on scrap pieces, and reserve a small stash of spare hardware. A brief post‑project review helps you refine your process for the next build-note what surprised you,what saved money,and what you'll do differently next time to elevate your craft without breaking the bank.
Build Your Dream Workshop on a Budget →
Tools and Safety Essentials for Successful DIY Crafting
Equipping a successful DIY furniture project starts with the right toolkit. Invest in a compact set of core tools that feel pleasant in your grip and stay sharp through many projects: a dependable power drill, a handful of high-quality chisels, a sturdy clamp set, a reliable random-orbit sander, and a good handsaw for clean cuts. Prioritize ergonomics and durability over sheer speed, because comfortable tools reduce fatigue and mistakes, turning rough prototypes into precise pieces from the first cut.
| Tool | Why essential | Beginner tip |
|---|---|---|
| Power drill | Drives screws and creates pilot holes with control | Use clutch settings and match bit to material |
| Clamps | keeps work steady and prevents slipping | Use multiple clamps on corners; place pads for protection |
| Random-orbit sander | Smooths surfaces quickly with long-lasting finish | Start with coarse grit, finish with fine grit, keep moving |
Safety is the invisible tool that protects your progress. Set up a dedicated workspace with clear sightlines, solid ventilation, and a simple dust-control plan.Wear proper PPE at all times: safety glasses or a face shield, a respirator or dust mask, hearing protection, and non-slip gloves when handling sharp edges. Always unplug tools before changing blades or bits, keep guards and fences engaged, and store blades securely when not in use. A small first-aid kit and a smoke detector nearby complete your safety net.
Keep your shop organized to avoid missteps. Designate zones for cutting, sanding, assembly, and finishing, and keep each zone stocked with quick-reach essentials.A tidy work surface and a dedicated waste bin make cleanup faster, while a simple dust-collection plan reduces airborne particles and extends tool life. Regular maintenance, like checking blades for dullness, lubricating moving parts, and wiping down surfaces after use, preserves precision and safety over time.
In practice, start with a focused, budget-aware toolkit and a realistic plan for each project. Build a short starter kit: a drill with a few bits, a couple of clamps, a mid-range sander, chisels, a handsaw, and a non-slip work surface. Create a simple, repeatable workflow: measure twice, cut once; dry-fit joints; then assemble with quality fasteners and finish with even coats. Schedule monthly tool checks and a quick safety refresher to keep momentum strong and projects moving forward.
Build Your Dream Workshop on a Budget →
Styling and Placement Tips to Maximize Impact
Anchor the arrangement by honoring your room's scale and letting a standout piece set the mood. Choose silhouettes that echo your overall style-sleek mid-century lines for a modern vibe, or chunky, hand-finished edges for a warm, rustic look. Let the finish coordinate with wall color and textiles, so the DIY furniture feels like it belongs, not an afterthought. A single, well-chosen piece with cohesive hardware can guide the entire room's energy.
To help visualize options at a glance, try these quick layout templates that adapt to different room shapes and furniture counts:
| Room size | Suggested layout | Key pieces |
|---|---|---|
| Small (up to 12×12 ft) | One focal chair with a compact coffee table; sofa facing it | 1 sofa, 1 chair, 1 coffee table |
| medium (12×16 ft) | Balanced seating around a rug; end tables flanking a sofa | 2-3 seating pieces, 1 rug, 2 end tables |
| Open or large | Floating layout with a statement piece and layered lighting | Sectional or 2 sofas, coffee table, floor lamps |
Experiment with arrangement on a wall or floor plan, and photograph from above to check alignment with windows and doors. After you settle on a layout, keep one anchor piece consistent and allow textiles, art, and plants to weave color and texture around it for a polished, cohesive vibe.
Build Your Dream Workshop on a Budget →
Q&A
What are essential tools and materials to start a DIY furniture project?
Build a basic toolkit: a saw, drill, sander, clamps, tape measure, and level. Add safety gear like goggles, a dust mask, and ear protection. Choose versatile materials such as plywood, reclaimed wood, and standard fasteners, plus wood glue and finishes.
How can I choose a design that elevates my home style without overdoing it?
Start with a single statement piece that fits the space and existing color palette. Consider your room's style (Scandinavian, industrial, farmhouse) and pick lines and hardware that echo it. Finish choices-stain, paint, or wax-can dramatically elevate the look without altering the form.
What are practical finishing techniques to make furniture look high-end on a budget?
Sand smooth, fill any gaps, and test finishes on scrap. try a mid-tone stain with a satin polyurethane or a durable water-based topcoat. For a refined touch, consider wax for depth or chalk-type paint with a clear glaze, and swap in metal hardware.
How do I safely plan and execute a project to avoid waste and mistakes?
Create a simple cut list from measurements, then lay out pieces on scrap or do a dry run before cutting. Double-check dimensions, allow for joints and clearance, and batch your tasks to minimize material waste. Work in a well-ventilated area with proper safety gear, and clamp firmly to prevent slips.
Insights and Conclusions
Ultimately, the message here is simple: great DIY furniture comes from thoughtful choices, not heavy-handed gimmicks. Start with a clear plan, pick a finish that harmonizes with your space, and let the piece echo your style while honoring the room's function. For woodworking enthusiasts, this topic matters as it translates passion into tangible, lasting objects you can use every day, while honing tools, patience, and problem-solving. Ready to act? Try a starter project, skim additional guides for techniques, or apply these insights to your next build-measure twice, cut once, and embrace the learning curve. May your workshop stay curious and your creations radiant.


Absolutely love these ideas! DIY furniture really brings a personal touch to home decor and it’s amazing to see how creativity can transform any space.
These DIY projects are so inspiring! It’s incredible how a little creativity can turn everyday materials into stunning pieces that reflect your unique style.
I couldn’t agree more! DIY furniture not only showcases your personality but also adds character to your home; it’s definitely a fun way to make your space truly yours!
I totally support this! There’s something magical about crafting your own furniture that not only boosts your creativity but also makes your home feel so much warmer and inviting.
I love all these thoughts! DIY furniture truly allows us to express our individuality and create functional art that resonates with our personal style-it’s such a rewarding experience to see your vision come to life in your home!
I’m totally on board with all of this! DIY furniture not only saves money but also allows us to create pieces that are one-of-a-kind and truly reflect who we are; there’s nothing quite like the satisfaction of making something special for our homes!
I absolutely love the idea of DIY furniture! It’s amazing how we can transform simple materials into beautiful pieces that add both style and a personal touch to our homes; plus, the whole process is such a fulfilling journey of creativity and self-expression!
I’m all for this trend! DIY furniture is an incredible way to unleash your creativity and turn your home into a unique masterpiece that showcases your taste while also being budget-friendly; nothing beats the pride of crafting something with your own hands!
I couldn’t agree more with all your sentiments! DIY furniture is such a delightful way to add character to our spaces while also diving into a creative adventure; crafting something uniquely ours makes home feel even cozier and more personal!
I’m completely with everyone on this! DIY furniture is not just a trend but a wonderful opportunity to enhance our living spaces with projects that embody our personal flair; every piece tells a story and brings so much joy to both the making and the end result!
I couldn’t have said it better! The beauty of DIY furniture lies in its ability to transform not just our spaces but also our creativity; each project is an exciting challenge and a chance to create something truly meaningful that resonates with our personal style!